| The Striker is known to members of cam7 as the Little
Green Striker of Froginess. However, I'd got rather tired of the greeness of the Striker, and particularly tired
of manhandling the one-piece bonnet on and off the car. So I decided to replace the bonnet with the newer design
of bonnet and separate nose-cone. The newer style bonnet has a bonnet bulge and I rather hoped that I'd be able
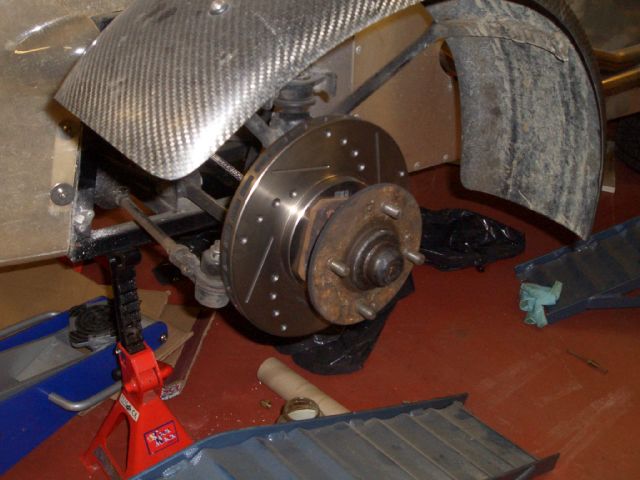
to squeeze the air filter underneath the bonnet rather than having it sticking through the top. Also, since I'd bought a new Powerlite brake kit for the Furyracer, this meant I had a spare Wilwood Dynalite brake kit going spare. OK, so it uses vented discs, which are ever-so-slightly unnecessary on a car that weighs only 428kg with half a tank of fuel, but even with the vented discs the Dynalite brake kit should weigh less than the existing solid disc and boat-anchor M16 caliper set-up. |
| |
The brakes were pretty straightforward to do. Take off the old calipers, remove the hub and brake disc, change the brake discs to the vented variety, install Dynalite calipers. The RHS caliper needed to be shimmed a little to get the disc centred in the caliper, but other than that things went fairly smoothly. |
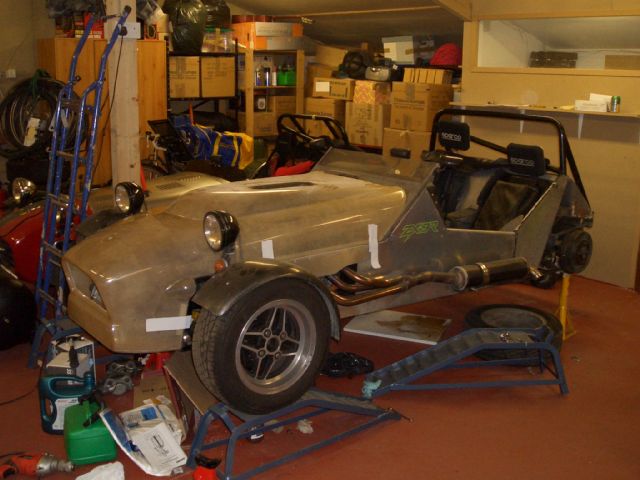
| The first stage of the bodywork change was to remove the existing bodywork.
The bonnet was easy - undo the catches, lift it off. The rear bodywork was slightly more involved, due to the fact
that it had been bonded to aluminium plates which had been attached to the chassis. And it had been bonded with
copious amounts of glassfibre and resin, so my spiffy air-powered cut-off tool (thank you Zena) and airsaw came
in rather handy. The net result was the rather naked looking Striker on the right. |
 |
 |
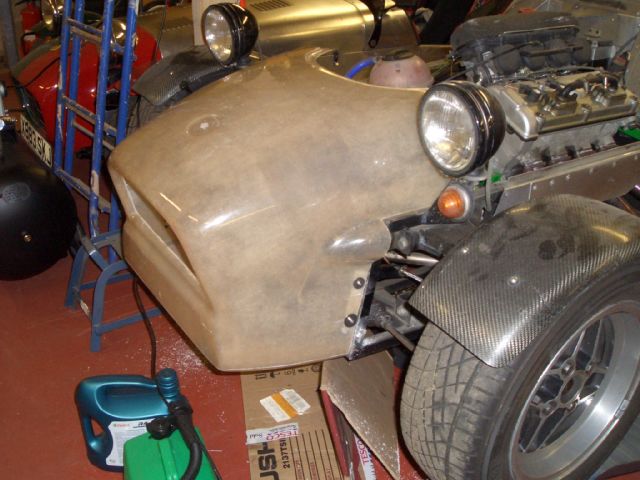
I'd already gone down to Hereford and collected the new nose and bonnet
from Raw Engineering. It was noticable how much better the quality of the laminating was when compared to the average
bit of Fury bodywork. The GRP parts were made with woven GRP, but properly laminated with the resin nicely consolidated.
Unlike mosst Fury bodywork, which consists of alternate layers of dry fabric and resin. Before attaching anything on a permanent basis I held the bonnet and nose in place using gaffer tape. The good news was that it all fitted pretty well straight away. The extra good news was that it looked as though, if I squashed the air filter down a bit, I could get away without a hole for the air filter. The bad news was I'd already cut a hole for the airfilter. Oh well, looks like I'm going to have to do some laminating on the bonnet... |
| Once I was happy that the nosecone at least fitted reasonably well,
I fixed it in place using two short strips of aluminium angle rivetted to the front of the chassis, some rivnuts
in the ali angle and some bolts. That meant that the next job was to fill in the hole in the bonnet that I'd cut out... |
 |
| The one bit of advice which appears to be consistent in relation to spraying cars is to never mix different paint systems. So, having listened to all that advice, I used an epoxy etch primer from a company I'd never heard of with a Max Meyer Maxicar basecoat and a Nexa ICI 1k clearcoat. Happily, they all seem happy together and haven't reacted (at least not yet). Spraying the primer and the basecoat went pretty well, although the clearcoat's got some sags in it (trying to lay down too much paint in one go) and could be shinier (I think the air pressure was too high so that there was too much overspray). But all in all, I'm pretty pleased with the result. |
 |
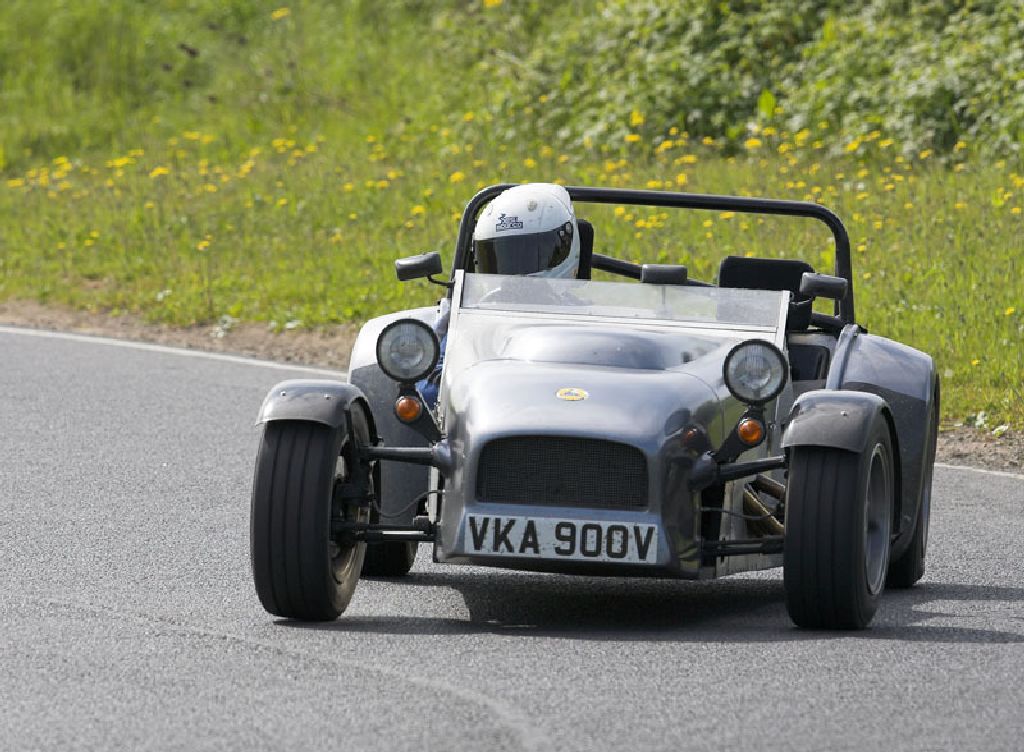
And here's the result - this was taken just before the GF and I set
off on the se7ens list tour of north England. The bodywork could do with another go with the compounder to make
it even shinier, but frankly I'm happy with it as it is. The new brakes worked really well on the tour as well - combined with some new Yokohama AO21R tyres (basically wet/intermediate race tyres) they provided rather more reassuring levels of deceleration than the old M16/very elderly Yokohama A539 combination. Although if I'm honest, that probably had way more to do with the tyres than it did with the brakes.... |
| On the last day of the tour we had a trackday at the South Tees Motorsport
Park (aka Langbar kart track). The Striker behaved impeccably despite being driven with considerable enthusiasm
for most of the day by me and a couple of other people. The pic on the right was taken by Peter Ellis, who sadly
broke the oil filter housing on his Caterham R500 and so couldn't take part. However, this did mean he was able
to take some excellent photos of the day's proceedings. And as you can tell from the tyres in the photo, I was definitely enjoying myself... |
 |