| Well, it has been a while since the last update. The bust finger nail did slow me down a bit, and 2 se7ens list tours took a fair bit of time, as did quite a lot of work and 2 weddings, but the real reason why this update's taken so long is because I've spent a lot of time doing a lot of really really boring stuff on the car. In particular, the bonnet bulge o' doom. |
| |
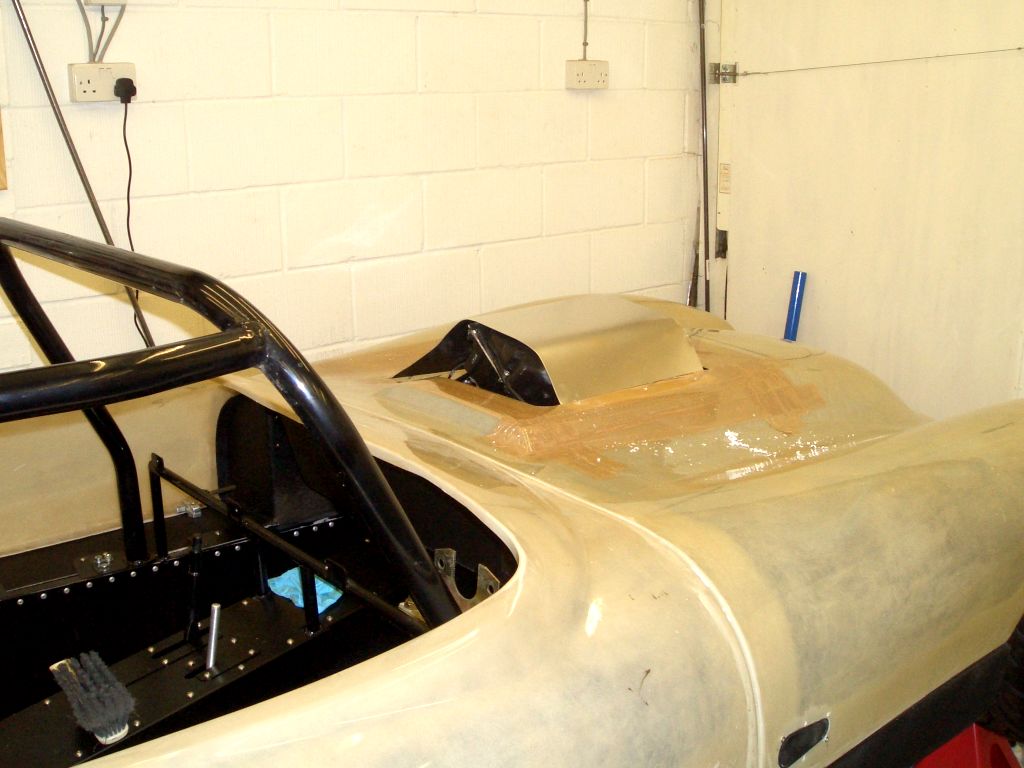
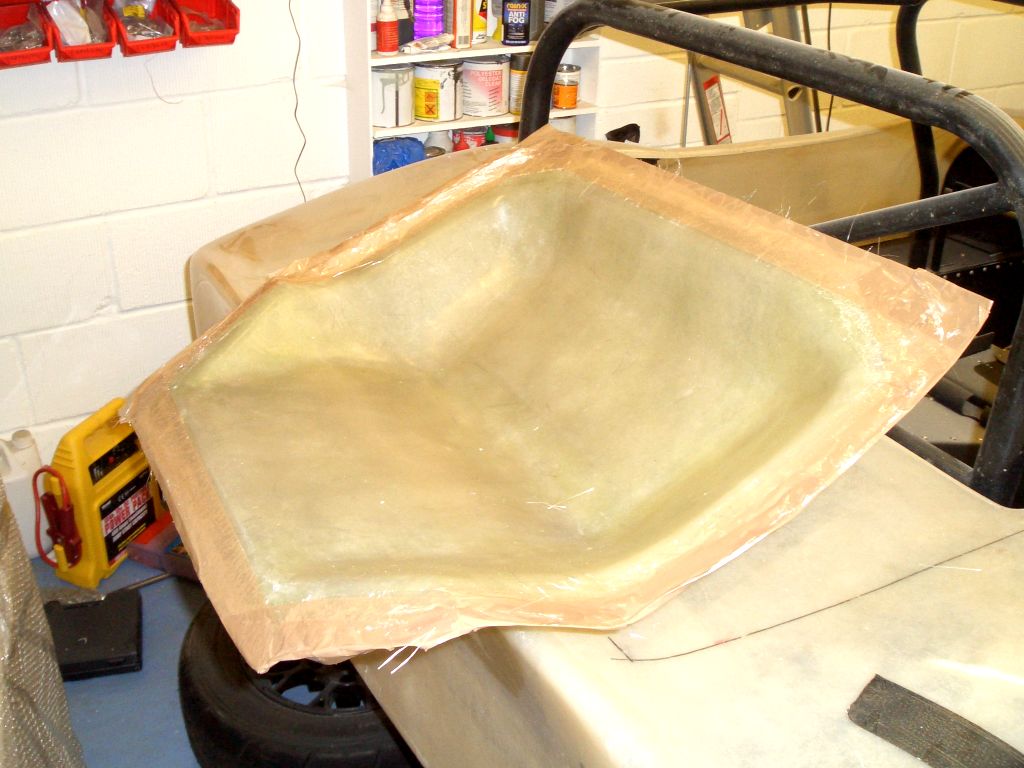
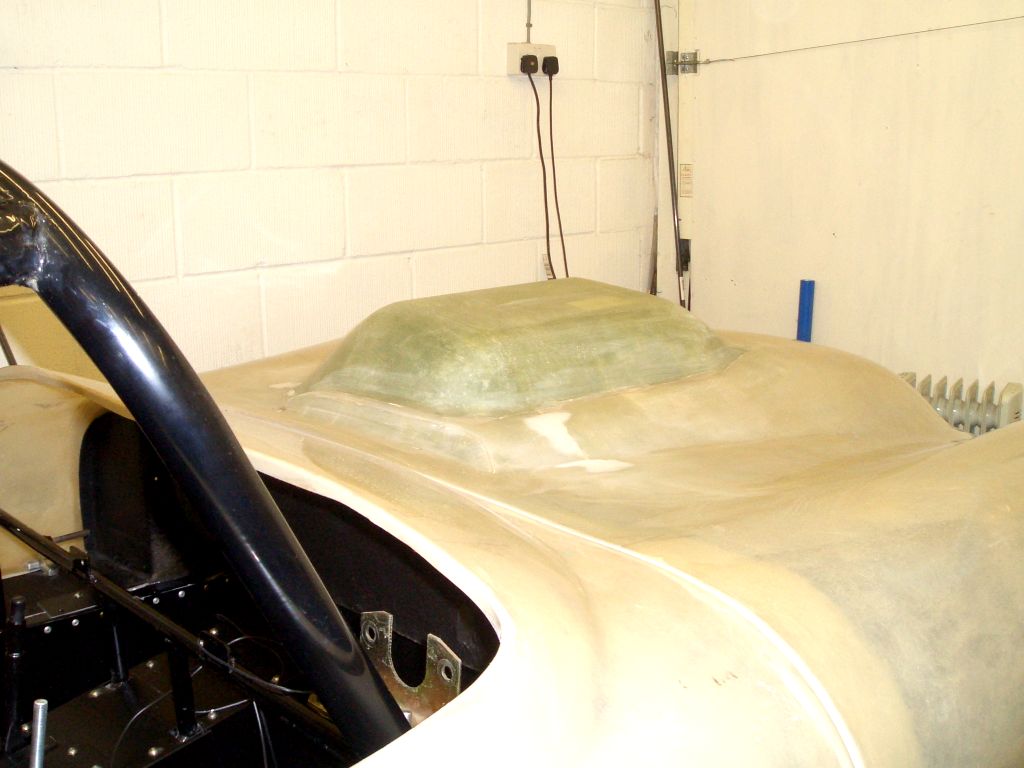
Even with the modified airbox, there was still quite a lot of it sticking out of the top of the bonnet. Neither the 750MC scrutineers or the SVA inspector was going to let me get away with simply having a hole in the top of the bonnet with the airbox (and various other engine bits) sticking out, so I had to make up a bonnet bulge to cover it. The first step was to put down a load of packing tape (God's own easy-to-apply self-adhesive release film) to the bonnet and fit a sheet of thin ali over the air box and other engine-related gubbins making a bid for freedom out of the top of the bonnet. |
| As you can see, I've tried to keep the bonnet bulge as flush fitting to the airbox as possible to keep it as low as possible. I'm still wondering whether the SVA inspector will decide that it obstructs the driver's forward view, but I have a cunning plan to avoid any such unpleasantries... | 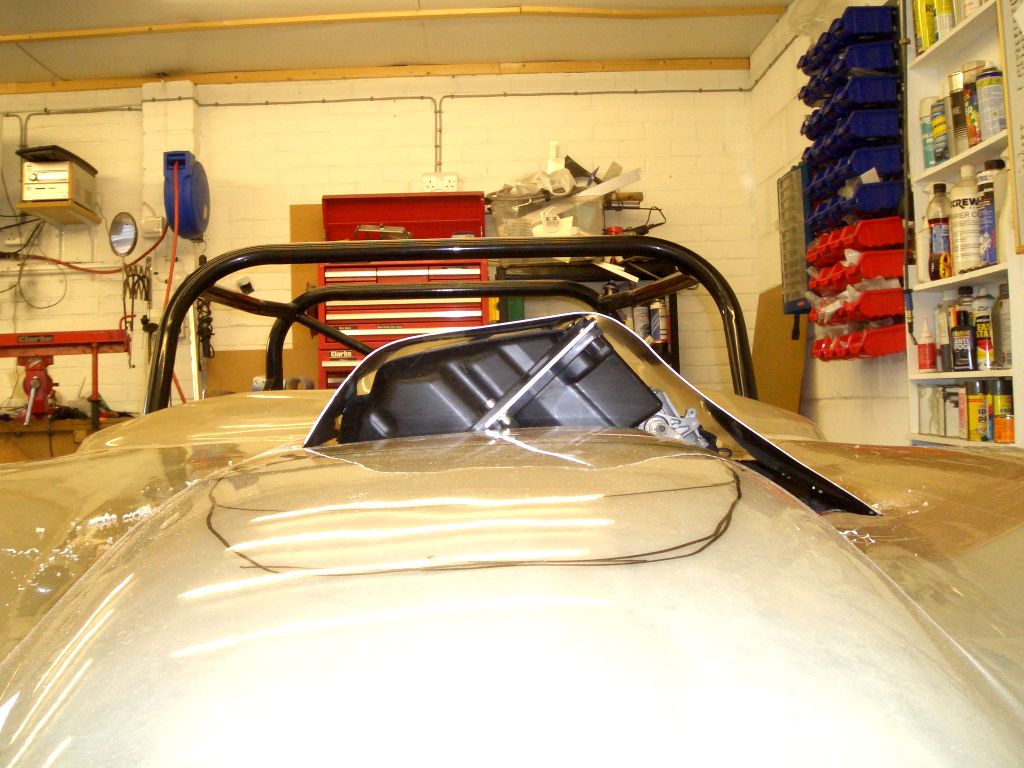 |
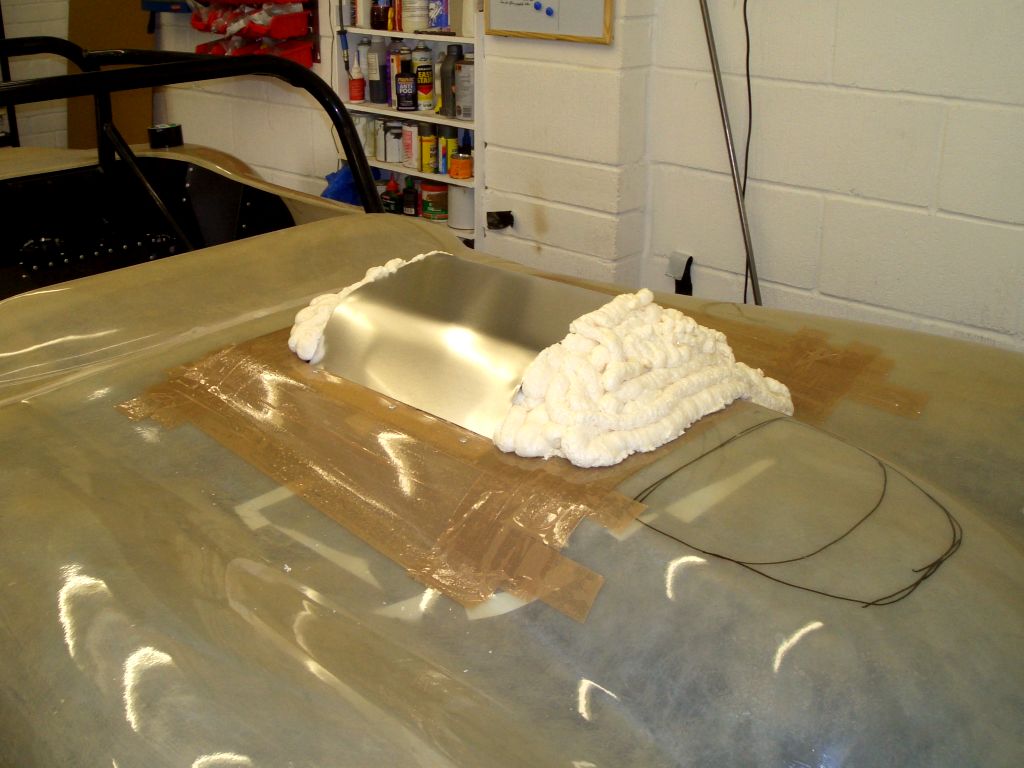 |
In order to form the ends of the bulge, I squirted a load of expanding foam into each end of the ali sheet. In order to protect the engine bay, I'd taped a black bin bag underneath the hole in the bonnet. Once the foam had set, I cut into the rough shape I wanted using a bread knife. Once it was roughly the right shape, I added some filler (GRP filler first for strength, then normal filler for a better finish). And sanded it all off again. And put on some more filler. And sanded it off again. And put on some more filler... Repeat until terminally bored and with no fingerprints. |
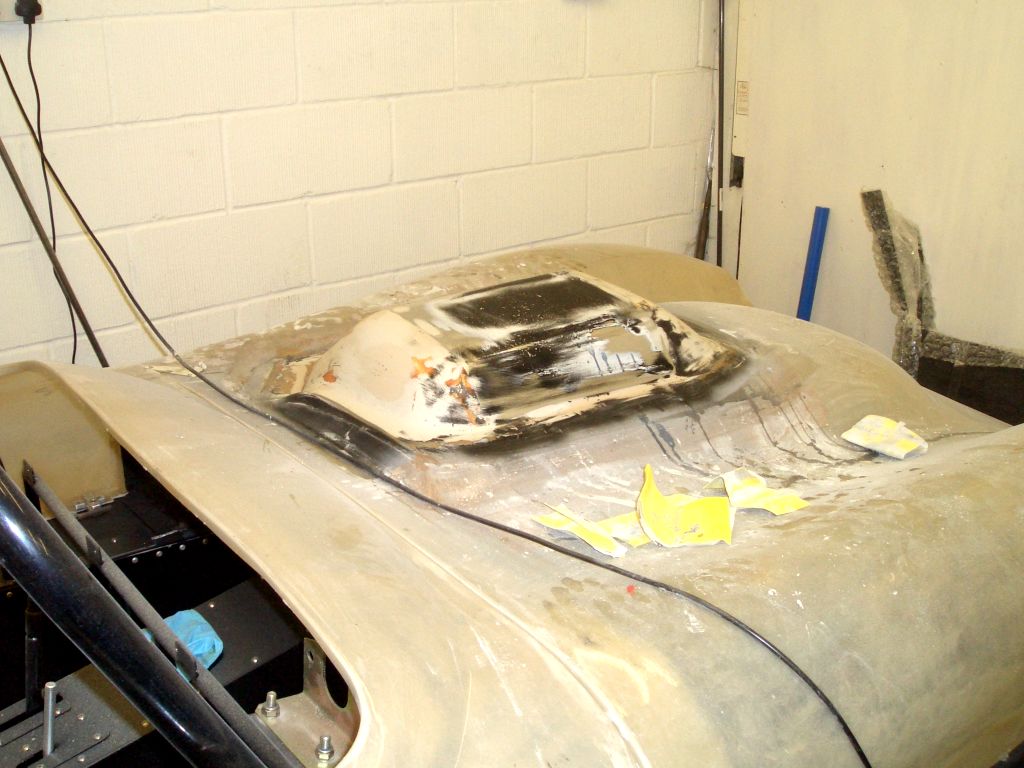
| This is a photo from about halfway through the process. The black
paint is a guide coat, so that I can see where there are depressions in the filler which need to be filled. The
idea is that you sand away until all the black paint has gone, which means you have a smooth surface. Or at least,
until you get bored, and slap some more filler over the black bits, and start the whole process all over again. Once the bulge was pretty much finished I sprayed it with some primer, sanded it again, sprayed some more filler, added a guide coat, sanded it again, and then sprayed it with some normal car paint to get a shiny surface. Then I waxed the bulge (there's just no way of saying that without it sounding rude) several times to act as a release agent. Once I was happy that there was absolutely no chance of ending up with a large lump of GRP, gelcoat, foam, filler, paint and ali stuck irretrievably to the top of the bonnet, I covered the bulge in polyester gelcoat, followed by 4 layers of 450g/m CSM glass fibre with polyester resin. |
 |
 |
Happily, the various layers of wax did their job and the mould popped
off without too much complaint although it did tear the bonnet in a couple of places. Given the quality of the
laminating on the bodywork, that came as no real surprise. In fact, the main surprise is that the whole thing didn't
delaminate on the spot... Anyway, after all that work, here's what I was left with - the mould. This is after I've trimmed it a bit and added more packing tape round the edges - there's nothing more annoying than ending up with your new bit of bodywork stuck fast to the mould it's supposed to pop neatly out of. |
| With a few layers of wax on the inside of the mould, I then used some more gelcoat and a couple of layers of 300g/m CSM to make the bulge. And here it is, neatly trimmed and ready to fit. Having marked out the edges of the bulge on the bonnet, and expanded the hole in the bonnet to suit, I could start bonding the bulge into place. | 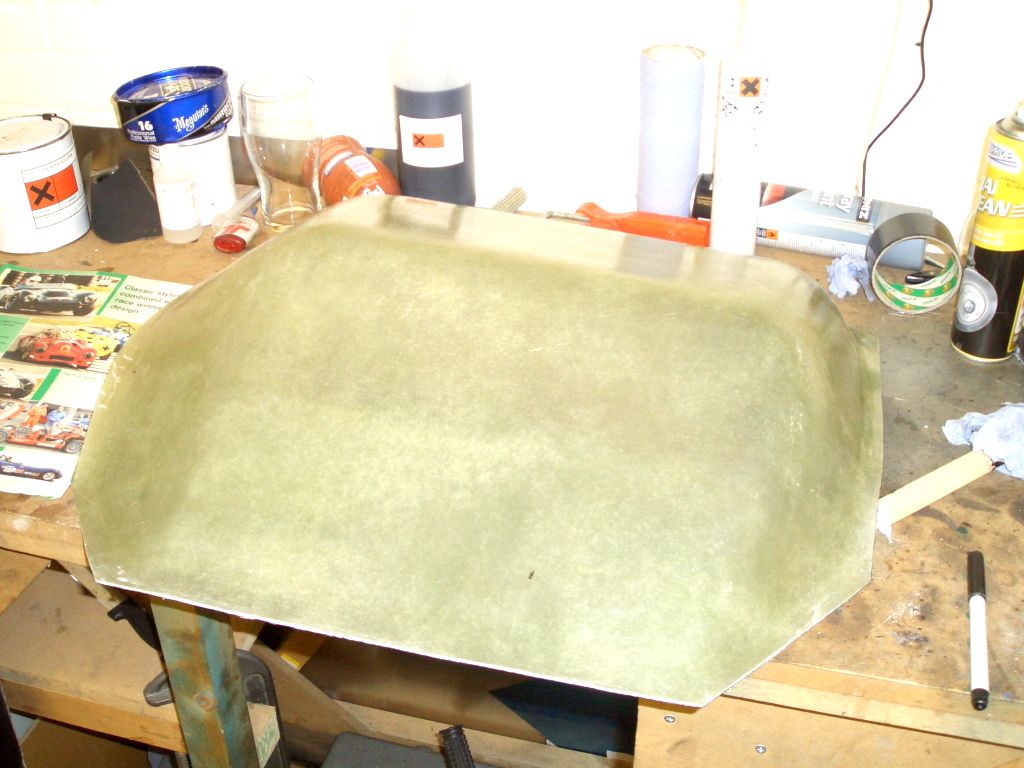 |
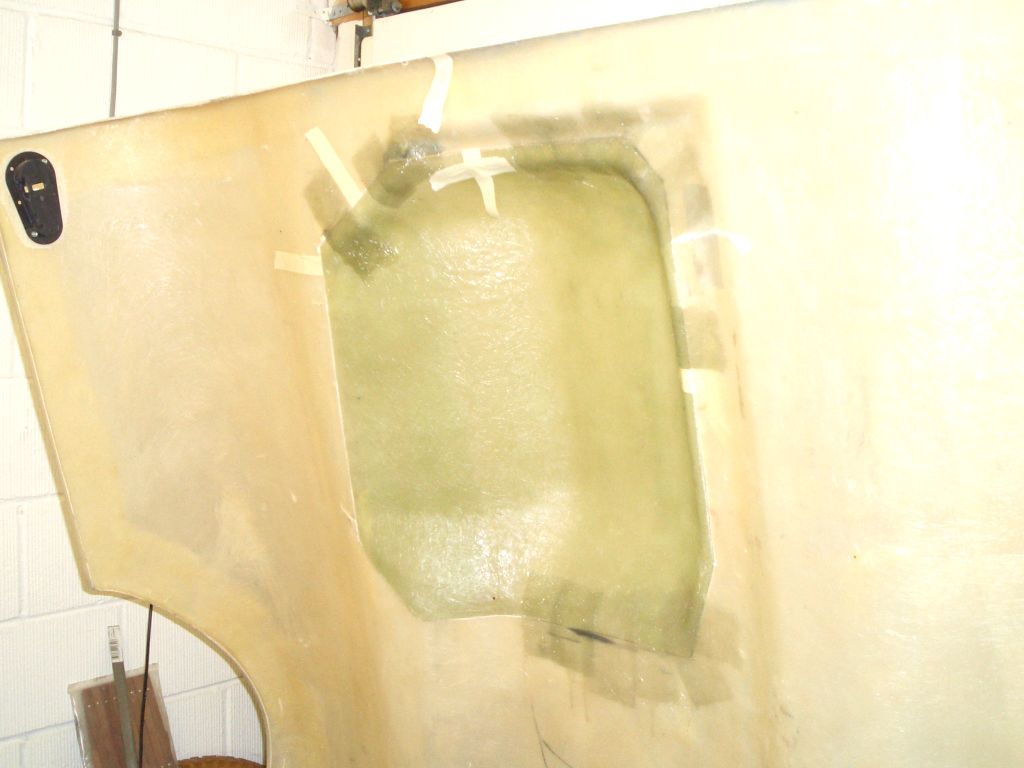 |
I bonded the bulge into place in the bonnet using small strips of CSM. This was so that I could adjust the fit between the edge of the bulge and the bonnet to get them sitting as flush as possible - the bonnet's quite flexible so you can't just bung it into place and expect all the edges to line up straight away. After all, the better the fit, the less filling and sanding I'd have to do later on. |
| In fact, the interface between the bulge and the bonnet required very little filler, although as ever it took ages to sand all the excess filler away. The bulge and the areas of the bonnet next to it which have been sanded don't have the same shiny appearance as the rest of the bodywork, but since it's all going to be sprayed (and there'll be a couple of coats of filler primer to cover up the worst of the remaining blemishes) that doesn't matter as long as it's all smooth. | 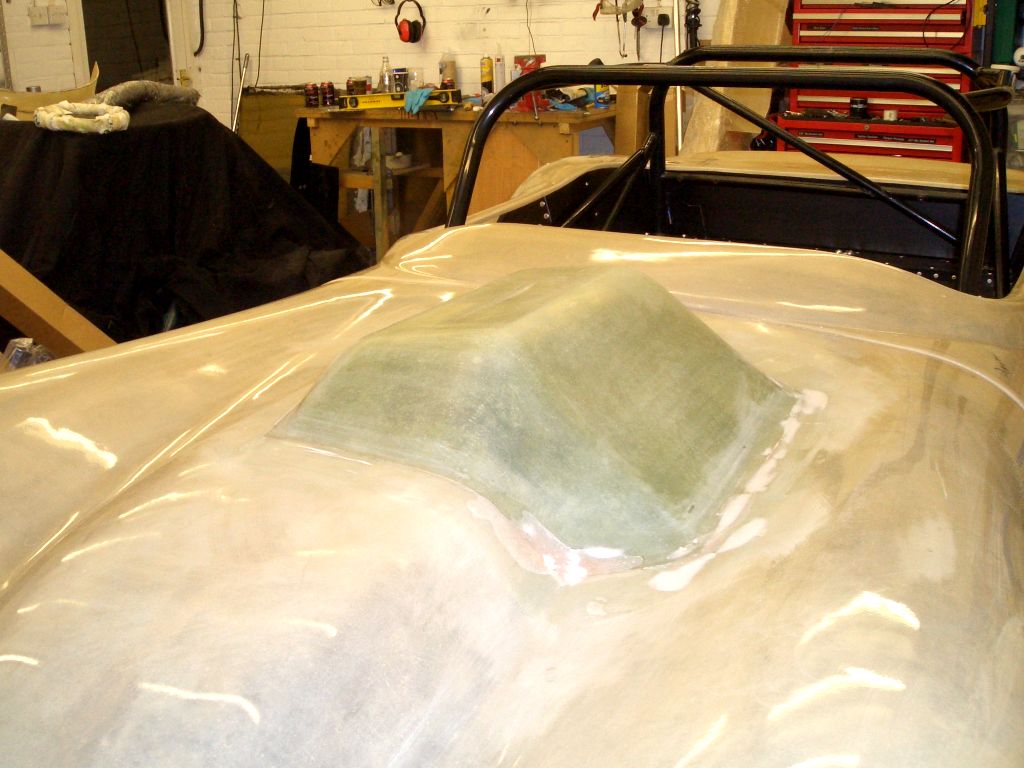 |
 |
And seeing as how it took so bloody long to do in the first place, here's another picture of the finished article. It is a rather large bulge (necessarily so), and it has taken ages to get finished, but I'm pretty pleased with the result. |
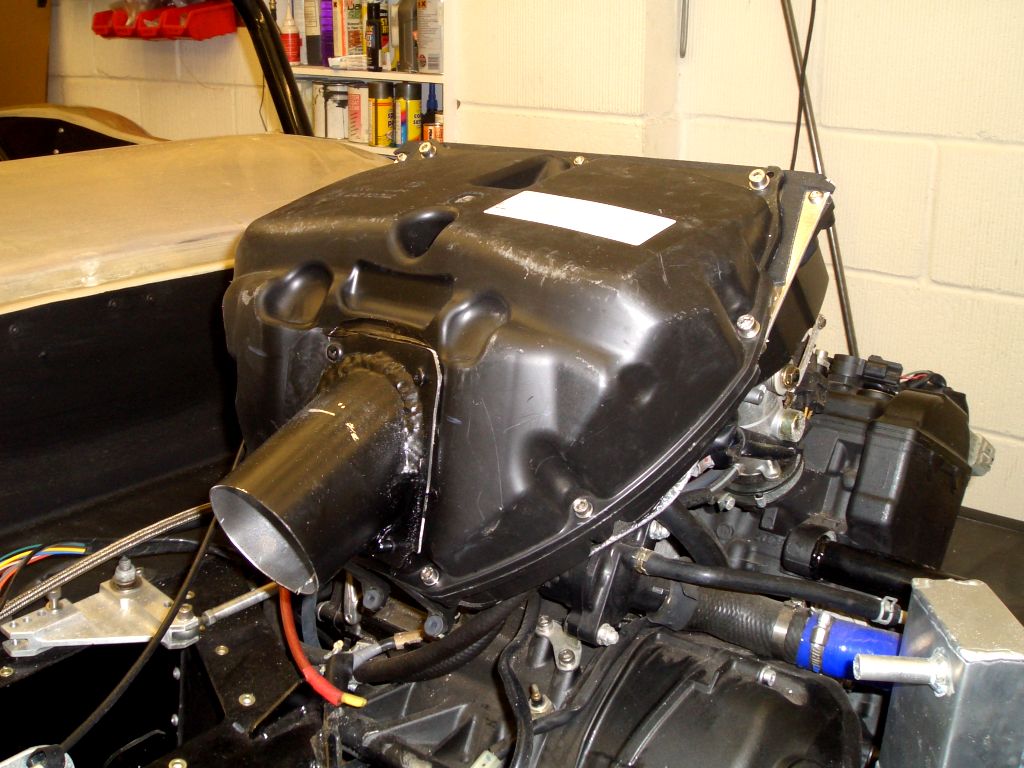
| In the meantime, the cause of all these problems, the air-box, required
some more work on it. Because the modifications to the airbox meant that the standard air filter was now sitting right above the engine, breathing warm stinky air, I needed to find a way to put the filter elsewhere.
What I've done is to blank off the hole where the air filter would normally sit, using an offcut of black GRP -
I've used GRP on the basis that it'll act as a slightly more effective thermal barrier than a piece of ali. You
can just about see the edge of the GRP plate at the bottom of the airbox. Then I've made up a bit of ali (doing this in GRP would just take too long...) which is basically just a bent plate with a hole in the middle and an 80mm tube sticking out of it. An 80mm hose will go onto this, with a remote air-filter stuck on the other end. However, I need to do some other jobs (like finish the dashboard, so I can put the steering column back in) before I can work out where the best place for the air filter is going to be. |
 |
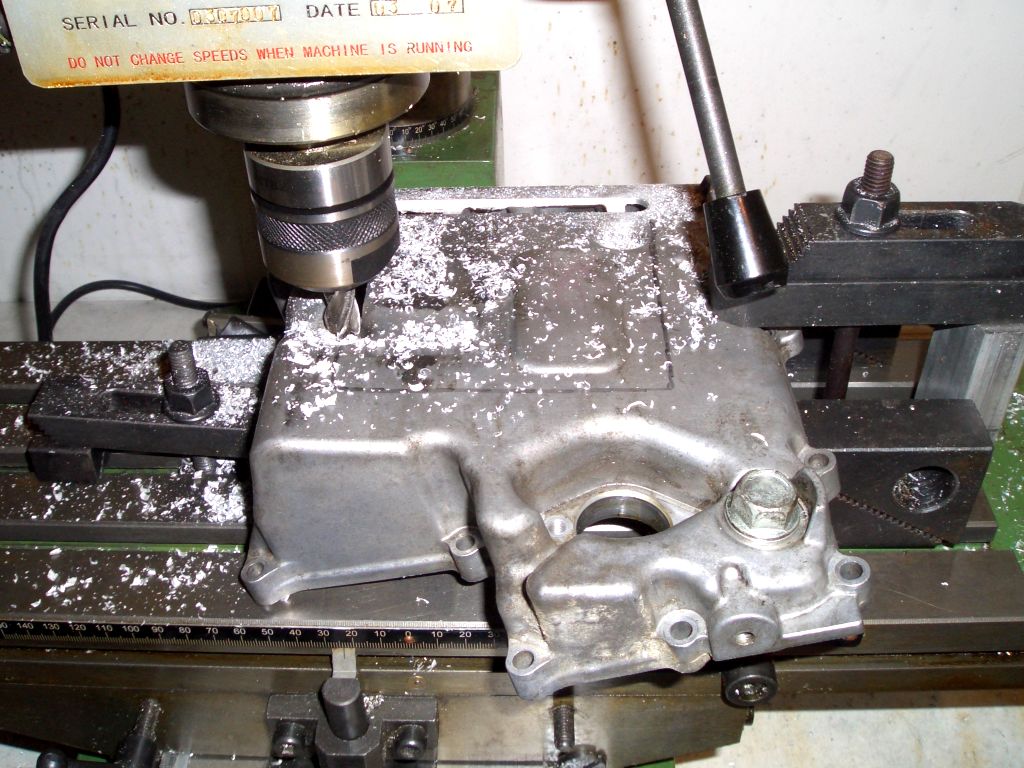 |
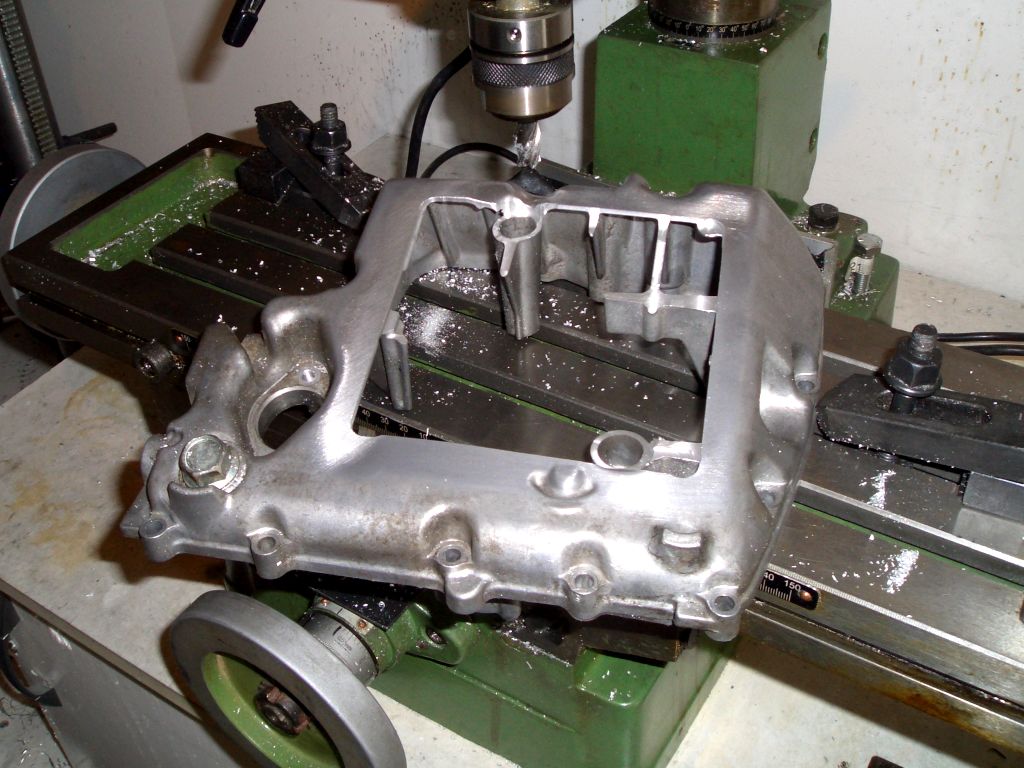
As I mentioned in my last page, I've decided to modify the sump to give a bit more oil capacity. The bottom of the sump, as installed, is at a slope so the idea is to extend it so the bottom of the sump is level ith the ground (and the bottom of the chassis). To this end, I've got a second sump (off a 2005 bike, which is why it's silver and not black). The first stage was to chop a gert big hole in the bottom of the sump. I used the milling machine to do this. |
Sadly, finishing the job once the hole was cut is not as simple as
slapping an L-shaped plate over it and welding the sides on. There are two circular bits you can see left in the
sump - one of these is the access hole for one of the sump's mounting bolts, while the other is the drain from
the gap between the water pump and the oil pump. Now the simple thing to do would just be to weld them up - I doubt
the sump would object too much to having one of its mounting bolts missing, and the drain is only really useful
to see if the seals on either the water pump or oil pump have gone. My other engines don't have this feature, and
I've never missed it overly, so I doubt I'd miss it here.
However, I've decided to do things properly. Just haven't got round to actually doing them yet...
 |
The next additional complexity to the build is one I can blame entirely
on my parents. Due to the genetic inheritance they left me, I have disproportionately little arms for my height.
As a result, if I sit in the Fury with my back against the rear bulkhead, as low down as possible (for CoG purposes)
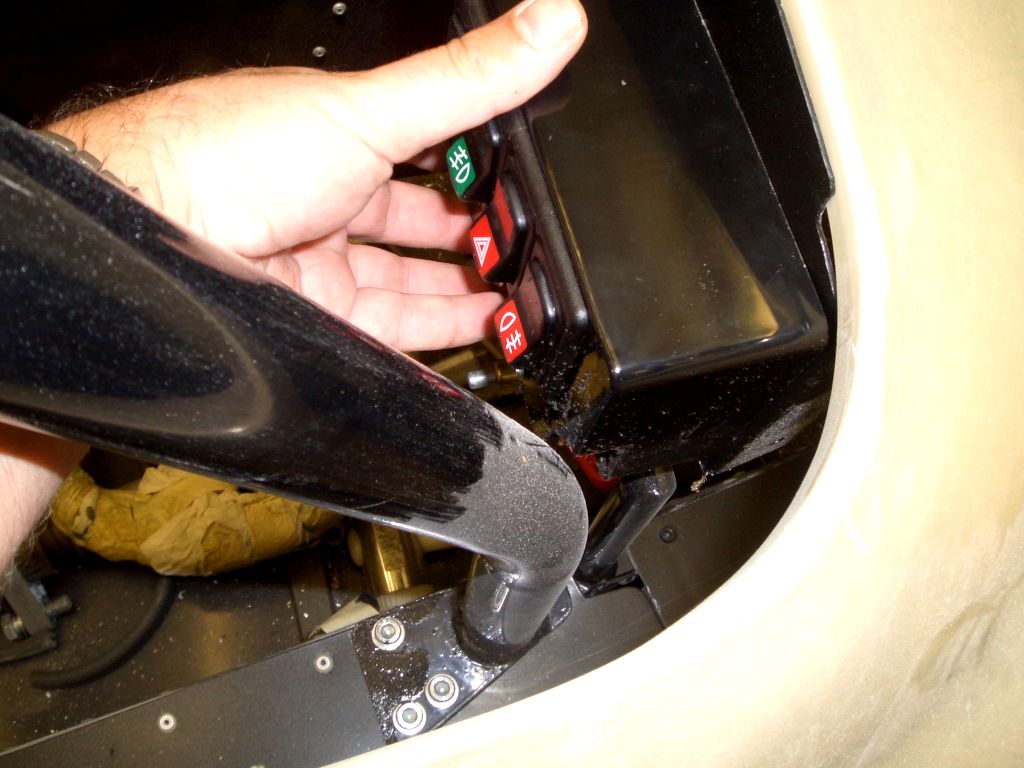
then I can't actually reach the dashboard. As a result, I've mounted all the switchgear in these two plastic boxes,
so I can bolt the boxes onto the dashboard and thereby reach the switches. The box on the left has the serious
stuff - FIA cut off switch, ignition and fuel pump kill switches, key switch (for SVA) and the starter button.
The one on the left has the boring light switches and the horn switch. It also has two holes, one for the indicator
switch and one for the main beam switch, but I haven't bought them yet. I was going to add some more buttons (to control the digital dashboard) on the right hand side of the right hand box, but... |
I've already had to chop part of that bit of the box away to make
it clear the front legs of the roll cage, and I'm not sure it's really the best place to put them. I quite fancy
having them on the transmission tunnel top like Tim has all his switches but I
haven't yet worked out a way of securing the cable so it doesn't get wrapped round the propshaft while at the same
time allowing enough space to disconnect the switches from the rest of the loom if I want to remove the panel.
 |
... although I haven't updated this site for a while, I am making steady progress on the car. More to follow, hopefully later this week. |