BODYWORK OFF
The first stage of the Fury's rebuild has to be stripping off the smashed bodywork. Zena suggested to me that the
bodywork is repairable - well, it is, but only in the same way that anything is repairable if you spend long enough
at it. Like a repaired chassis where only the VIN plate is original...
One broken dashboard... And one broken bodyshell...
The fact is that the bodyshell would require a LOT of work to ever get it right again. The gel coat has cracked
and crazed right across and along the main tub section, one of the cills is totally dead and the bonnet has large
holes in it. Seeing as it was a heavyweight shell anyway, and I was never that happy with the fit, it seems like
too good an opportunity to pass by.
Before I'd even really started stripping the car down (I spent a couple of days while I was still recovering cleaning
up the garage before work started) I went to the Donington Kit Car Show. While I was there I had a chat with Mark
Fisher about bodyshells, and about the different weight shells. He happened to mention a rather interesting possibility
on the bodyshell front... At this stage I'm keeping things under my hat (unless you're a member of cam7 ;) but
it's gonna be good (unless you agree with the GF in which case you'll think it's crap).
 One of the first things
to do before stripping the bodyshell off, however, was to see if the engine sounded OK. The bodyshell definitely
has to be replaced, but there are question marks over the engine and chassis. The chassis definitely has some bent
tubes, but it may still be repairable if it's generally straight. Of course, I can't really check if the chassis
is straight until the bodywork's off. However, checking the engine was going to be much easier with the electrics
in place, and since I couldn't strip the main tub until the loom and dash were removed, that made starting the
engine a priority.
One of the first things
to do before stripping the bodyshell off, however, was to see if the engine sounded OK. The bodyshell definitely
has to be replaced, but there are question marks over the engine and chassis. The chassis definitely has some bent
tubes, but it may still be repairable if it's generally straight. Of course, I can't really check if the chassis
is straight until the bodywork's off. However, checking the engine was going to be much easier with the electrics
in place, and since I couldn't strip the main tub until the loom and dash were removed, that made starting the
engine a priority.
Hhhhmmm, does that roll bar look a bit wonky to you? Oh dear...
I finally managed to get a jump battery (the car's bike battery was removed by the marshalls after the accident),
some jump leads and an FIA master switch (lost after the crash when I removed it) together in the garage at the
same time. The engine got oil pressure quickly, started fine, and sounded.... well, it sounded no worse than it
ever had done. This engine (number 3) always sounded a bit rough at idle - the carbs aren't very well balanced
and I susepct the cam chain tensioners are a bit worn. However, everything seemed fine, so I decided to just keep
my fingers crossed and hope.
 That, of course, meant
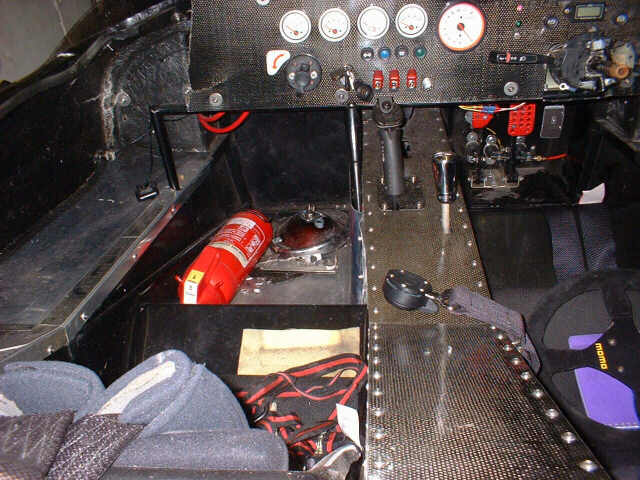
it was time to start getting the bodyshell off. First off was the dash, or at least what was left of it. Then mirrors,
aeroscreen (remains of) and internal trim panels. I stripped down the dashboard and put the gauges and switches
and things in a box - which was depressingly small given how much the contents cost me...
That, of course, meant
it was time to start getting the bodyshell off. First off was the dash, or at least what was left of it. Then mirrors,
aeroscreen (remains of) and internal trim panels. I stripped down the dashboard and put the gauges and switches
and things in a box - which was depressingly small given how much the contents cost me...
I was a bit brutal removing the loom, but it's going to have a lot of work done to it soon. As I've added things
to the car (such as the transponder, intercom, gear indicator wiring, reverse box etc.) a lot of wires have been
added to the car. In time-honoured tradition, they've been tacked onto other wires in a pleasantly random manner,
with the result that quite frankly it's a bit of a mess now. So I wasn't *too* restrained about cutting most of
the loom out...
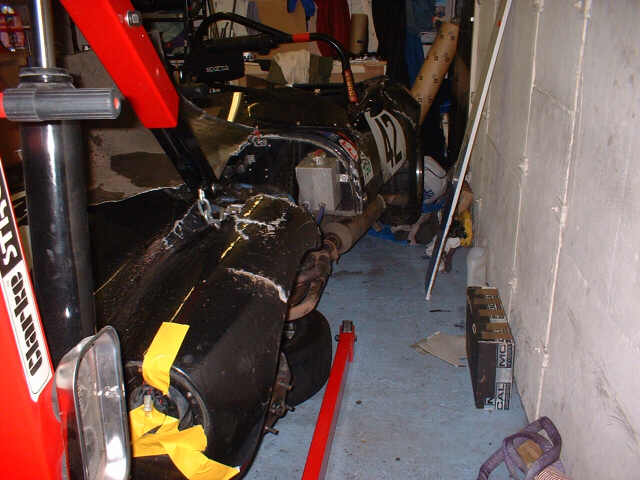
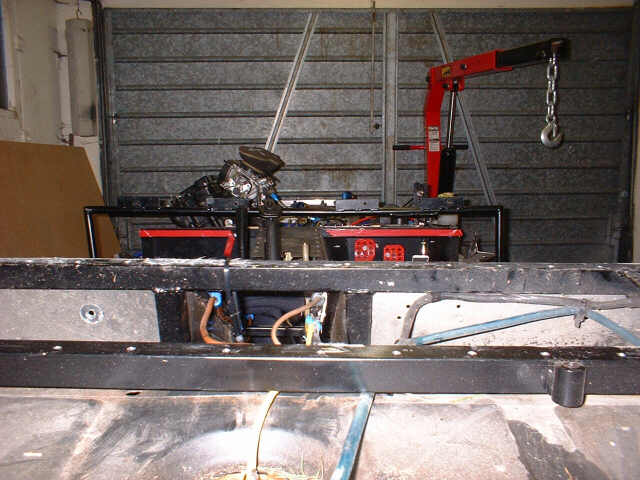
 The main tub came loose surprisingly easily - about
24 rivets and off it came. The next stage was to borrow Zena's airsaw, chop up the bodywork, and take it to the
tip. Once that's done, I can get the engine out, put the chassis on trestles, and start either repairing it or
thinking about how to afford a new one. Repairing it would definitely involve replacing the chassis rail shown
on the left - no, it's not supposed to be bent like that, it should be straight. And the scuttle tube should involve
only 90 degree angles...
The main tub came loose surprisingly easily - about
24 rivets and off it came. The next stage was to borrow Zena's airsaw, chop up the bodywork, and take it to the
tip. Once that's done, I can get the engine out, put the chassis on trestles, and start either repairing it or
thinking about how to afford a new one. Repairing it would definitely involve replacing the chassis rail shown
on the left - no, it's not supposed to be bent like that, it should be straight. And the scuttle tube should involve
only 90 degree angles...
 Chopping up the bodyshell
was harder than I'd thought. And unfortunately necessary - the local council tip will accept anything if it's in
a black bin bag, but if it's not, and it looks vaguely car-like, there's a deafening sound of sucking teeth and
the plaintive cry of 'Sorry guv, it's more than my job's worth'. I ended up jumping up and down on the shell and
ripping it apart - it was eating up jigsaw blades like no tomorrow and the air saw didn't have enough grunt to
get through it once I'd rigged up a long enough air-line to reach inside the garage.
Chopping up the bodyshell
was harder than I'd thought. And unfortunately necessary - the local council tip will accept anything if it's in
a black bin bag, but if it's not, and it looks vaguely car-like, there's a deafening sound of sucking teeth and
the plaintive cry of 'Sorry guv, it's more than my job's worth'. I ended up jumping up and down on the shell and
ripping it apart - it was eating up jigsaw blades like no tomorrow and the air saw didn't have enough grunt to
get through it once I'd rigged up a long enough air-line to reach inside the garage.
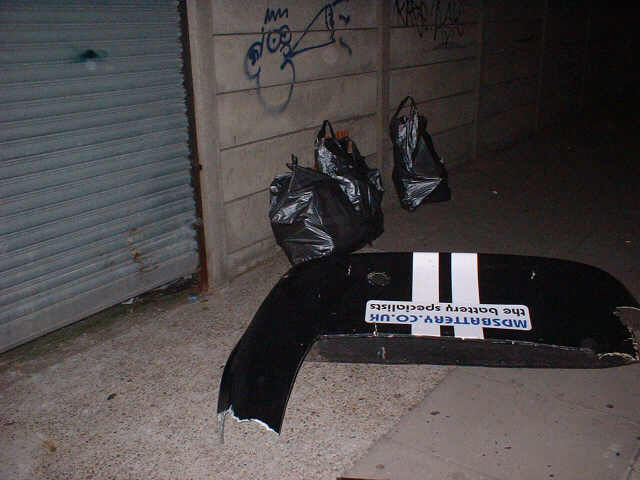
So there I was, jumping up and down on the shell, outside the garage, in one of the nastier areas of London, at
night, putting the resultant debris in bin bags. Nice...
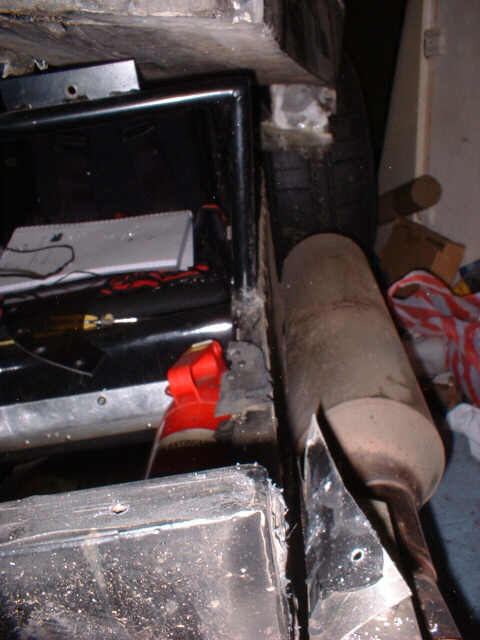
 Having got the bodyshell I could see how badly mangled
the chassis was. I knew that the side chassis rails next to the exhaust (on the passenger side) were fairly bent.
However, it soon became obvous that the problems went a bit further than that. Because I'd hit the chassis (hard)
against the tyre wall on the LHS rear corner, it seemed that the chassis was bent. If you compare the rear chassis
rail over the fuel tank with the front chassis rail (with the red tape on it) you can see they're not parallel...
Having got the bodyshell I could see how badly mangled
the chassis was. I knew that the side chassis rails next to the exhaust (on the passenger side) were fairly bent.
However, it soon became obvous that the problems went a bit further than that. Because I'd hit the chassis (hard)
against the tyre wall on the LHS rear corner, it seemed that the chassis was bent. If you compare the rear chassis
rail over the fuel tank with the front chassis rail (with the red tape on it) you can see they're not parallel...
Yup, definitely wonky...
So, time for a new chassis. And while we're at it, why not go for an IRS chassis. With a Freelander diff. And race-style
lowered suspension. And lots of custom modifications. And CARBON PANELS!!!! Wooo!!!
You see, all along when I was building the first Fury, I'd wanted to have carbon panels on the interior. The trouble
is, the panels aren't flat - they're twisted, so unless you use pointlessly flimsy carbon, you need to mould the
panels to fit the chassis. And making moulds for all the panels seemed just too much like hard work. But now I
had the basis for the necessary moulds - the old chassis. Surely it would be the work of but a moment to chop up
the chassis and make moulds of the required panels? Of course it wasn't, and the fun and games involved are here.