One of the reasons why my crash was so unfortunate was that if I'd had a better
seat, I wouldn't have earned myself a night in hospital with broken ribs. Because of the way I like to sit while
driving the Fury (very laid back - curse of short legs and a long back) most seats don't fit me particularly well
when they're cranked back as far as I'd like them.
So, time to make a custom seat. Making full use of the bust chassis (again), I roped in my brother to help and
we set about making a 2-part foam seat with me sitting in the old chassis surrounded by bin bags full of gently
expanding and pleasantly warm foam. Thanks to Buroz for the foam by the way.
A quick tip for making 2-part foam seats - don't take shortcuts. Don't, for instance, decide that this time you
can't be bothered to bag up the existing foam properly and add more, and just slap a bit more foam on top with
a bag laid on top of it, and then sit on it. This will
result in the foam working its way out from behind the bag
and going through the top you're wearing
and setting on half the skin on your back
meaning you have to rip the congealed mess of foam and T-shirts off your back
with a resulting loss of skin and lots of swearing...
A more useful tip might be to add the foam slowly in stages. Add a bit to the
bag, sit on it and let it expand and set, then add a bit more, and so on until the foam is a snug fit around you.
It's not a particularly difficult job, just time consuming. And don't let the foam get into contact with the car
or, in particular, your seat belts/harnesses. It does not come off.
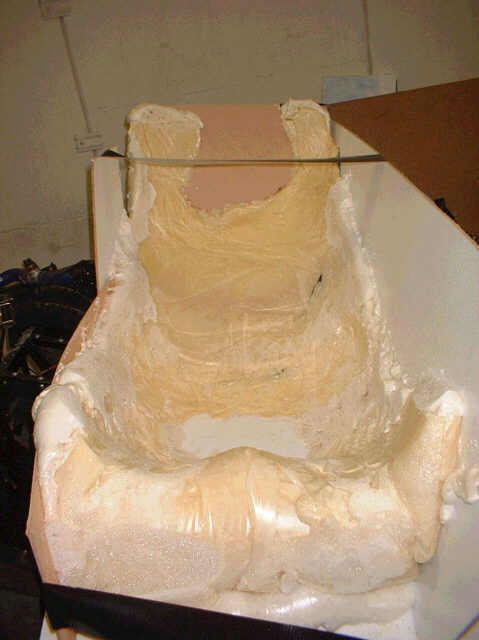
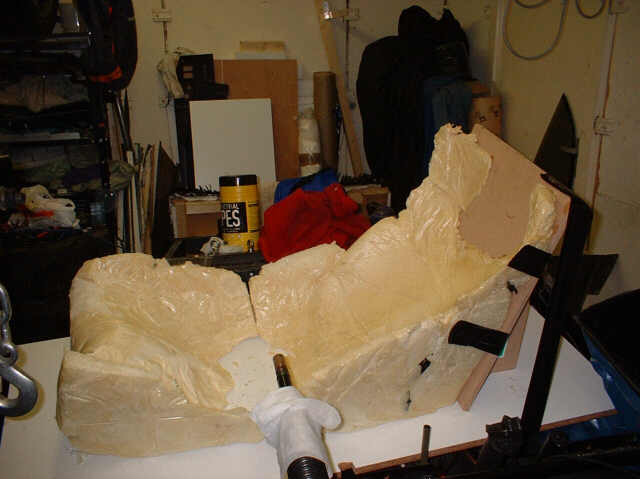
After a rather extreme course of defoliation, we
ended up with 2 pieces of foam, one for beneath my legs and one underneath my back. I then stuck these to two pieces
of MDF - this was necessary as I wanted to be as low down in the car as possible, so behind my back and underneath
my pert and well-rounded behind there was no foam. Anyway, a picture is worth a thousand words, so I'll shut up
and you can look at the piccie on the right.
I then put boards round the sides of the foam pieces
and used some more expanding foam (the type in an aerosol can this time) to fill in the gaps between the foam and
the boards.
Here you can see the boards on either side with
the spray foam filling in the gaps.
I then cut down the boards on the side to the same
level as I wanted the sides of the seat to be. Add about 4 tubs of polyfilla and 3 tubs of car filler, gallons
of elbow grease, several sheets of 60 grade wet'n'dry and a total absence of fingerprints (too much sanding) and
you get to this.
The strip of foam across the back is because I wanted the back of the seat to be slightly higher than the top of
the rear bulkhead - the foam is there to avoid having to use 5 tubs of polyfilla...
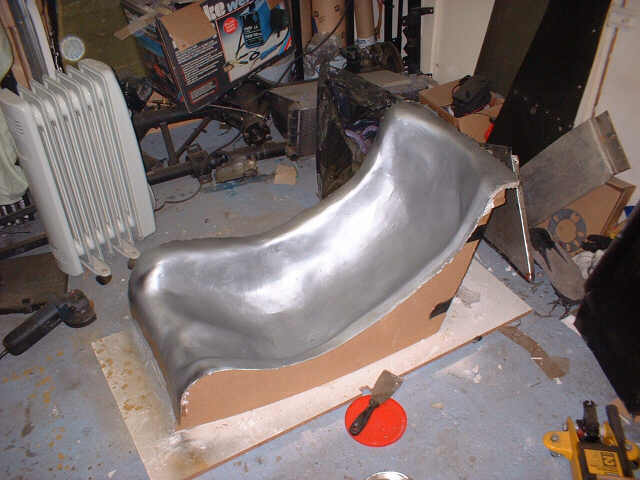
And after even more sanding,
filling, and a few coats of my new and rather shiny ali spray paint, and you get this. It's then time to apply
lots and lots of layers of wax - there's nothing more annoying than spending weeks making a buck to then find that
you can't release the mould. There's no photo of it after waxing cos it looks the same and you can't see the wax.
You can also just about see the strips of 90 degree angle plastic I added to the boards on the side of the mould
to give a bit more of a return - one of the problems I find making moulds and bucks is not making the returns large
enough - this means that laying up the mould or finished product is very fiddly because the edges have to be really
accurate.
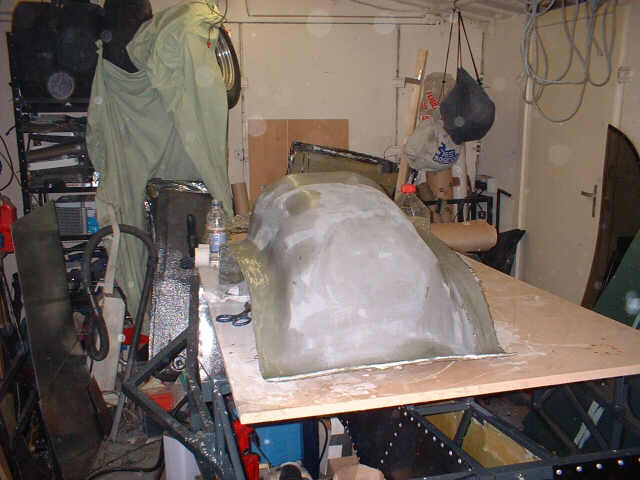
I then laid up the mould
on the waxed buck - this was made using CSM and polyester resin, with a polyester gelcoat. For no good reason other
than that I was experimenting with coloured gelcoats, the gelcoat is grey. Sadly the buck didn't survive the mould-making
process - the release angles on the mould aren't that ideal, and because the buck is only made from foam and filler
it's not very strong. Hopefully now I've got the mould, I won't need to make another one...
The mould is on the left. The edges of the mould were a bit rough and there were some imperfections on the surface
of the mould, so I used some topcoat to fill in the gaps and smooth things out. Topcoat is like gelcoat but with
wax added so it sets even when it's exposed to air. If you used normal gelcoat for this it wouldn't set.
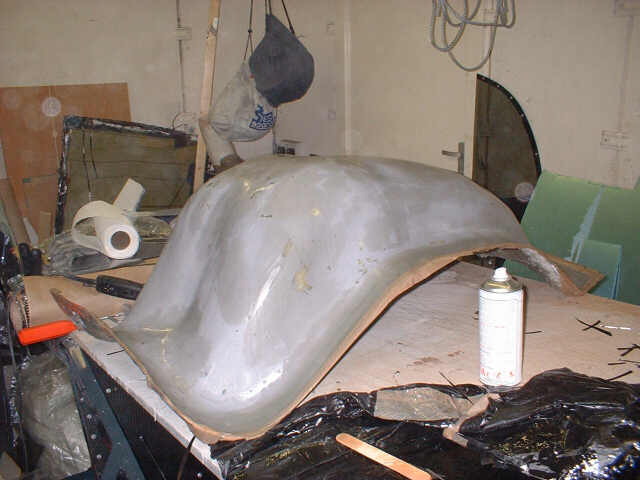
After lots and
lots of sanding and topcoating and sanding and topcoating I was reasonably happy with the finish on the mould,
so it was time to add the wax. I used several layers of normal wax, then a few layers of spray wax which I find
works really well. You can buy it from CFS and I find that it works really well. In the end I used about 7 or 8 layers of wax. You
can see one of the layers of spray wax drying in the picture.
I also added some packing tape along the edges of the mould - this reduces the chances of the end result sticking
to the rough edges of the mould.
And
this is the result after laying up the carbon. I used SP115 resin from SP Systems, with 2 layers of 6k x 6k 2x2
twill carbon on top and 2 layers of 12k x 12k twill carbon underneath for strength.
It needs trimming down, obviously, and there are a few voids present in the top coat of epoxy. I'll fix the voids
using a layer of SP115 as a flowcoat which should give it a nice shiney finish.
Current status: Both the carbon
fibre and GRP seats are made. The carbon one needs some tarting up as there are some voids in the top resin layer.
 After a rather extreme course of defoliation, we
ended up with 2 pieces of foam, one for beneath my legs and one underneath my back. I then stuck these to two pieces
of MDF - this was necessary as I wanted to be as low down in the car as possible, so behind my back and underneath
my pert and well-rounded behind there was no foam. Anyway, a picture is worth a thousand words, so I'll shut up
and you can look at the piccie on the right.
After a rather extreme course of defoliation, we
ended up with 2 pieces of foam, one for beneath my legs and one underneath my back. I then stuck these to two pieces
of MDF - this was necessary as I wanted to be as low down in the car as possible, so behind my back and underneath
my pert and well-rounded behind there was no foam. Anyway, a picture is worth a thousand words, so I'll shut up
and you can look at the piccie on the right.