Taking full advantage of having a bust chassis, I decided to use parts of it as moulds for interior panels. Some of the panels I had to make from scratch - the outside chassis panel alongside the exhaust was too bent to be of any use, and the rear panels on the transmission tunnel are different on the IRS chassis compared to the live axle chassis.
However, the 2 major transmission tunnel panels and the outer chassis panel on the driver's side were usable. I
could have used the rear panel (and intended to do so) but in the end just made up a mould out of a simple ali
panel.
The panels are all basically pre-preg carbon. I'd done quite a lot of work with wet lay-up carbon fibre stuff but
I'd never tried pre-preg before, and had accepted the commonly-accepted view that pre-preg carbon manufacture wasn't
the kind of thing you could do yourself - that it involves autoclaves, sophisticated materials handling, keeping
the carbon in a freezer... Don't believe the hype - pre-preg is pleasantly easy to use and a lot less messy than
wet lay-up. You don't need an autoclave (unless you're making fighter aircraft, or Formula 1 tubs) - after all,
large racing yachts are made from pre-preg carbon, and I don't think anyone's got a 60 metre long autoclave...
You don't need a freezer (unless you need to keep the pre-preg for long periods), and it's a lot nicer to use than
big buckets of gloopy resin.
I get all my carbon stuff from Marineware who are a distributor for SP Systems. To make pre-preg carbon you need:
I use SP Systems SE84/RC200P pre-preg. This means that the resin system used is SE84 and the fabric is RC200P. What do you mean that's not very useful? ;)
The SE84 resin is a low temperature resin - it cures at any temperature between 80 and 120 degrees C, and is low
viscosity so it doesn't need to be put in an autoclave, just vacuum bagged. The RC200P refers to the carbon cloth
- it's 200 weight carbon (so quite a tight weave with small fibres) and its a plain weave. I was planning to use
twill weave carbon because I prefer the way it looks, but Marineware didn't have any in stock when I ordered my
first batch. So I'm using plain weave (which still looks pretty pimpy IMHO). If you want to use twill either because
of the looks or because it drapes better (my panels are pretty much flat so this isn't an issue) then you'll need
RC200T instead.
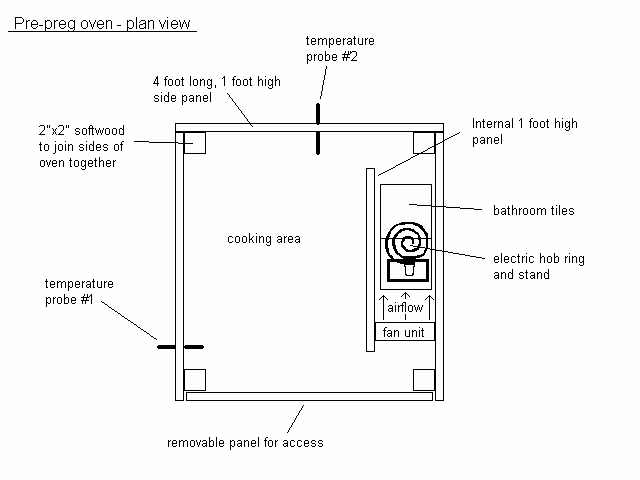
I needed a DIY oven that was cheap, easy to build, and preferably easy to dismantle and reassemble. So far it's met 1 and 2 pretty well, but I suspect it'll fail 3. The oven is an MDF box, 4 foot by 4 foot and 1 foot high. It's made from 18mm board with one 8'x4' board chopped in half for the top and bottom, and another chopped into 5 1' x 4' strips (with some left over). The heater element is a 2.5kW electric hob which is mounted on a simple steel mount, which in turn rests on some rather nasty bathroom tiles from B&Q to insulate it. The whole oven rests on 2" of insulation foam to stop all the heat simply sinking into the concrete garage floor.
Access to and from the heating chamber is via one of the 1' high side panels which is not screwed in place but
is just an interference fit.
There's also a fan in there to drive the air around - it's a slightly badgered Fireblade radiator fan that was
on Furybird I and which had a long argument with a radiator hose. The radiator hose eventually lost that battle
(just north of Le Mans) but the blades on the radiator took a bit of a beating. Still, it's perfect for this purpose.
Originally I powered the fan using a 15V and then a 12V power supply but these were only simple plug-in jobs from
Maplin and died fairly quickly. Thinking about it, a 1.5A PSU was never likely to be able to provide enough grunt
for the fan. So now I'm using my spare car battery to power the fan which, when the fan is running, is connected
to a battery charger. It seems as though the charger can provide enough current to drive the fan when buffered
by the battery - it's been running for over 20 hours now and the battery's still charged.
The inside of the oven was lined with tinfoil but in the 'cooking' area it's mostly been pulled away by putting
moulds in and out. The temperature inside the oven is monitored using a temperature probe on my multimeter - it's
a thermocouple type sensor and it's reasonably accurate - it shows 98 degC when placed in boiling water, so it's
good enough for this purpose.
The oven has worked very well so far. It warms up fairly slowly (not surprising given the mass of air involved)
but it's got up to 120 degC and was still rising. In fact, since I run it at about 80 to 90 degC usually, I've
bought a Eurotherm 91e temperature controller from eBay to automatically regulate the temperature in the oven.
When it's on for 3 hours plus, it's a bit boring having to manually monitor and control the temperature. With a
thermocouple and a relay to switch the heater element, this should automate the temperature regulation nicely.
The key to a successful pre-preg oven is a nice consistent temperature throughout the oven. This is why using a
domestic oven isn't usually that successful, apart from the fact that it limits the size of the things you're making
- the radiant heat from the exposed heater element heats up the pre-preg stack unevenly. To avoid this, the oven
has 2 chambers inside it - they're separated by an internal 1 foot high baffle, about 2 feet long. The heater element
and fan sit behind this, with gaps of about 1 foot at either end to allow the air in and out. This leaves a space
of about 4 foot by 3 foot for the working part of the oven. This seems to work well - the temperature differential
across the oven never seems to be more than 1-2 degrees C.
 The only problem with the oven so far has been that
all the panels have warped - MDF probably isn't the best thing to use for this, although making a heftier frame
to attach the panels to might have helped. The warping of the panels has meant that the joints between the panels
have opened up in places. I've just taped over the gaps with gaffer tape. It does seem that MDF panels (from B&Q
at least) have quite a high water content - when I first fired up the oven steam used to escape from any gaps between
the panels. I assume that this has led to the panels warping. There's still steam produced, which gets absorbed
by the gaffer tape, so periodic inspection and replacement of the tape is required. Still works, though, so I've
no plans to change things in the short term.
The only problem with the oven so far has been that
all the panels have warped - MDF probably isn't the best thing to use for this, although making a heftier frame
to attach the panels to might have helped. The warping of the panels has meant that the joints between the panels
have opened up in places. I've just taped over the gaps with gaffer tape. It does seem that MDF panels (from B&Q
at least) have quite a high water content - when I first fired up the oven steam used to escape from any gaps between
the panels. I assume that this has led to the panels warping. There's still steam produced, which gets absorbed
by the gaffer tape, so periodic inspection and replacement of the tape is required. Still works, though, so I've
no plans to change things in the short term.
Just for Chris Good, here's a plan of the oven (click on the piccie for a legible version) -
I had originally planned to use a vacuum generator powered by a compressed air supply (I've got a compressor in the garage) but the thought of my very noisy generator running intermittently for hours on end put me off that idea. Then I found an abandoned fridge in a skip near Zena's parent's place and whipped the compressor out of that. This can be used as a cheap vacuum pump - for details see here and here. However, in the end Steve Wiseman lent me his vacuum pump and 2-piece breach unit. The breach unit makes connecting the vacuum pump to the bagging film much easier and although the pump smells rather grim when it's working it does the job pretty well.
I still plan to get the fridge pump working one day - I suspect Steve is going to want his vacuum pump back one
day! In order to measure the vacuum being generated I've also bought a vacuum gauge off eBay for a few quid - it's
from a 50s Triumph Herald apparently although I think it's an aftermarket gauge not an OEM part.
The important thing with pre-preg is to make sure that the mould can survive the temperatures in the oven - that pretty much rules out polyester resin based GRP. The interior panels for the Fury were either made of bits of the old chassis or sheets of ali bent to shape. Where bits of the old chassis were used, returns were added to give a little extra room to play with.
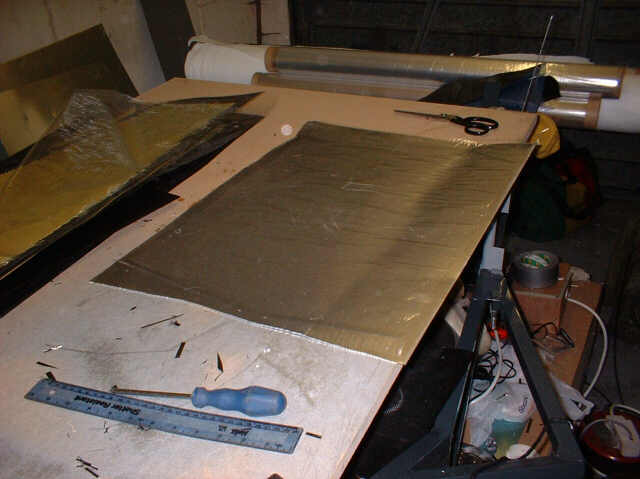 The first stage is to make the mould. This is the mould
for one of the rear transmission tunnel side panels. It's just a bent bit of ali as you can see. You can use virtually
anything for the mould as long as it's capable of surviving the temperatures in the oven (so not polyester GRP)
and, if you're bagging the entire mould and stack together and don't have any vacuum regulator, can survive the
pressure exerted by the vacuum bag. Or, if you're a science pedant (hello cam7) the pressure exerted by atmospheric
pressure on the vacuum bag and its contents.
The first stage is to make the mould. This is the mould
for one of the rear transmission tunnel side panels. It's just a bent bit of ali as you can see. You can use virtually
anything for the mould as long as it's capable of surviving the temperatures in the oven (so not polyester GRP)
and, if you're bagging the entire mould and stack together and don't have any vacuum regulator, can survive the
pressure exerted by the vacuum bag. Or, if you're a science pedant (hello cam7) the pressure exerted by atmospheric
pressure on the vacuum bag and its contents.
Obviously you're going to need some way of making sure the carbon doesn't stick to the mould. You can use PVA release
agent (horrible stuff IMHO) or wax (not that much better) or, if the panel's flat, you can just use a layer of
release film between the mould and the carbon stack. If you're using release film for this purpose, use low perforation
film - it gives a better finish with fewer little bumps where the perforations are.
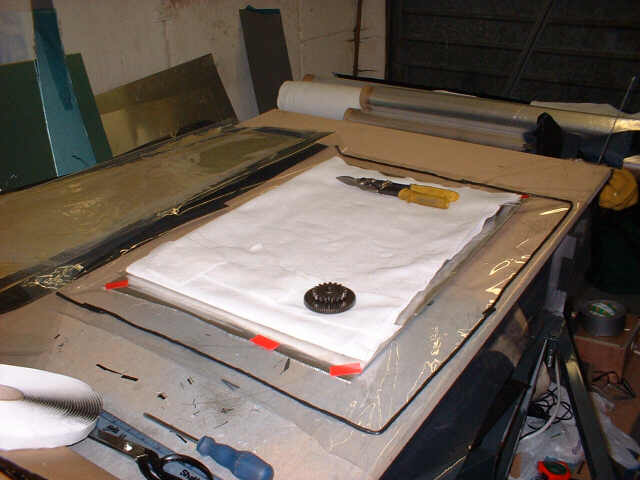
Of course the environment in which all this takes place should be spotlessly clean, with lots of glistening white
worksurfaces and people wearing silly paper hats. You can probably tell that my garage doesn't *quite* reach these
standards...
TOP TIP: a Fury chassis with lowered
front suspension makes a great work bench for carbon work. Simply put a 3' x 3' MDF board over the passenger compartment,
and the rolls of material sit nicely in the engine bay, held in place by the columns for the suspension mounts.
:)
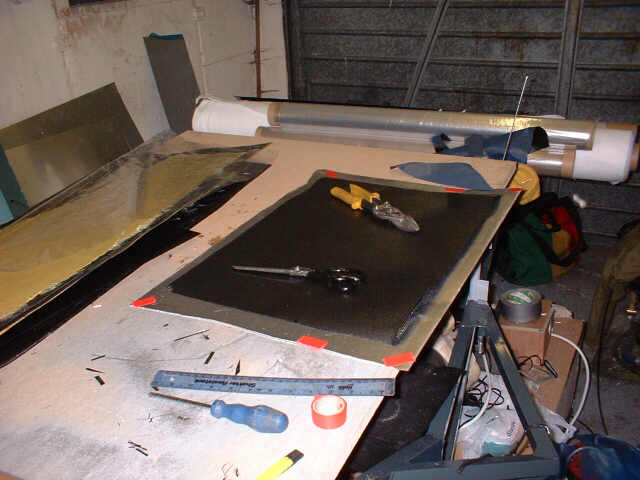 Then it's simply a case of
laying up the pre-impregnated carbon, layer by layer. The carbon comes in rolls about 1.2m wide, covered in a protective
blue plastic sheet. The properties of the part when it's finished are partially determined by how the carbon is
laid up and the direction of the fibres in the fabric. Generally, I use just 0/90 degree orientation, with a few
45 degree bits thrown in for good measure if I've got some suitably sized offcuts handy... The trickiest part is
keeping the carbon vaguely flat - it's quite tightly rolled up when it's on the roll (figures really) and it's
quite keen to return to its curved shape - hence the random stuff piled on top of the layers of carbon. This panel
is 4 layers thick IIRC.
Then it's simply a case of
laying up the pre-impregnated carbon, layer by layer. The carbon comes in rolls about 1.2m wide, covered in a protective
blue plastic sheet. The properties of the part when it's finished are partially determined by how the carbon is
laid up and the direction of the fibres in the fabric. Generally, I use just 0/90 degree orientation, with a few
45 degree bits thrown in for good measure if I've got some suitably sized offcuts handy... The trickiest part is
keeping the carbon vaguely flat - it's quite tightly rolled up when it's on the roll (figures really) and it's
quite keen to return to its curved shape - hence the random stuff piled on top of the layers of carbon. This panel
is 4 layers thick IIRC.
The outlife of SE84-based pre-preg is fairly good - up to 8 weeks being stored at 21 degC. Keep it in a cold garage
in winter, and if shelf-life is a problem, you just don't love carbon fibre enough cos you're using it too slowly...
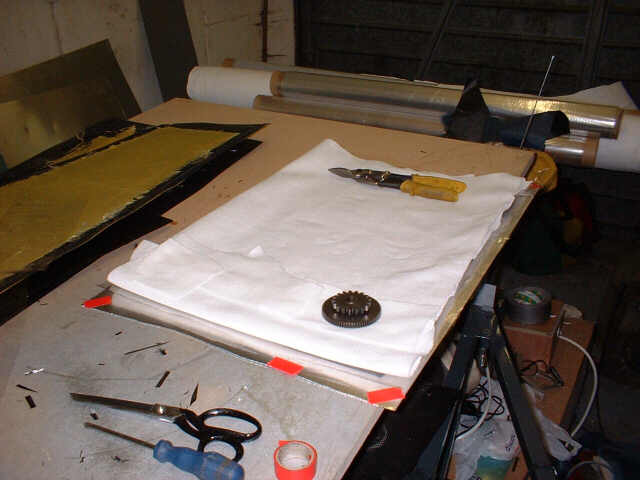 Then you put another layer
of release film on top (making sure it covers the whole of the carbon + a bit for luck) and bung a load of breather
fabric on top. I find that with the set-up I've got the low perforation release film works best for this top layer
too - this may change depending on what vacuum you're pulling, how many layers of carbon there are, what temperature
you're using etc. To get the ultimate mechanic properties out of the pre-preg you want as little resin as possible,
but I'd rather err on the same of too much that too little.
Then you put another layer
of release film on top (making sure it covers the whole of the carbon + a bit for luck) and bung a load of breather
fabric on top. I find that with the set-up I've got the low perforation release film works best for this top layer
too - this may change depending on what vacuum you're pulling, how many layers of carbon there are, what temperature
you're using etc. To get the ultimate mechanic properties out of the pre-preg you want as little resin as possible,
but I'd rather err on the same of too much that too little.
Release film and breather fabric are allegedly reusable (to a limited extent - the breather fabric obviously absorbs
more resin the more you use it) but to be honest they cost pennies compared to the carbon. In a 4 layer carbon
stack, the carbon's costing £100 per square metre, the breather fabric's costing 65p per square metre...
The stack's now ready to be bagged up. The bagging film is sealed using tack tape - this is just a long piece of
blue-tack-like material. You can put the tack tape on the mould and then put a single layer of bagging film on
top. I did this on the first few pieces and to be honest it wasn't terribly successful in getting a good vacuum.
Part of the problem may have been that the moulds (because they were made from bits of the old chassis with returns
added) might not have themselves been airtight. Actually, make that, they *weren't* airtight.
 If it's
possible then it's best to put the entire thing, mould and stack, in a bag and vac the whole thing down. On a simple
mould like this the bagging is easy - put the mould and the stack on top of a big piece of bagging film, run a
line of tack tape along 3 sides, and fold the bagging film over the make a vacuum bag. SteveW gave some good advice
that it's best to roll the tack tape into a thin tube rather than using it in its square section form. Once you
draw the vacuum down you can hear if there's a leak from the hissing noise - you can usually get rid of the leaks
by just pressing down a bit harder on the tack tape - if not, use some more tack tape to plug the gap.
If it's
possible then it's best to put the entire thing, mould and stack, in a bag and vac the whole thing down. On a simple
mould like this the bagging is easy - put the mould and the stack on top of a big piece of bagging film, run a
line of tack tape along 3 sides, and fold the bagging film over the make a vacuum bag. SteveW gave some good advice
that it's best to roll the tack tape into a thin tube rather than using it in its square section form. Once you
draw the vacuum down you can hear if there's a leak from the hissing noise - you can usually get rid of the leaks
by just pressing down a bit harder on the tack tape - if not, use some more tack tape to plug the gap.
Once it's vacuumed up (or down), lob it in the oven, bake at around 90 degrees C for a few hours, leave it to cool
down, and separate the carbon from the release film. Don't go above 100 degrees C in the oven - the release film
will start to melt and stick to the carbon, which makes it a bit pointless using it in the first place...
 And the result should be something
like this. On the larger picture you can see the small pin-pricks where the resin has bled through the release
film. You could sand them down I suppose and laquer it, but IMV life's too short as it is.
And the result should be something
like this. On the larger picture you can see the small pin-pricks where the resin has bled through the release
film. You could sand them down I suppose and laquer it, but IMV life's too short as it is.
After it's come out of the oven I give it another couple of hours at around 110degC in the oven to finish curing
it. A complete cure at 90 degrees C takes about 9 hours, and as I've said, life is just too short. Once you've
got it away from the release film you can use the higher temperatures to give it a post-cure blast without worrying
about the release film going uggy.
Now it's time for the REALLY boring bit - cuting the panel to shape...
Once the panels are cut to shape, it's the usual thing of drilling
the rivet holes (5mm holes as I'm using 4.8mm rivets), and then attaching the panels using polyurethane sealant
(not silicone sealant which doesn't have sufficient adhesive abilities) and rivets. I'm using 4.8mm aluminium closed
end rivets. These are stronger than normal rivets which, leave a small hole where the mandrel gets pulled out.
The closed end rivets don't leave this hole (the mandrel shears at the bottom of the rivet instead). This increases
strength and also means that water can't permeate into the chassis tube through the rivet head. The downside is
that they're an absolute sod to use, and so I've been using an air-powered rivet gun for these.

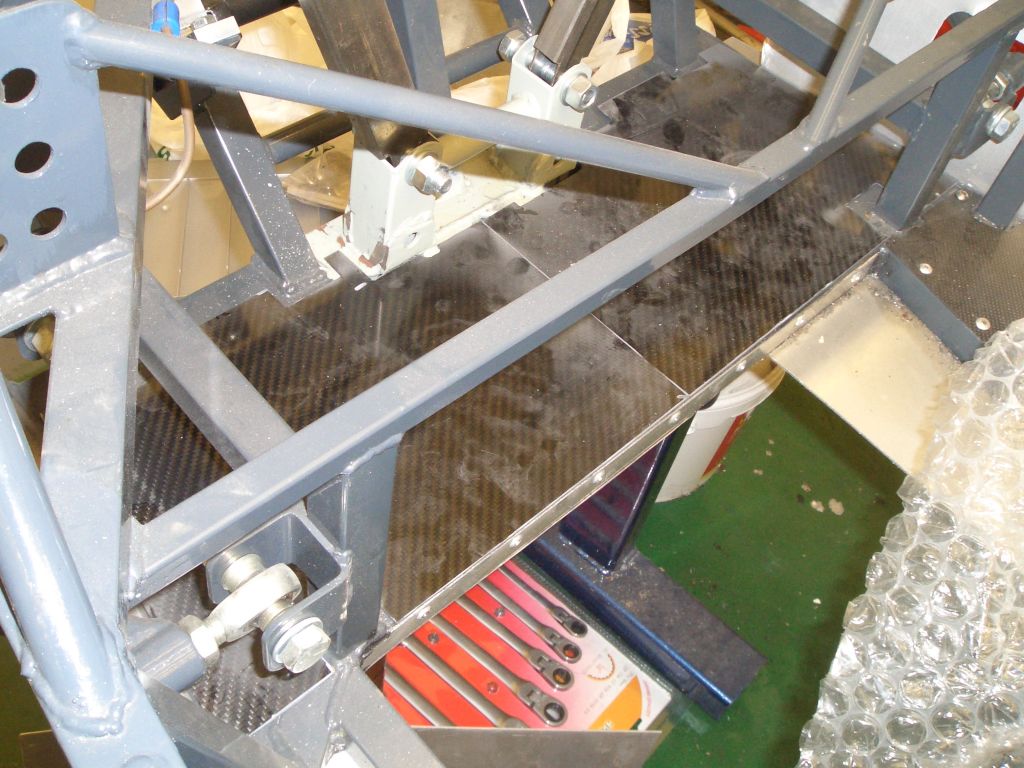 |
I'm also panelling the inside of the the engine bay, both top and bottom.
The top panels are really just there to stop the areas between the chassis tubes filling up with gravel and much
- if you only panel the bottom of the chassis tubes then you end up with these shallow spaces which fill up with
crap and are a pain to clean. These carbon panels around the front suspension were the off-cut from the hole I made in the rear parcel shelf for the extra storage area (details below). I cut these with a Dremel and a thin cut-off tool - fast, but messy, hence the dust covering the panels. It's necessary to make this panel in two pieces otherwise it won't fit. |
| And here the same panels are with.everything rivetted into place, and cleaned up. | 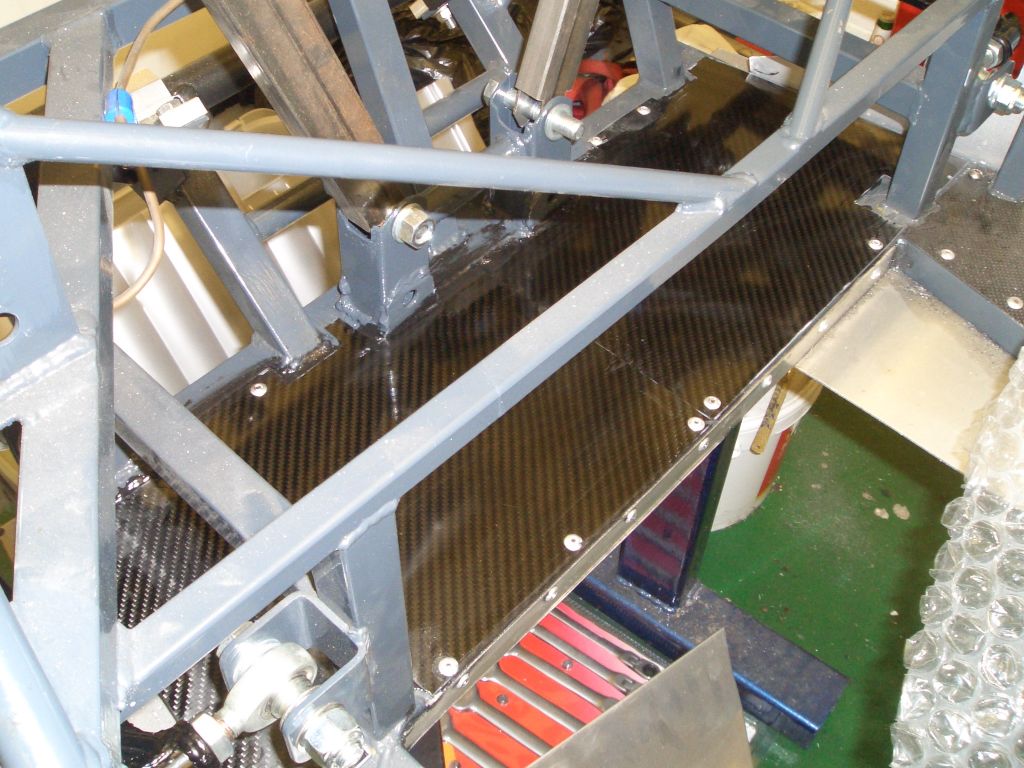 |
The panels are basically pre-preg carbon but some of them have extra layers added. The long panels at the front of the transmission tunnel have 2 layers of chunky 12K carbon on the back (wet lay-up) to add extra strength and a layer of Kevlar on the very back in a probably futile attempt to try and limit the damage if the propshaft decides to go walkabouts. I added these using some 12K Kevlar I bought in an impulse purchase a while back (it was cheap) using SP115 resin. Doing this using the old wet lay-up techniques reminded me how nice pre-preg is to use...
I vac bagged the stack again once I'd added the layers of carbon and Kevlar and resin to make sure it was consolidated
properly and to suck out air and excess resin. Seems to have worked rather nicely.
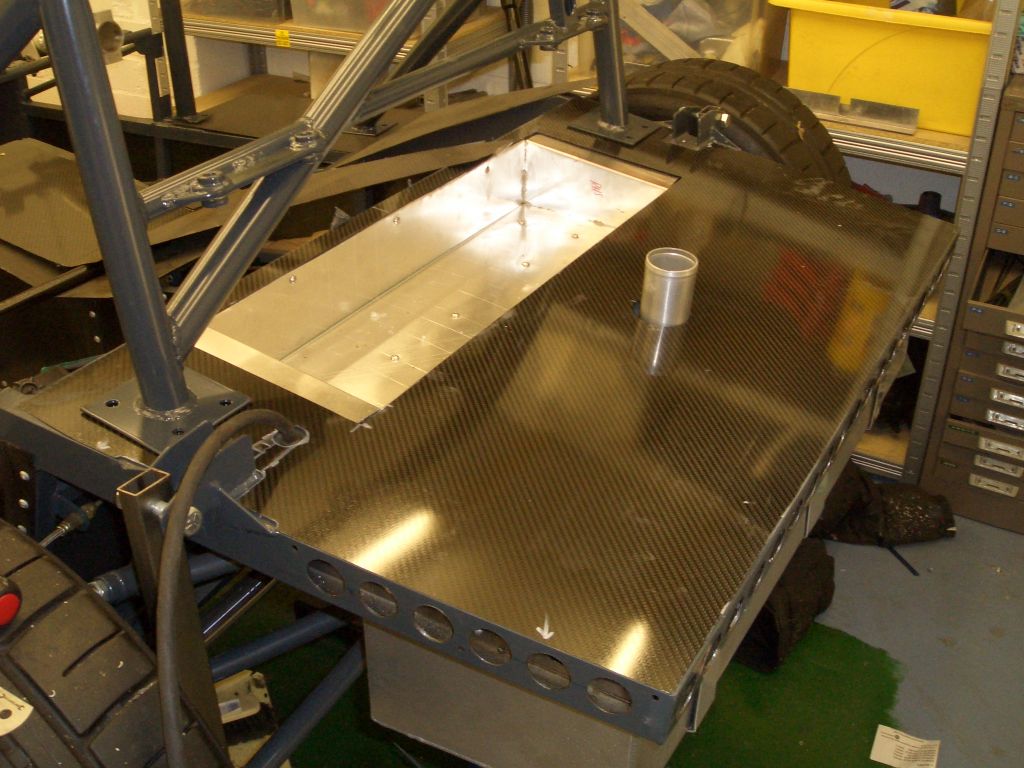 |
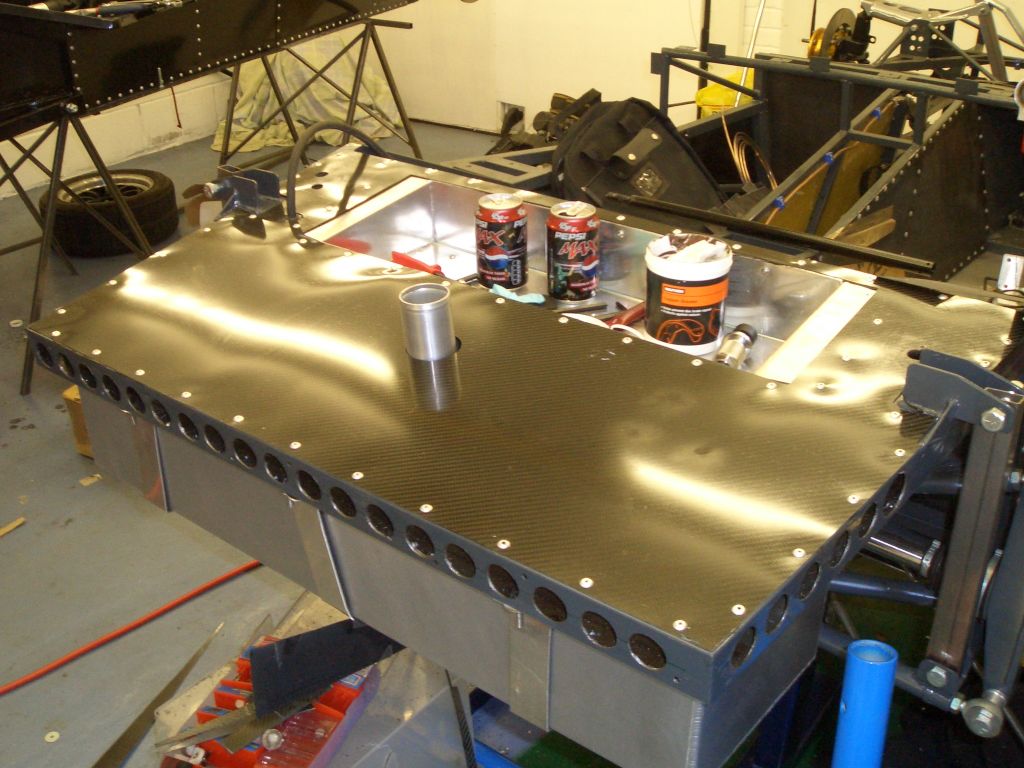
Since the Furybird is going to be my touring car, as well as occasionally track-use vehicle, a reasonable quantity of storage space is desirable. One potential area for additional storage space was above the diff and in front of the fuel tank. There's a box-shaped space below the level of the boot floor which I reckoned would be ideal for stuff like spare fluids, the intercom and some tools. |
| The carbon deck went into position with the usual combination of Sikaflex
polyurethane adhesive and closed-end ali pop rivets. As you can see, the ali box is already proving useful for storing bits and bobs... |
 |