2nd August 2010

More progress

This weekend I should've been racing at Pembrey. With the car still in pieces, that wasn't an option, so I pressed on with getting it working again. And apart from a quick bike ride on Sunday morning, that's what I did. I *think* I've now very nearly reached the stage where all the dismantling and fixing and making new bits is finished, and (apart from the bodywork) it's simply a matter of putting everything together again. Still, the weekend's work did throw up a few surprises.  

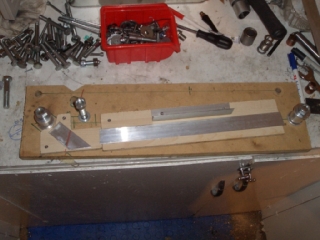
Jig #2


With the new top rocker arms finished, the next jig to make was the one for the rear trailing arms. I needed at least one new trailing arm since the one on the driver's side of the car had been wrapped round the chassis in the crash, and had been bananananerified in the process.

Having said that, making up new trailing arms was something I was going to do anyway. When I modified the old trailing arms, to make them into a J-shape, I'd calculated the height of the damper mount, relative to the bushes at either end, on the basis that I'd be using my old Nitron shocks. After they
fell apart, I got some ProTech dampers instead, but these were an inch shorter than the Nitrons when fully-extended. As a result, once I'd wound the spring seats up to the position where the car had a 20mm rake (the front of the car being 20mm lower than the rear) the dampers were nearly at the end of their travel. Also, there was a suspicion that due to the hockey-stick shape, and the fact that as a result the bottom of the trailing arms were less than 75mm off the ground, strictly speaking my car didn't comply with the ride height regs. And, if that wasn't enough, it was a right swine putting the car on the trailer as the trailer ramps wouldn't slide underneath the trailing arms.

So lots of good reasons to replace them with some less 'hockey-sticked' versions. This jig is actually based on my old jig, although given that the old jig was just a bit of MDF with two 1/2" holes in it, it didn't provide much assistance. Especially as I couldn't even use the existing holes...

Trailing arms

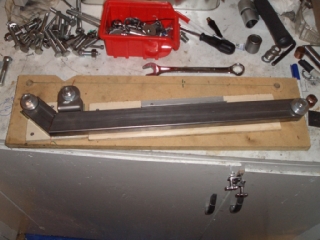
And here is a new trailing arm ready to be tack-welded together. The damper mounts are once again SUS2 mounts from 3GE components, drilled out to 1/2". The box section tubing is the same as that used on the standard Fisher components - 40mm x 20mm with a 2mm wall thickness. The only difference is the bush holders at either end (which are as usual held in place with some aluminium bobbins I turned up on the lathe).

The OD of the metalastic bushes used on the Fury (BP636/2 bushes for reference) is 27mm, and the bush housings on the standard Fisher trailing arms have a chunky 4mm (or so) wall thickness. As far as I can see, they're made from 1 3/8" 8swg tubing. I couldn't get any 1 3/8" 8swg tubing (10 gauge, no problem, but that left too large an 'ole down the middle), so I used some 1 1/4" 10 gauge tubing instead, and bored out the ID to just under 27mm. This means the wall thickness of the bush mounts is just over 2mm, and so less than that on the original parts, but since it's still slightly thicker than the wall thickness of the box section I can't see that this'll be an issue in practice.


  The only time-consuming part of making up the trailing arms was making up the six bush mounts - cutting sections of 1 1/4" tubing, facing the ends on the lathe, turning them down to precisely 32mm and then boring the insides out to ~26.9mm. Cutting up the box section and drilling the half-circles at either end (using a 32mm bi-mettalic holesaw in the milling machine) was relatively straightforward, and the damper mounts just needed the holes drilling out to 1/2".

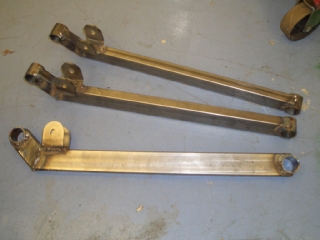
I've made three, as you can see - two for the car, one for spares.

Panhard rods

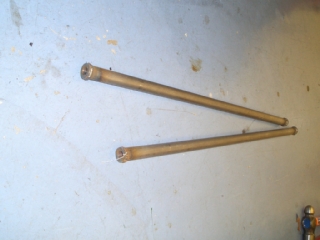
The last suspension component I needed to make from scrach was the Panhard rod, and again I've made a spare one while I'm at it. These are very easy to make, however - turn down a Rally Design 1/2" UNF threaded bushes, insert into suitable length of 7/8" 16g tubing, weld, repeat at other end. 5 minutes each. Job done.  

Bonnet hinge

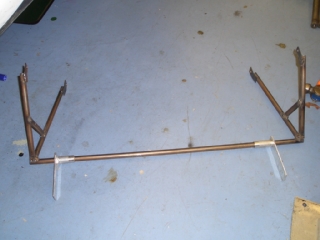
  The last thing which needed fabricating was a new bonnet hinge. This is the part which I've had on order from Fisher/BGH now for about 3 years (no sign of one yet). The old one wasn't really reusable again - it's been bent in crashes and then beaten in to shape too many times, and each bit which should have been straight was ending up rather wavy from the repeated attempts to straighten them. The standard Fisher part is made from 16mm diameter tubing, but the only bit of 16mm diameter tubing I had was a bit bent - in fact, it was a bit bent following last month's flying bonnet episode. So I've used 14mm stuff instead.

I've designed the bonnet hinge a little differently from the standard item, as this one mounts on the outside of the brackets on the chassis. This means it's a bit wider, which will hopefully give the bonnet a bit more side-to-side adjustability. The little hinged brackets are made from ali and not steel since I didn't have any steel tubing which would slide over the 14mm tube the rest of the frame's made from, and I had just enough Argon left to weld the aluminium brackets together using the TIG welder. I'm hoping that in any further crash the brackets will take more of the force and spare the bonnet. Wishful thinking, I suspect, given the pounding the previous frame took...

Oh, and as for the little triangulation braces on either side - well, I had a wee bit left from the 2m of 14mm tubing I started with, and it seemed a pity not to use them up.

Now I just need to get this, and the rest of the suspension components, powder-coated and I can start bolting them onto the chassis.

Bonnet repairs

I've also spent some time making further repairs to the beaten and bruised bonnet. The damage from its doomed attempt to fly to the Sheds was fairly light, mostly centred around the front right corner which had already taken the brunt of the impact at Brands and which appears to have repeated that feat when it crashed back to earth.

The main problem appears to be that the original bits of the bodywork have delaminated further, while the repairs I've made to the back of the original bodywork is still intact. This gives you some idea of the appalling quality of the original bodywork, in that my home-made repairs are substantially stronger and more impact-resistant than the professionally-made original stuff.

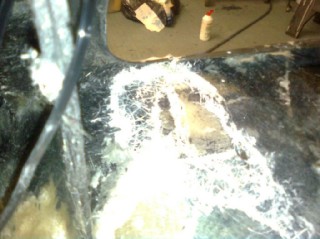
Carrying out the repairs therefore involved quite a bit of ripping off sections of delaminated bodywork, having chopped the still-intact repairs away. Apologies for the lousy quality of the photo on the right (blame the camera on my 'phone) and for banging on about this once again (blame the feckless muppets who laminated the bodywork in the first place) but this illustrates quite how poor the bodywork is. In the middle of the photo, surrounded by gleaming white unconsolidated glass fibre, is a translucent section. That's clear gelcoat. And only clear gelcoat. All the GRP and resin which is supposed to provide strength to the bodywork came away by hand, simply by pulling at it. As far as I can tell, most of the bodywork only achieves any degree of structural ridigity because of the gelcoat. The rest of the laminate is simply doing its darndest to hang onto it, despite not being attached very firmly.

Still, it's spurred me on with the task of repairing the poxy bodywork that I've got - the thought of paying good money for more of this crap is an effective motivator in that respect...
 

The bonnet's now back in one piece again, so this time I think it is simply a question of filling and sanding and painting. I've still got to repair the damage to the rear tub, but that's relatively straightforward. The next big job was to fix the rear axle by replacing the casing. That's a faff due to the large amount of stuff (mostly braking related) strapped to it.  

Rear axle


Removing the rear axle means

  • removing the rear brake calipers and hanging them somewhere so that their weight isn't taken by the brake hoses (I made up some little eyelets and pop-rivetted them onto the chassis so I could use zip-ties to hang the calipers from)
  • removing the rear brake discs (easy enough once the calipers are removed)
  • removing the caliper mounts and bolting them (temporarily) back onto the calipers
  • removing the handbrake cables from the calipers (they go underneath the rear axle so have to be disconnected in order to allow the rear axle to drop)
  • disconnect and bung up the fuel line from the tank to the pre-pump filter (ditto, but a much smellier job than disconnecting the handbrake cables)
  • remove the brake hoses from the solid brake pipe running down the rear axle (otherwise the rear axle's still connected to the calipers and the chassis by the brake hoses, and the rear brake line goes through various brackets in the rear axle casing so can't be removed en masse)
  • unbolting the propshaft (snipping through my carefully-applied lockwire)
  • unbolting the rear axle from the suspension arms, and removing the dampers (this allows the trailing arms to drop out of the way and allows the rear axle to drop down)

After all this monumental faff, the rear axle is able to drop down out of the way. This is itself quite tricky, and trying to balance a nose-heavy 5 foot long rear axle, on top of a trolley jack single-handed is quite hard. Indeed, the axle made the last 9 inches of the drop to the floor rather more rapidly than I'd intended. In fact, without motive power or a stronger gravitational field than that possessed by the Earth, it couldn't have done those last 9 inches any faster. Ow, ow, ow...

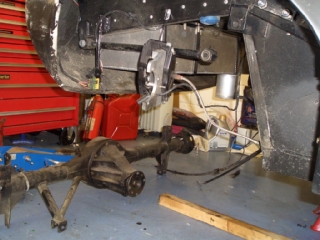
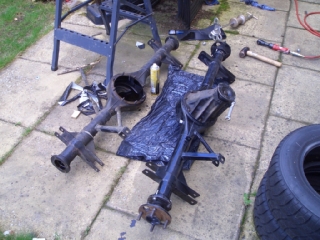
Still, as you can see, it's now off the car and resting quietly on the floor.


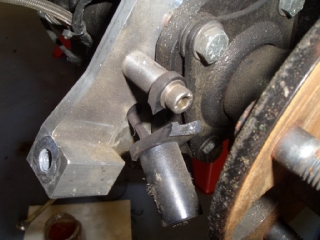
One rather curious thing I found while stripping the axle down was that the wheel speed sensor on the driver's side had broken off at the mounting point. I can only assume that at some point the end's come into contact with the end of the wheel stud. At first I assumed that this was simply another result of the crash, but it turned out that both sides were like this. Given that the passenger side of the car didn't hit the barrier, I doubt that the impact from the crash caused the sensor to break on that side. I suspect that what is in fact responsible is the fact that the halfshafts have been moving laterally under load, with the result that the clearance between the wheel speed sensor and the wheel stud has gone from waffer-thin to negative. I'll take a mm or so off the spacer which holds the sensors in place and try again. I've ordered some new sensors from RS although with hindsight that break looks fixable with a bit of bodge...  

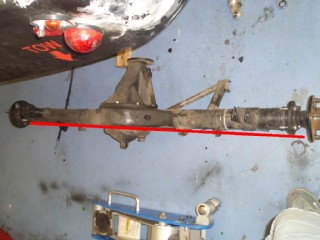
  And yes, the rear axle is definitely bent. Of course, there's no guarantee that it wasn't bent beforehand, given its exciting and sometimes aerobatic history, but regardless of when it happened it's bent now. I've checked this with various combinations of straight-edges, lengths of ali and G-clamps. There's a tiny bit of toe-in on the passenger side, and quite a bit on the driver's side. The red line is in roughly a straight line along the passenger side of the axle casing - as you can see, the driver's side isn't in line with it.

So on one of my many visits to the Shed to pour resin all over the remains of the bonnet, I nicked Jonathan's spare axle casing and nicked back my slide hammer. Now I've just got to work out where I've got enough space to withdraw the half-shafts without walls, cars and bikes getting in the way...

By this point, despite the confirmation that the axle was indeed a bit badgered, everything seemed to be going well, and it looked as though it would be soon time to start putting things together again. However, once I'd removed the rear axle it soon became apparent that my initial conclusion that the chassis hadn't sustained any damage wasn't entirely correct.

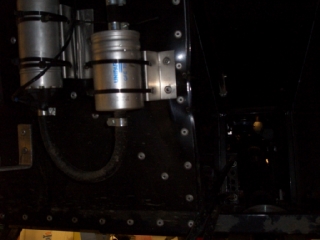
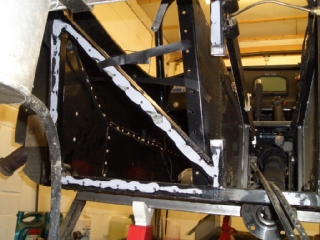
Once again, it's difficult to show in a photo since everything's black, but it's obvious even from this poxy photo that there's something wrong here. What has happened is that the nose of the axle has hit the upright chassis member at the back of the transmission tunnel, and has largely flattened it. This has caused the panel on the rear of the rear bulkhead to become creased. Strangely but happily the panel on the front of the bulkhead (i.e. the other side of the bent panel in the photo) is still completely flat.

Tempting as it was just to ignore this - the bulkhead's a lot beefier than the standard lightweight Fury chassis as I've added diagonals to the rear bulkhead which aren't there on the factory chassis - I decided that racing with a partially crumpled chassis would, upon mature reflection, be pretty bloody stupid. So I'll have to chop out the bent bit of chassis and weld in a new section. This means:

  • disconnecting the fuel filters and fuel pump mounted on the rear of the bulkhead panel
  • drilling out the rivets holding the mounts in place
  • drilling out the rivets holding on the rear bulkhead panel, the front bulkhead panel, and the rear panel on the side of the transmission tunnel
  • persuading the PU adhesive bonding those panels into place to let go
  • cutting out the squashed bit of chassis tube while lying underneath the car
  • welding in a new section inches away from the fuel tank
  • putting everything back again

Excellent. Better get stuck in then...


Front end

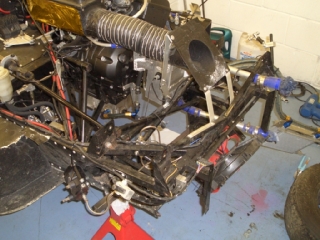
  Actually, rather than start that horrible job, I spent the rest of the day removing all the bits I hadn't yet got round to removing from the front end of the car. Radiator, radiator shroud, steering rack and both bottom wishbones are now gone.

One of the reasons for doing this was to try and work out whether the top rocker arm mounts on the driver's side have been pushed backwards in the crash. According to the Eyeball Mk1 measuring device it looks as though they have, but there's nothing which appears to be bent or out of place. The main chassis members appear to be roughly in the correct places and straight and level, the bracing is all in place and none of the welds are cracked or distorted. Indeed, all the powder-coating is pristine and looks pretty virginal.

One of the problems with trying to establish whether the suspension mounts have been knocked out of place is trying to decide what the reference plane should be. Very few of the chassis members which you'd think should be parallel or level are in fact parallel or level, and the standard Fisher construction tolerance appears to be +/- 4mm. It's difficult in the circumstances to establish whether something's moved or whether it's just always been in the wrong place. I've tried lamping the mounts with a hammer and they seem reluctant to move forwards. I'll try with a bigger hammer, and if they remain resolutely in place I'll consider that definitive proof that they haven't moved in the first place.

But before doing that, I'd better start cutting out the squashed chassis member...

5th August 2010

Yellowness

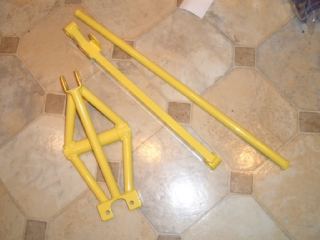
Actually, before sorting out the squashed chassis member, I took the fabricated suspension components to the powder-coaters, GKL Coatings in Soham. Delivered them on Monday morning, and they rang later that afternoon to say they were all done and ready for collection. Pretty prompt service really.

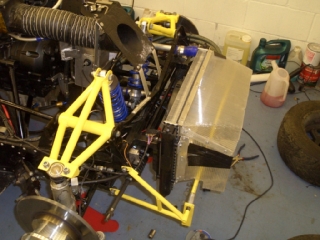
Mind you, one of the reasons why they were done so promptly is the fact I made it clear that speed was rather more important to me that being able to chose what colour they ended up being. I wanted them to be a pale colour so that cracks would be easier to spot - and because fitting black components onto a black car is frankly too much like hard work - and it turned out that the other stuff they were coating that day was going to be bright yellow. So that's what colour the new parts are. To be fair, the photo doesn't really do them justice - they really are very, very yellow. Still, should stand out against the uniform blackness of the rest of the car, and any cracks should indeed be fairly easy to spot.

So, with that done, it was time to start removing the panels at the back of the car and to chop away the squashed chassis member...
 

Rear axle studliness

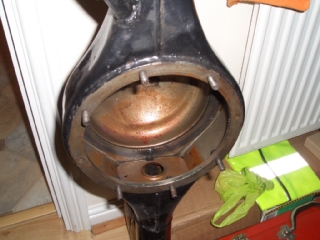
  But before dealing with that rather unpleasant task, a quick word on the new axle casing. The casing needs the paint touching up in a few places (I think it's actually powder-coated at present, but it's lifted in a few places), the insides cleaning up a bit and some of the brackets straightening out, but it seems straight and true - certainly better than the existing axle. However, it is missing two of the studs on which the diff mounts.

On the English axle (of which this is an example) the diff is mounted in the diff nose which bolts onto the face of the axle casing using the studs you can see in the picture. The studs are like small wheel studs, but with a tapered head. Trouble is, this axle casing is missing two of them. In the short term that's not an issue - I've got another spare English axle casing at the Shed (it doesn't have any additional brackets on it and is standard at present) and so I've pinched a couple of studs off that one. However, that still leaves me short of two studs overall, and at present I'm still at a loss as to where to get some replacements from. All my usual sources of Escort bits and bobs have come up with nothing so far, so if anyone happens to know where English rear axle diff studs can be purchased, do let me know - dan[at]danstuff.info.

One thing I had of course forgotten was that I'd need a new gasket between the axle casing and the diff housing. eBay to the rescue, and a couple are on their way (I never buy a single gasket, it's asking for trouble) but I'll have to wait until they arrive before swapping the axle casing over.

And finally...

I did eventually get round to chopping out the squashed chassis member. And it was a truly horrible job. About 100 rivets to drill out to remove the panels, petrol on the floor and down my sleeves from removing the fuel filters and pumps, wires and fuel lines everywhere, lots of rivets in inaccessible places due to the presence of the fuel pump, moan, moan, moan.

The result of all this work was that the bulkhead panels were out of the way and the transmission tunnel panel could be pulled to one side - removing it completely would involve taking off the panel at the front of the transmission tunnel as well as it overlaps this one - and so I could start wielding a hacksaw. As usual when cutting parts of a Fury chassis, as soon as you finish the first cut there's a loud clang and the remaining parts of the chassis member spring out of position due to the fact that they've been welded into place while under strain. Hopefully it won't be too hard to get the remaining stumps of the chassis member to line up so I can weld a new section into place.

Once that's done I just have to grind back the welds on the back of the new section of chassis, paint it, drill the rivet holes in the new section of steel, remount the panels and remount the fuel filters and fuel pump. And then I can start putting the rear axle, complete with new casing, into place using the new trailing arms...
 

22nd August 2010


Chassis tube


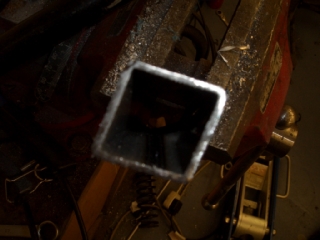
I'm quite glad I decided the chop out the damaged chassis tube rather than trusting that it would OK as it was. Although it's not as clear as it could be from the photo - the camera has decided inconveniently to focus on the floor rather than the thing in front of it - the square section of tubing is no longer square in the middle, it's triangular. The two sides that got clobbered by the rampaging diff nose have been squashed flat. I can't really thing, however, of any way of stopping this happening in a large shunt - the only alternative would be to make the Panhard rod really strong, to stop the axle from moving, but I suspect that would result simply in either chassis damage where the Panhard rod attaches, or even more damage to the rear axle. I suppose one alternative would be to have some sort of sacrificial crushable structure in between the diff nose and the chassis tubes - the trouble is, there's not really enough space to insert anything of a reasonable thickness between the diff nose and the chassis tubes. I suppose the best answer is not to have large shunts in the first place...

Reassembly is the reverse of the above

With all the new parts made (nearly), all the bent bits of chassis chopped out and the repair work to the bonnet if not complete then substantially underway, it was time to start putting things back together again. I decided that it would be sensible to start at the back of the car and then work forwards, if only because that would mean I'd get the 'orrible job of refitting the rear axle out of the way nice and early. It's a pig of a job to do single-handed, as it involves balancing a rather large, unwieldy and nose-heavy axle on a trolley jack while trying to nudge it into position with yet another hand you don't have but need in order to do the job...  

New chassis member

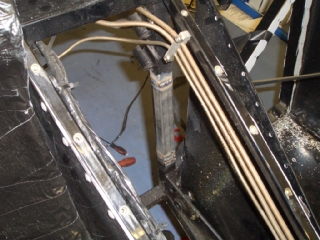
After a few minutes furtling around in the off-cuts bin I found a length of 1 inch square ERW which was about the right length, and after some spectacularly painful out-of-potision welding (welding splatter while lying on your back welding whilst wearing shorts - ow ow ow...) a rather fresher piece of steel was in place. The welds on the back of the tube needed to be ground back as there's an ali panel which is attached to that face, but the others could stay as they were. A quick slap of black POR15 later, I could reattach the aluminium panels (having beaten the one on the rear of the bulkhead back flat). Praise the FSM for air-powered riveters. I had to do about 10 of the rivets by hand, as the air-powered riveter was too big to get at those rivets, and it reminded me just how much like hard work it is, using a hand-riveter and closed-end rivets. With the air-powered tool it was a short, if rather noisy, job to put the panels back in place.  

Rear axle casing swap


  Swapping the rear axle casing was fairly straightforward once the axle was out of the car. Remove the bolts holding the halfshaft retaining plates in place, remove the halfshafts using the slide-hammer, unbolt the diff housing, clean up the mounting face on the diff housing, bolt it onto the new axle casing using a new gasket, push the halfshafts into place and tap them home using a soft-faced hammer, and then replace the bolts holding the halfshaft retaining plates in place.

I even treated the rear axle to a new axle breather (that's the little white and black plastic thing sticking out new the diff casing).

With the rear axle ready to go, it was time to fit the new trailing arms to the chassis (remembering not to bolt them up tight until the jacks are under the axle rather than the chassis, so the rear suspension's not at full droop). With them in place, and the leading arms still in place, I could replace the rear axle. As usual, this involved a trolley jack, using my knees to keep the axle level, and lots of swearing.

Rear suspension

Once the rear axle was reconnected to the trailing and leading arms, and supported by the trolley jack, I could reinstall the rest of the rear suspension (the Panhard rod and the dampers), the rear brakes (discs, calipers, handbrake cables and hydraulic lines) and replace the wheel speed sensors with some new ones from RS, after shortening the mounts so as to increase the clearance between the sensors and the wheel stud heads.

I've fitted the dampers all round with new, slightly stiffer springs, going up to 180lb/in from 150s. The car's just a wee bit too soft, as is evident from its propensity to go onto three wheels, and is a bit too rolly-polly round the corners. I've also fitted the dampers with some new longer bump-stops. This is, to be honest, a major case of 'me-too-ism' on the basis that many other RGB racers have longer progressive bump-stops so I thought I'd try it. Now I had been planning to use
the same ones as Tim uses on his car, of course, which are Powerflex SAF026 bump-stops. However, although there are a couple of places on the 'net which claim to sell these, it appears that they don't in fact have any. Powerflex's factory burned down a while back, and while they've re-engineered the tools for most of their stock, they haven't bothered remanufacturing their range of universal bump-stops. As is traditional with British industry, the fact that there's a demand for a product (and there is - I know a few people who are after these) certainly isn't going to induce a company to produce them.

Instead, I ended up having to buy some universal Superflex bushes at 3 times the price. I did ask Superflex's UK distributor whether they had a force-deflection graph for the bushes, and while it appears that they may well do, the distributor said I couldn't have it as 'it wouldn't be useful'. Gee, thanks. So, I'll just have to rely on the Lemon test (suck it and see) to establish whether these bump-stops are any good. If they're not then at least it's easy to remove them. Still, the most significant factor in the car's performance at present is the driver, and upgrading the driver with a heavier right foot (selectively, anyway) is the most important upgrade at this point...
 

Radiator

  The radiator was still water-tight after the crash, but it certainly wasn't straight and I didn't really fancy relying on a banananana-shaped radiator to remain continent. And falling of the track in a vast puddle of your own boiling-hot coolant is embarrassing. So, new radiator time.

When I built the car, and
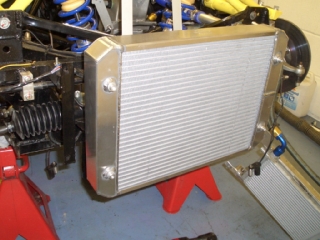
Tim found out I was using a standard OEM Polo radiator, he said it wouldn't be enough to keep the car cool and that I'd need a blingy ali radiator from Rally Design. However, the OEM Polo rads from Advanced Radiators were 23 pounds each, inc VAT and P&P (they've increase in price since) and the blingy ali ones from Rally Design are a wee bit pricier at £220 plus VAT plus P&P. In fact, while the oil and water temperatures are OK with the oil cooler, they could do with being a bit lower so I splashed out on a blingy ali rad from Rally Design. However, as you can see from the photo, it's quite a bit narrower than the Polo rad I've been using (hence the mounts and the radiator bosses don't line up). In the long-term I'll modify the mounts and may use this to my advantage to have the oil cooler and radiator side-by-side rather than stacked one in front of the other. However, for now I don't have the time to start fannying around doing this, so it's back to the OEM Polo rad. Happily I bought three of them many years ago, so I've got one I can fit to the car and still have one spare.

Front suspension

The rest of the front suspension is now in place. New top rocker arms using the old bearings and a new Chevette ball joint on the off-side of the car, which was the side which took the impact with the barrier at Brands. New 180lb/in springs and bump stops on the dampers, and one new lower wishbone (in fact, it's one I've pulled off the Furybird II - for reasons which are very dull and I won't bother going into the wishbones on the Furybird II were the same as those on the FuryRacer (but without the ARB mounts) but were a little bit too long. So I've taken them off the Furybird II, and added some ARB mounts to provide me with one replacement for the broken offside lower wishbone and one spare (the spare has two sets of ARB mounts, one on the 'top' and one on the 'bottom' so that it can be used on either side).

I've also refitted the radiator and oil cooler and the radiator ducting. The radiator ducting is rather second-hand after the crash, but I haven't got time to make a new one and with a bit of gaffer-tape engineering it's usable if not pretty.

I've also added the bonnet support frame, ready for when the bonnet comes back from the Shed after I've sprayed it.
 

Front hubs

  One of the ongoing problems I've had with the Furyracer is the nearside front brakes, which keep on binding. I refaced the mounting surfaces for the calipers, but I don't think that's really cured it. One other problem was that there was some run-out on the offside front brake disc, although this wasn't a problem with the disc but a problem with the hub. An entirely self-induced problem, I should add - when I was trying to install a set of new wheel-studs (which were the wrong size, which wasn't due to me) I'd tried knocking them in with a hammer and in doing so had inadvertently damaged the surface on the hubs which the brake disc attaches too. I'd tried filing it flat again (there was no obvious way to mount it in the lathe and use that to skim it flat) but without total success.

Given that these were still the heavy old iron Escort hubs, the obvious answer was to splash some cash and get some new aluminium hubs. Should be an easy answer, but it isn't. The front uprights on the FuryRacer are Escort MkII front struts, cut down and modified to make them into uprights. There are two types of Escort MkII front struts - a spindly one used on the base 1.1/1.3/1.6 models and a chunkier one used on the RS2000 model. The latter is also used on Capris. There are lots of ali hubs which fit onto the RS2000/Capri uprights, and they come in various flavours, some with wheel studs and oversized bearings (Grp4 spec) and some without. However, the Furies almost invariably use the spindlier uprights from the lower-spec models as they're lighter and we don't need the extra strength provided by the RS2000 models, unlike the Escort rally boys.

Again, there are various companies which claim to make hubs for standard Escort struts. MNR are one of them, having taken over the remains of Raceleda's business. But although
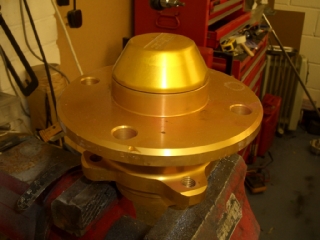
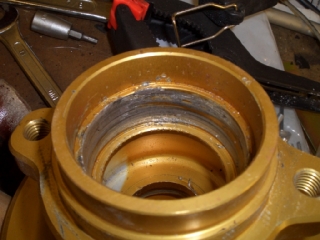
they still advertise them, they don't still make them. At least, I understand from other people that they no longer make them - they never bothered to return my call or reply to my e-mail asking them to confirm this. This left one company which was still selling suitable aluminium hubs - HiSpec. Now, I haven't had the greatest of experiences with HiSpec in the past, and wasn't particularly keen about providing them with more cash. But it turned out that Tim already had a pair of HiSpec Escort hubs going spare - pictured on the left.

However, there are two problems with these hubs. The first, and most serious, is that they don't fit - as Tim had warned me. It seems remarkable that a company specialising in making automotive parts should be unable to copy what is, essentially, a pretty basic part but I can confirm that it definitely doesn't fit. The problem appears to be that the recess for the inside wheel bearings (the larger ones nearest to the upright) has been machined too deep. This means that if you install the wheel bearings, and then try and install the hub on the upright, the inner face of the hub hits the upright before the bearing is seated properly. Quite a fundamental problem, really.  

The other problem is that the recess for the inner wheel bearing (this is the bit which is machined too deep in the hub) is, ah, not exactly in the first flush of youth. And no, it wasn't me... Mind you, it wasn't Hi Spec either.

The long and the short of it appeared to be, however, that if I wanted some aluminium hubs and they would have to come from HiSpec since no-one else was in the business of making them. Of course, I could switch to RS2000 or Capri struts, and get the modified into uprights (assuming that BGH can still do this) and then get some RS2000 hubs, but the RS2000 struts are heavier (unnecessarily so in this case) and largely if not entirely negate the weight saving afforded by the aluminium hubs.
 

This left me with, essentially, three options. Option one was to source a new pair of standard iron front hubs, but they seem pretty rare these days and of course there's no guarantee that they wouldn't be bust or out of true in some way. Option two was to try and skim the disc mounting face on the existing hub, but this would have involved significant time and effort in finding a way to mount it in the lathe and at the end of the day I'd still have heavy iron hubs. Option three was to buy a new set of Hi Spec hubs and hope that they fitted rather better than Tim's pair. Option 3 involved spending the most money but was potentially the one which involved least time. And being shorter of time than money, that's the option I went for.  

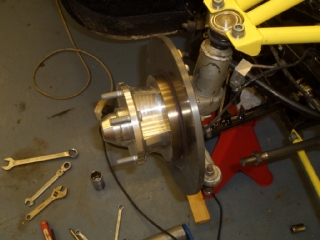
  The new aluminium hubs were supplied reasonably promptly (with a week anyway) and are clearly a very different design to those supplied to Tim. Rather chunkier, and presumably easier to machine, although it's gratifying to see that the brake disc mounting holes are helicoiled. And they do fit. Sort of.

The fundamental problem with Tim's hubs is still present, but less so. Rather than the bearings being 10mm or so too deep in the hubs, it's more like 3mm. Annoyingly this does mean reshimming the wheel speed sensor and even more annoyingly it looks as though I'll have to grind most of the heads off
the bolts holding the bracket for the wheel speed sensor onto the upright. I think that'll give everything enough clearance (although presumably I'll also have to reshim the brake caliper mounting blocks) and allow me to use the HiSpec hubs.

Then all I've got to do is set up the suspension alignment, change the front LHS caliper, bleed the brakes, respray and mount the bonnet, and repair the main tub. In fact, the main problem at the moment is that George Polley still haven't got the wheels I ordered back in June, so at present it looks like I'll be racing on cut wets at Silverstone regardless of what the weather's like...

26th August 2010

Final bits and pieces

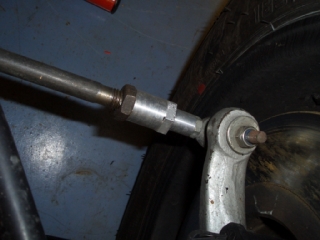
By this stage I'd done the majority of the work putting the car back together again, but as ever the final few bits and pieces left to do took an inordinate amount of time. One further part I needed to make was a replacement for the TRE adaptor which was damaged in the crash. In order to make them easier to fabricate I've changed the design, so instead of a tapered adaptor it's a simpler unit made up from 22mm hex ali bar. With these made up and fitted, the suspension and steering were complete and just needed to be set up. There was no way I could corner-weight the car, so I just set up the ride heights approximately correct (85mm ground clearance at the front, with the front right a wee bit higher, and 115mm ground clearance at the rear with the rear right quite a bit higher). What I really need to do is get some ballast to replicate my weight in the car so I can set the car up properly single-handed.

The rear geometry is fixed, so provided the axle's central there's nothing further to do there. The front I set at 2.5 degree negative camber, 7 degrees caster and a tiny smidgen of toe-out.
 

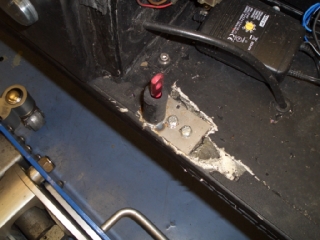
  Before putting the bonnet back on, I needed to ensure it would stay in place once it was there. This meant finding some way of attaching the bonnet pin which, along with its attachment plate, had been ripped out by the crash. There wasn't really any way of repairing this properly - now that the sidepod had completely delaminated the remaining bits of GRP were no longer strong enough to hold it in place. However, as usual, while the bits of Fisher-supplied bodywork was barely capable of structural integrity, the GRP I'd added when I installed the reinforcement plates was still sound enough. So I made up a new reinforcing plate, removed the delaminated GRP, slid the reinforcement plate into position where the GRP remained in situ, and then bolted the plate down into place. When i have time I'll probably add some GRP and topcoat on top, and try to make it a bit less of an 'orrible bodge, but for now it does the job.

I could now therefore replace the bonnet. I'd spent a fair few hours at the Shed filling and sanding and filling and sanding, and had rapidly got thoroughly bored of the whole thing, particularly as the more I sanded and filled, the more the original sections of bonnet delaminated and developed star-cracks. When my DA sander broke (in quite spectacular fashion - the driveshaft snapped in two and sent the sanding head off across the spray booth - it meant the only tool I had left for the job was the angle grinder with a flap wheel in it. It's not exactly the most subtle of tools, and doesn't provide the most perfect of finishes, but it's fast and I was starting the lose the will to live by this stage.

So having got the bonnet to vaguely resemble its original shape (albeit with some quite substantial lumps and bumps left where I'd been overly or underly vigorous with the angle grinder) I gave it a couple of coats of etch primer and then some matt black celly. Once that had (nearly) dried, I put it back on the roof of the Scooby (with plenty of zip ties this time), took it home, and refitted it.

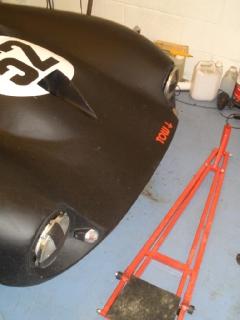
Then followed the race numbers, the 'TOW' sticker, and the lights. I'd ordered another self-adhesive number plate but despite having ordered it a week earlier (from Craigsplates - not exactly the speediest of suppliers, nor the cheapest) it still hadn't arrived. The headlights don't have the chrome trim around them - there's a reason for this. A Jolly Nice Chap is in the process of making clear headlight covers for the classic Fury bonnet (something I've been after for ages, and something which the factory has been promising to do for ages as well) but they won't fit with the headlight trim in place as the headlight trim is pretty much flush with the edge of the bonnet. So rather than buy some new headlight trim only to bin them when I get the headlight covers, I've left the headlight trim off completely.
 

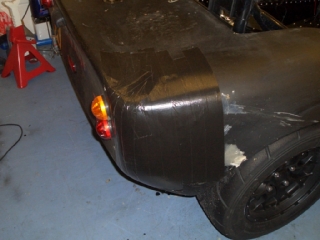
  By this point it was past midnight on Friday morning, and the first test session of the day was due to start at 9:20 am. I worked through until 3.30 am, but then decided that rather than do a Steve and crash the car (again) due to sheer exhaustion, I'd better go to bed and finish things off in the morning. The last job I did was to add some fresh GRP to the rear of the damaged section of the rear tub. As you can see, when I continued working on the car later on Friday morning, I decided that the traditional racers' Gaffer tape finish was preferable to filling, sanding and painting it (not that I had time anyway). I also had to replace the broken indicator on the right hand side, and work out why virtually none of the rear lights worked (the bulbs had come adrift from the light housings). Once I'd wired the headlights and front indicators in, so that I had a working set of lights, I dropped the car down off its axle stands for the first time since the Brands crash, put it on the trailer, and drove off to Silverstone.

I got to Silverstone at 3:40, with the last test session starting at 4:20, so spent 40 minutes running around signing on for testing, entering the Allcomers race the next day, changing the wheels from the partially-broken set with dry weather tyres on to the unused wets, and getting changed into my race suit. Having run around like a headless chicken to get all this done by 4.20, they then held us in the pitlane for 15 minutes while they recovered an MR2 which had rolled end-over-end and been reduced to little more than a crumpled shell. It was during this time that I remembered that I hadn't checked the tyre pressures on the wet weather tyres, and so had no idea what they were. Still, there was nothing I could do about it sat in the pitlane. Eventually they managed to scoop up the larger chunks of MR2 scattered over the circuit, and we then had about 10 minutes on track, which was largely pointless save to reassure me that nothing fell off the car, that the rFactor version of the Silverstone National circuit was really rather accurate, and that the brakes appeared to be working properly. Oh, and it turns out that it required 8 full turns of the brake bias adjuster to get the brakes feeling like they ought to...

Test session over, I took the two damaged wheels over to George Polley's trailer to have the tyres fitted to my new wheels, which had finally arrived. As it turned out, the rear tyre was too badly damaged to be reused, but the front was OK, so I ended up with one new tyre on the car and three worn ones. However, they weren't very worn so I didn't think this would be an issue.

Having got all this sorted, I erected my new pop-up tent (the one I used at Brands had been mortally wounded by the fact that the inflatable mattress I'd inflated inside it was slightly larger than the internal dimensions of the tent itself), had a couple of beers, and slept like baby until six on Saturday morning.
 

28th August 2010

Scrutineering

After I got back from the very brief test session on Friday afternoon, I saw lots of cars congregating near the scrutineering bay. I wondered why at the time, but was too busy getting wheels and tyres sorted and wondering why the hell I hadn't bought a pop-up tent earlier to find out. It turns out that the scrutes were around and open for business, despite the fact that officially scrutineering didn't start until Saturday morning. In hingsight, it would've been much better to get the car scrutineered on Friday.

I'd entered the Allcomers race at the last moment on the Friday - I need to get six signatures on my licence before I can do the Birkett 6 hour relay race at the end of the season, and to get a signature I need to finish a race. I didn't get a signature at Snett last year because I forgot to take my upgrade card along. I didn't get a signature at Snett this year because I didn't finish the race. I got two sigs at Brands, since I finished both races, but none at the second Brands meeting due to the fact I didn't even manage to start the races. So that means two signatures, and four to get. If I finished both the RGB race and the Allcomers, I'd be a good way to getting the six I need.

However, this meant the timing was a bit tight for Saturday morning. Because I'd never raced at Silverstone before, I had to attend the first time drivers briefing. I can sort of see the logic in having these but personally I've always found them a total waste of time. The clerk of the course (or whoever is conducting the briefing) talks you round the circuit, but since I've invariably both driven it on rFactor and tested on the circuit already that's telling me nothing I didn't know already. We're reminded, yet-a-bloody-gain, about keeping all four wheels on the circuit (OK, point taken, no need for repetition) and told lots of stuff which applies at every circuit (spot the marshal posts on the first lap of practice/qualifying, assemble in the assembly area when called to do so, leave the circuit after the race, be excellent to each other etc. etc.). On this occasion the need to attend this rather pointless hearing was particularly unwelcome, since scrutineering for the Allcomers race was at 7.45 am and practice/qualifying started at 9 am. This meant there was only one first-time drivers briefing I could attend, at 8.15 am. This left little slack time.

So I made sure I was right at the front of the queue for scrutineering. Unfortunately the car failed scrutineering because the brake lights weren't working. It turned out that the poxy Wipac Land Rover lights I've used had worn away so that the detent which was supposed to hold the bulbs in place had worn away and the bulbs were popping out at the first opportunity. After lots of swearing and fiddling I got them to stay in place just long enough to show the scrutineer that they were working, got my scrutineering pass, and dashed off to join in the qualifying for the Allcomers race.
 

Allcomers - qualifying

Qualifying for the Allcomers race was pretty uneventful. I've got it all on video, but nothing particularly remarkable happens, so I haven't bothered uploading it. I was, as usual, towards the back of the pack as we went onto the track and spent the first lap mimbling around getting the oil and water up to temperature. I then spent a couple of laps getting past the tintops I'd be trundling round with, and got a fair few clean laps with no traffic ahead of me, and just the occasional lightning-fast wings'n'slicks sportscars ripping past me. After a few clear laps I got back in with the traffic, passed a few more cars, including some of the other RGB cars out there, and then the session stopped. My best lap was a low 1:08, which put me 11th on a grid of 25 cars and 5th out of the 9 RGB cars in attendance. I was pretty pleased with that - solid mid-table respectability is the height of my ambition just now - and so settled down to wait for RGB qualifying. Essentially the grid was split into three groups - the top third was the wings'n'slicks sportscars and Mallocks, the middle was the RGB crowd and one Phoenix from the Kit Car race, and then the bottom third was the tin-tops, along with a Kougar Jag-based kit car.

In the meantime, while waiting for RGB qualiyfing, I went over to see Tim and get the lap file for the DL1 so it could provide me with my lap times. Not that it ever works properly - the spurious figures which the DASH2 presents can be guaranteed to be anything except your lap time, and at one point it was claiming I'd done a 0:00 lap - but I thought I might as well. At the same time, Tim and I compared our respective datalogs from the Allcomers qualifying session. It was interesting in that I was really only losing time in two places, but other than that it was looking pretty respectable. OK, I was losing time because my up-changes down the straights were too slow, but the main difference was that I was backing off the throttle into Becketts, which was losing me a chunk of time, and then losing another huuuuuge lump of time under braking into Brooklands where I was braking in a different time zone to Tim. By the end of the day I was still losing large chunks of time in those two spots, but rather less than I was initially.
 

Qualifying for the RGB race was similarly uneventful - a few cars to overtake at the beginning of the session, then a quiet patch where I got a few clear laps in, then a bit more traffic. My fastest lap was a 1:07.04, just ove a second faster than for the Allcomers quali, so Tim's words of advice had paid instant dividends.

Looking at the video now there's a few obvious places I could gain time. I'm not letting the car run out on the exit of Brooklands enough - there's about an acre of so of tarmac on the exit that I'm simply ignoring. I'm still backing off way to early into Becketts, simply because while my head knows I should be flat right up to the apex, my right foot doesn't believe it. And I'm braking too early into Brooklands, and not trail braking to help get the nose of the car in towards the apex.

But hey, I didn't crash. And 16th out of 24th was still just about mid-table. I even qualified one place ahead of Marcus Pye, the Autosport journalist, who was having a guest drive in Phil Alcock's Pulsar.
 

Allcomers Race

On the grid for the Allcomers race I had Austen next to me in his class C Fury, Tim ahead of him and Adrian Terry in Steve Robinson's Genesis in front of me. And in front of Adrian was a bloody great big Prosport 3000, which according to Tim was nippy down the straights but surprisingly slothful round the twisties given it had foot-wide slicks fitted. Unusually we had a green flag lap - normal for Allcomers since some of the cars are on slicks, but unusual for RGB where we only get green flag laps if it's raining - and so I made a few modest efforts to get some heat in the tyres. In my efforts to do so, throwing the car left and right, I got very sideways down the National straight, so I decided that that was quite enough of that...

I don't know whether my tyre-warming efforts were spectacularly successful or whether I'm finally getting the hang of starts in the FuryRacer, but I got a blinding start. Straight past Tim, and the followed Adrian through past the Prosport, squeezing between it and the pitlane wall. I stayed ahead of the Prosport but that wasn't going to last - they have 320bhp Ford/Cosworth V6s as standard, and on a power circuit like Silverstone I wasn't going to keep it at bay, so I conceded the place gracefully into Becketts. OK, I could have tried to fight it out, but it's a big car and I kept on reminding myself that Operation Finish the Bloody Race was in progress. Next up behind me was Tim. He came close behind me at the end of the National straight, and again I let him past with no resistance - he was going to get past eventually, and it seemed a bit churlish to hold him up in the circumstances.
 
I don't actually recall seeing anyone behind me after that. All my concentration was on Austen, who was in front of me, and who I managed to close down after a lap or two. I should in all fairness point out that since Austen has a class C car, I had something like a 30% power advantage over him, and so being able to catch up with him on a power circuit like Silverstone National isn't really a reflection of our respective driving prowess. Still, it was good to be dicing with another RGB car. I was, not surprisingly, faster than Austen down the straights, particularly the long National straight, but Austen took a defensive line into Brooklands and I wasn't really that keen on a do-or-die outbraking duel into Brooklands. Remember, Operation Finish the Bloody Race was still in progress. As a result, while I got my nose in front once or twice, I never really got close to making the pass stick. Then I got distracted letting the leader through and lost a fair bit of time at Brooklands (as usual, I'm far too eager to get out of the way of the leaders, to my own disadvantage) and then I thought I had a rather serious mechanical problem.

Through Copse and, to a lesser extent, round Maggots, I started suffering from what felt like clutch slip - the revs would suddenly rise but the car wouldn't go any faster. It wasn't wheelspin - the car didn't yaw like it would have done if the rear wheels were spinning up. For a lap I tried to see if I could manage the problem, and felt very grumpy as I didn't have a spare clutch with me and there aren't that many other drivers using the 2004-6 R1 engine who might have one I could pinch off them. However, while trundling around losing more time to Austen, it dawned on me that if I really was getting clutch slip then why wasn't it happening on the straights where I was accelerating flat out in the higher gears? It also dawned on me what the real problem was - on the right hand corners I was bracing myself in the cockpit of the car by (amongst other things) pressing on the clutch pedal. Once I made a conscious effort to keep my foot off the clutch pedal the problem, not surprisingly, went away. I think I may need to put a footrest on the side of the pedal box for my left foot.

By the time I'd sorted this out Austen had scampered off into the distance. I started closing him down and had got within spitting distance by the end of the race, but never even vaguely close enough to challenge him again. The highlight of the last lap was lapping the Alfa GTV6 which was racing with us for the second time round the outside of Luffield. All good fun. After the Allcomers race I was rather looking forward to the RGB race. I'd got a signature in the bag, I got my best lap down to 1:06.89, I knew I could go faster, and if I remembered not to keep inadvertently proddling the clutch pedal I wouldn't have a repeat of that particular problem. However...
 

RGB Race

Before I'd left for Silverstone the BBC and Met Office weather reports had both said it was going to be dry over the weekend with sunny intervals. However, after the Allcomers race the wind started to pick up, and the sky started to look ominously dark and foreboding. Just before the MR2 race - two races before the RGB race - it started spitting with rain. Then it started raining more heavily. By the time we were in the assembly area and the SaxMax race was underway it was raining good and proper. So, this was going to be my third wet race, which was rather ominous since I'd managed to spin during both the two previous wet races and come away with a non-operational car. RGB cars don't really work in the wet. It's not so much the engine, although the high power-to-weight ratio doesn't help, so much as the tyres. With the light weight of the cars, and the light treading of the AO48R tyres, it's impossible to get any heat into the tyres. In the Allcomers race I'd just got into the 1:06s. In the wet RGB race I didn't get below 1:26. That's partially because I'm rubbish at racing in the wet, but largely because there was simply no grip.

Because it was wet we were given a green flag lap before the race, although I'd managed to get the car well out of shape just getting from the assembly area to the grid. Going round Luffield onto the grid I'd given the throttle a gentle squeeze to see where the grip levels were at, and the back end had immediately stepped straight out. The green flag lap seemed like a terrifying series of arm-twirling oversteer, locked brakes and spray.

Although I'd qualified pretty well, I was last by the time we reached the back straight. I was very tentative off the start, backed off completely for the first corner, and then mimbled round Becketts and Maggotts at a speed which would have had Miss Daisy complaining about being late. As usual, however, I started to work out where there was grip (the braking zone for Brooklands, for example, and Copse) and where there wasn't (Luffield, Woodcote and the strip of standing water down the middle of the National straight) and started to build up a little confidence. I passed quite a few cars before having a big scare at Woodcote. In the dry Woodcote's not really a corner, it's just a kink in the pit straight. You take it flat in an RGB car and can pretty much pick your line at will. In the wet it's terrifying. It's not quite flat (not for me anyway) but the temptation is of course to squeeze the throttle a bit harder to gain more speed down the pit straight. I squeezed just a bit too hard, the back stepped out, and I found myself looking at the pit wall whilst going sideways at just under 80mph. I just about managed to gather it up together and carry on my way, but started losing places once again because my confidence was completely shot.

I then lost more time at Woodcote, although this time not because of anything I did. One of the three new drivers in RGB at Silverstone was a chap called Robert Gardiner in a class C Raw Fulcrum. He'd got past me at the start, I'd overtaken him before my big moment, but he'd subsequently got ahead again. Having got over my slide at Woodcote I was starting to gain on Robert, but at Woodcote the back end of his car started sliding. And kept sliding. There was another car to my left, so my options about which way to go were limited, and in any event it wasn't clear at this stage when Robert's spin would stop and whether (as so often happens) the car would spear off in a different direction once it regained traction and, if so, which direction. In the end Robert did the sensible thing and just slithered to a half in a straight line with the wheels locked, and I nipped past between him and the pit wall. Robert then got past me again, but I got him back on the start of the last lap. I got lapped by the first two cars on the end of the last lap, and finished fourth last.

Not a great result, although it was a race full of incident and drama, which makes it all the more galling that the Neuros stopped recording while we were waiting in the assembly area getting rained on. That's one of the problems with not having a significant other at races - no-one to take your pitlane brolly off you when you go out onto the track, hence no brolly. Ah well, back to Snett next. I'll try to wash the car before then...