![]()
| So, I've now got a moderate sized list of things which I need to do in order to get the car through the SVA retest (or at least have a decent stab at doing so). From the top, they are: |
1
Fit jam nuts to the handbrake clevis bolts
2
Fit longer bolt through handbrake pulley
3
Replace indicator switch (and do the main/dipped switch while I'm at
it)
4
Refit RHS rear stop/tail bulb
5
Remove foam seat and replace with GRP shell
6
Add trimming to dashboard stay
7
Remove sharp edge on tailpipe return
8
Remove brake bias cover plate
9
Undo brake bias remote adjuster cable
10
Add locknuts to bias bar (with spacers if necessary), drill and fit
roll pins
11
Modify handbrake lever clevis point to increase leverage
12
Modify handbrake lever handle to increase leverage
13
Fit a new cover to the handbrake lever as the original will no longer
fit
14
Remove airbox and pipework (in the process, balance the throttle bodies
since the balancing tubes are only accessible with the airbox off the car)
15
Remove the secondary throttle plate servo
16
Devise and fit a mechanism to keep the secondary throttle plates open
17
Remove headlights and indicators from existing bonnet and remove bonnet
18
Repair Tim's bonnet, paint matt black, and fit Aerocatches
19
Fit mesh filter to throttle bodies
20
Make up and fit stays/mounts for the airbox temperature sender and throttle
cable
21
Fit Tim's bonnet
| Given that doing the work necessary to Tim's old bonnet was easily the grimmest of the jobs needing to be done, and would take the longest to do, I thought I'd start off with that. However, this is no ordinary bonnet. It's had a long, varied and interesting history, which in part explains why it's going to be necessary to do so much work to it. Here's a brief potted history of this particular bonnet, illustrated with pictures pinched off Tim's site (with his permission, of course). |
 |
This was Tim's second bonnet, although the first had only a short time on the car before being unceremoniously shoved into a tyre wall at Mallory Park. Unable to get a red bonnet in time for his first race at Brands (I remember it well. Well, vaguely) Tim instead ended up with a not-particularly-matching yellow bonnet. And here it is in all its pre-race glory. |
| Unfortunately, it didn't stay like that for long, as Tim had a coming together with a stationary car left in the middle of the track after a spin. As you can see, the force of the impact was taken by the front right of the car, and given the mess it made of the chassis, it's hardly surprising that the bonnet was pretty badly mangled afterwards. | 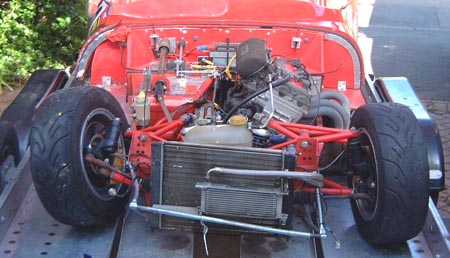 |
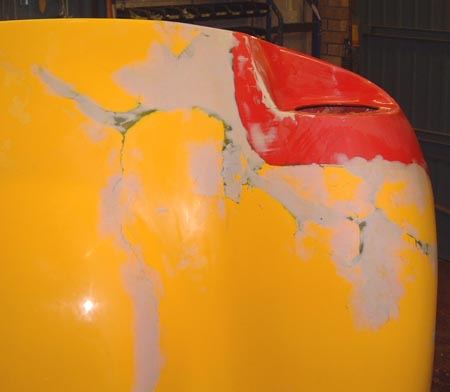 |
In fact, Tim ended up fixing it by patching the remains together with a bit of his earlier red bonnet, hence the patchwork of colours. |
| Then it grew a bonnet bulge, which had a hole chopped in it... | 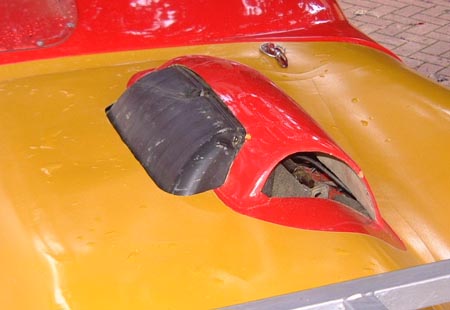 |
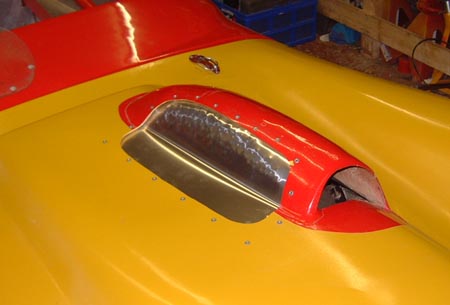 |
...which was then covered with an ali sheet. |
| After a season's racing (and, from the look of things, a couple more impacts) it's spent the last few years at my storage unit, with Tim's old main tub resting on top of it. As a result, it does need rather a lot of work. The most obvious problem is the remenants of the bonnet bulge, as there's no point replacing the existing bonnet with another one with an extra bonnet bulge. |
| Due to having been stored upside down, resting on the bonnet bulge,
with the main tub on top of it, the bonnet's adopted rather a strange shape over the years, with the sides of the
rear of the bonnet splaying out rather oddly. I'm hoping that a bit of persuasion, and the restraining effects
of some bonnet catches, will get everything roughly into place. Once I'd juggled the bonnet down from where it's been stored, the first job (after taking off some of the stickers - the rest can stay and get painted over - life's too short) was to chop off the bonnet bulge remains and fill the hole in with GRP. I did the latter job by covering over the hole with a sheet of cardboard covered in packing tape, and just laid up a layer of gel coat and a couple of layers of CSM on this. This finish isn't great... |
 |
 |
...but as you'll see there's nothing that filler won't solve. To be honest, the photos don't really do justice to the defects on the bonnet - there are massive cracks in the paintwork, the filler's lifting in places, and the bottom of the radiator grille opening is mostly held together with silicone sealant. However, it's nothing that plenty of filler, some matt black paint, and most importantly a DA sander and some 60 grit paper won't sort out. |
| A quick lick of matt black paint, laid on nice and thick to try and cover up some of the worst of the defects underneath, and it's almost ready to be fitted. I just need to fit the bonnet catches, and fit a grille once it's on the car. | 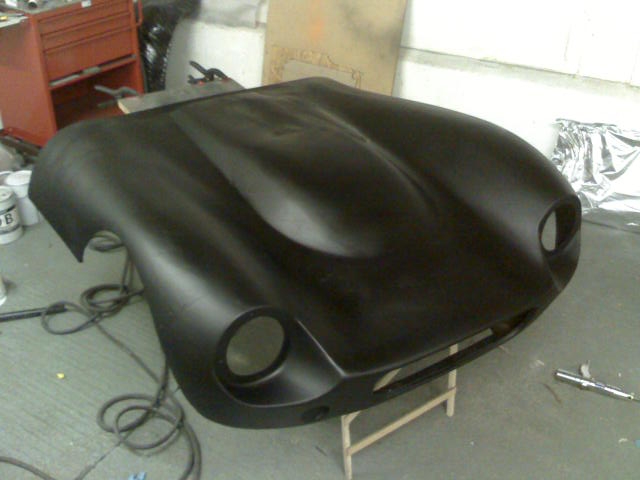 |
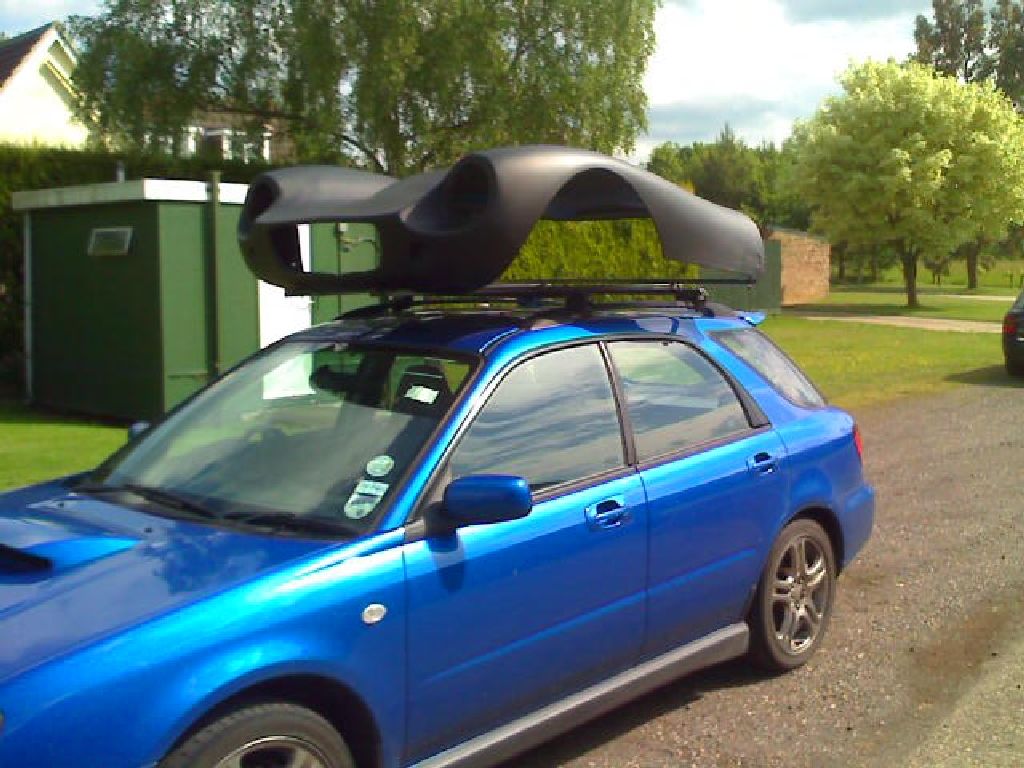 |
Having fitted another pair of flush-fitting Aerocatches to the bonnet
I was able to mount it on a frame (zip-tied together) mounted on the Scooby's roof rack. The cross-piece at the
rear of the bonnet has the bonnet pins for the Aerocatches bolted onto it, holding the back end of the bonnet pretty
securely in place. Good enough for 60mph, at any rate, and a lot less faff than shuttling the trailer and car too
and from the Sheds to my house. Mind you, while getting the bonnet on the car with Jonathan's help was pretty simple, getting it off the car with just little old me was a wee bit trickier. Still, just about managed it with only slight muscle sprains... |
| With the bonnet safely at home, I could turn to the work required to
fit it. The first thing was obviously to remove the airbox from the car so that the bonnet had half a chance of
fitting over its contents. While I had the airbox off the engine I checked the synchronisation between the TBs,
but it was fine so I left well alone. I also had to remove the servo which controls the secondary throttle butterflies,
the top of which is poking through the bonnet here. The servo's linkage is held together with a number of ludicrously small
split pins, all of which I hope I've managed to retain. I've looked into whether or not its worth removing the
secondary throttle system in its entirety (subject to clarification as to whether it's race-legal to do so - the
rules are more directed to carbs than EFI) but the conscensus on the source of all truth (the 'net) is that it
isn't. In order to prevent small animals and children falling into the engine, I made up a truly nasty and ineffective mesh filter and bolted it into place. I do hope I won't have to run the engine for long like this... With the servo and linkage removed, the secondary throttle butterflies go over-centre due to the spring in the mechanism. This gives enough of an opening to allow the engine to run and rev. I don't imagine it'll allow anything more than about 10% throttle under load - the secondary butterlies can't be opened fully as they'd hit the mesh filter. Happily, even with the air intake temperature sender removed, the secondary throttle servo removed, and the airbox and trumpets removed, the engine still starts and runs pretty happily. |
 |
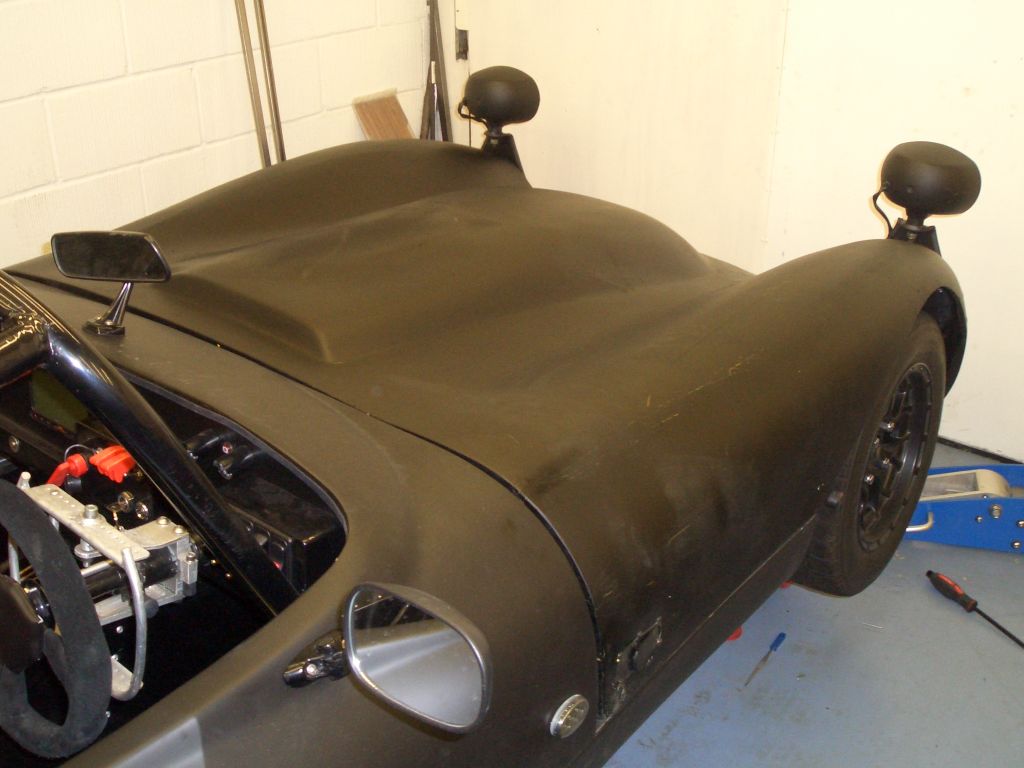 |
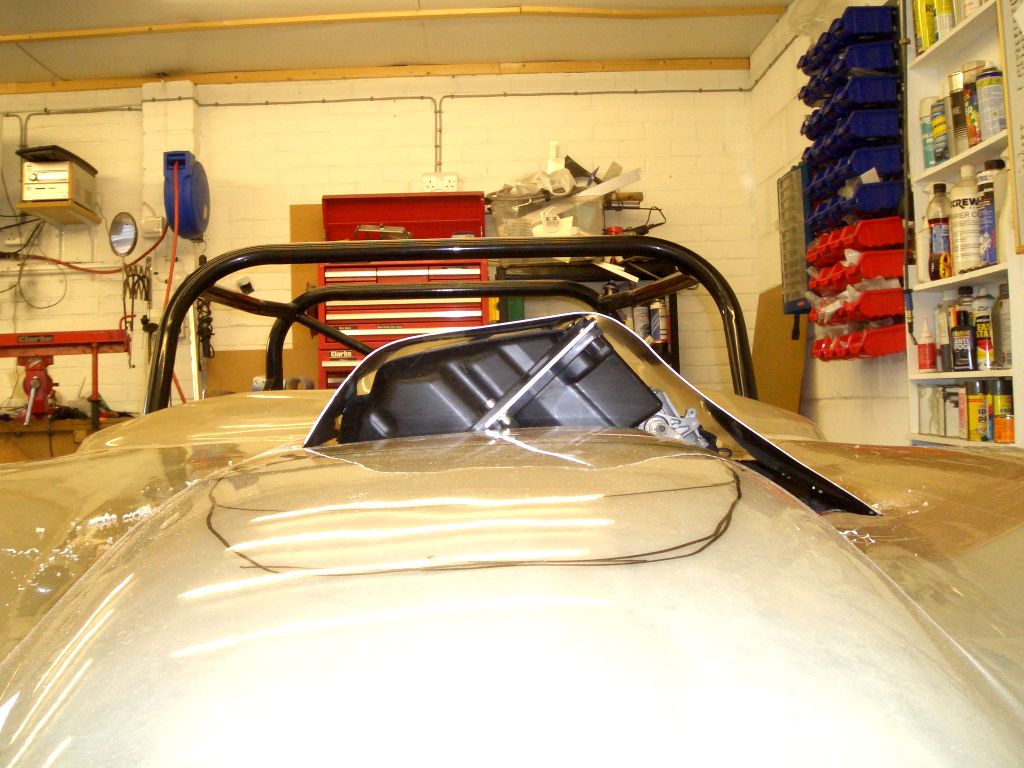
Then it was just a case of bolting the bonnet into place. What this photograph doesn't really show is the 10mm gap between the sidepods and the lower edge of the bonnet, but you can see the exposed edge on the left hand side of the bonnet - that's because the boss for the secondary throttle servo is hitting the underside of the bonnet and preventing it from closing properly. Still, it is just about possible to shut the bonnet with lots of BFI and persuasion. I've also refitted the headlamp and indicator plates and wired the headlamps up again. |
| There were of course two problems with the brakes - the insufficiently
effective handbrake and the plate covering the brake pedal. The latter required the removal of the plate, and the
addition of lock-nuts held in place with roll-pins on the bias bar. The problem here was that with a .625 MC on
the rear brakes and a .75 on the fronts, the bias had to be wound all the way to the front, and left no space for
the addition of a lock-nut on the left hand side of the bias bar. So the first job was to swap the .75 MC on the
fronts with a .625, which was pretty easy to do albeit messy due to the usual floods of brake fluid such jobs entail. Hopefully the new set-up will give a decent SVA-passing brake bias with the bias bar in its central location (there's no real way of testing this, so I just have to hope). I've added lock-nuts held in place with 3mm roll-pins which should be secure enough for Mr. SVA tester. |
 |
 |
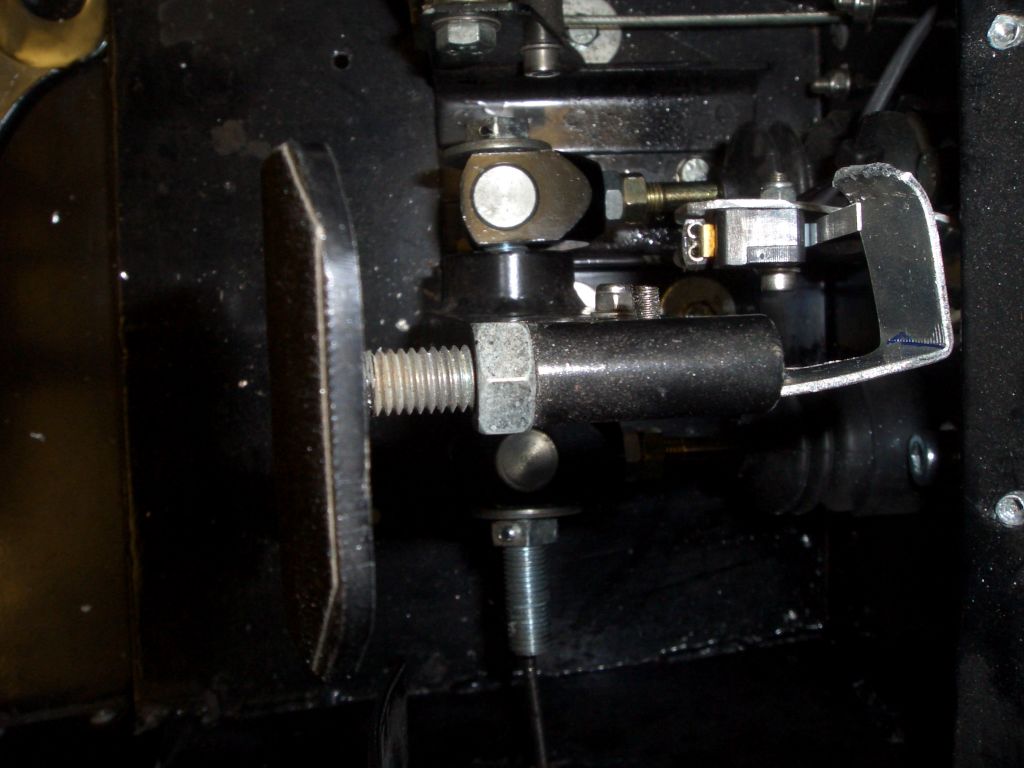
As for the handbrake, the essential problem is that the actuating arms on the Powerlite HB calipers are very short and so give almost no mechanical advantage. A conventional handbrake caliper generally has a rack and worm gear system which provides a considerable amount of mechanical advantage. There's nothing to do to increase the leverage at the caliper end, so I had to try to alter things at the lever end. In order to increase the mechanical advantage at the lever end I've done two things - moved the lower clevis closer to the pivot on the handbrake lever, and extended the handbrake lever by about 80mm. Together, these should increase the mechanical advantage afforded by the lever by about 30%. It's obviously having some effect, as the first time I tried yanking on it, one of my home-made cable stops came off. No matter which I did, I couldn't make these stay in place, either by welding them or soldering them into place, so I had to come up with another plan for keeping the cable stops in place. |
| This is the solution I've come up with. There are two home-made ferrules made from mild steel, with a 3mm hole up the middle and an OD of about 8mm. I tried squashing them into place by just lamping them with a hammer on a flat surface, but they ended up splitting. Instead, in order to get a three-sided crimping action provided by the ferrule, I've made up a tool... | 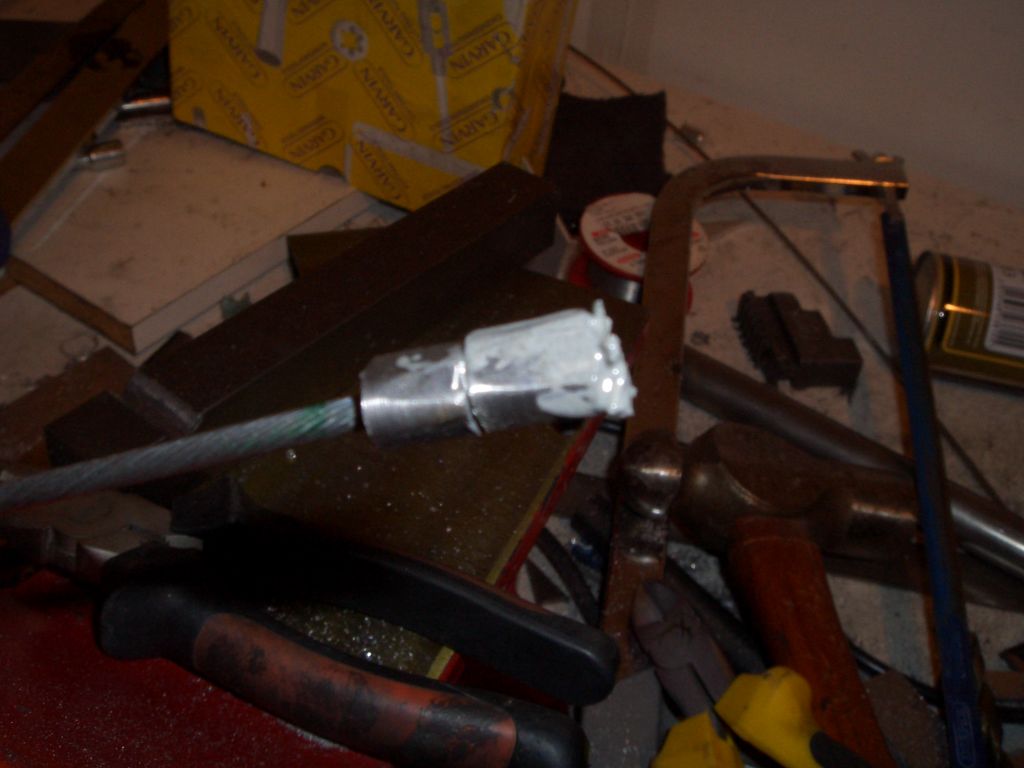 |
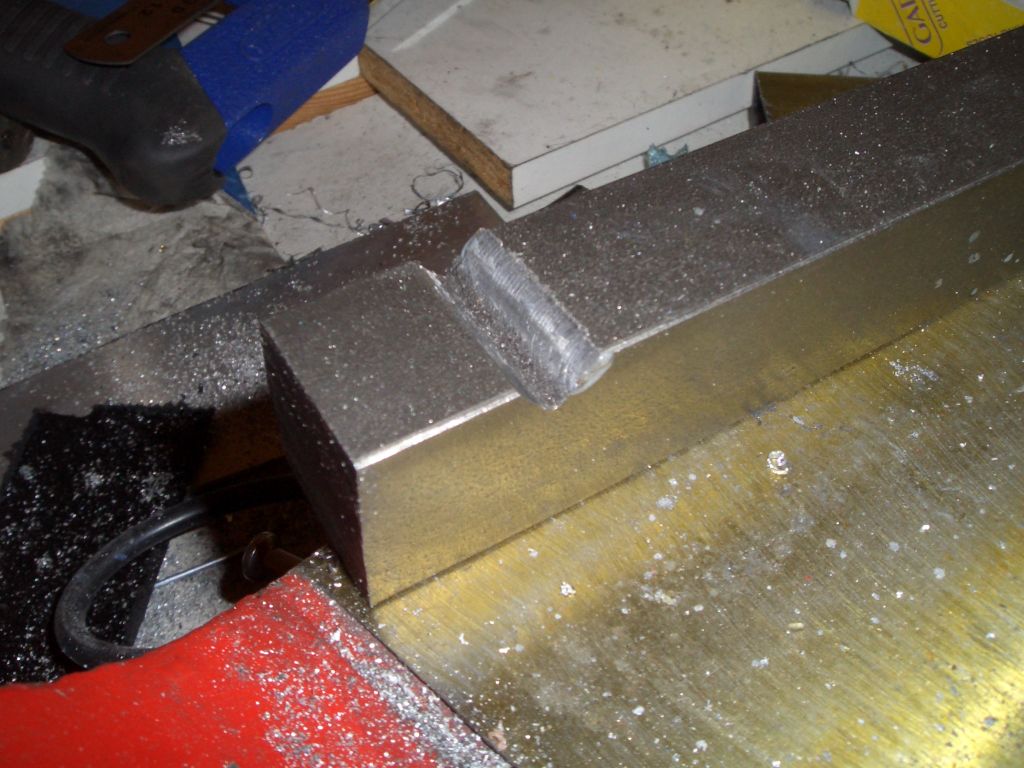 |
...which is just a bit of 1" square steel, with a triangular groove
machined in it. In order to fit the ferrules, I just place the ferrule (with the cable inside it) in the groove,
and then lamp it with a hammer. Because the impact gets spread over 3 faces of the ferrule, it squashes it into
a triangular shape and it doesn't split. I certainly seems to clamp the ferrule on the cable pleasingly well, but
to make sure I've added some JB Weld on the insides of the ferrules, and splayed the end of the cable over and
added lashings of JB Weld. With the new cable ends, the whole system has held together with the handbrake on as hard as I can get it for 5 days now, so fingers crossed it's now sorted. Unless the lever still doesn't provide enough mechanical advantage, in which case I'll have to fabricate a new linkage to increase the leverage applied by the current pulley-based linkage, which inherently gives a 2:1 ratio, and instead go to a lever-based system which can give any ratio I want. |
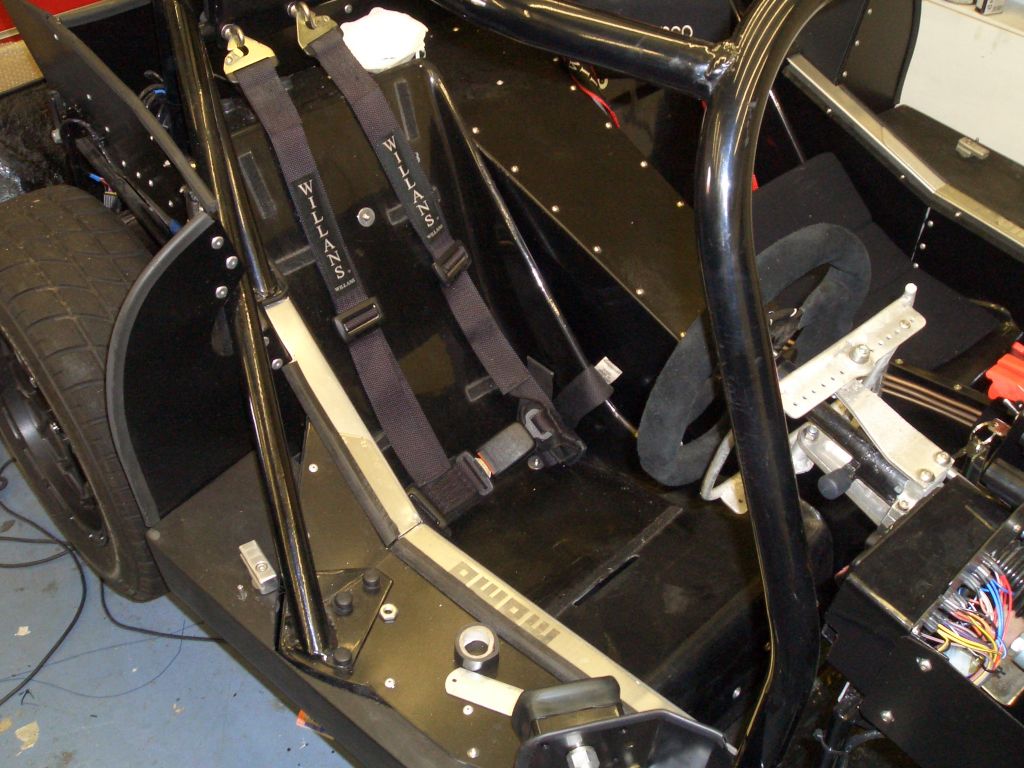
| I've taken out my home-made seat and replaced it with a GRP shell from
my old racer. There was nothing wrong with the old seat for SVA purposes, except that it made measuring the seat-belt
mount heights and field-of-view height quite tricky due to its reclined position and lack of any defined edge between
the seat base and the seat back. I've also replaced the indicator switch with a rather more substantial metal toggle switch, added a layer of heat shrink to the reverse mechanism cable, and rewired the rear lamps which, it turned out, were wired up the wrong way round with only one working correct because the bulb was in the wrong way round... In fact, I'd say the car's pretty much ready for its retest... |
 |
| Which is just as well, as I've now booked the restest for Thursday 25th June. There's still a few minor things to do, but it's mostly there... |
| Well, that went well... I booked the re-test for 2.30pm, and the original
fail sheet said that the retest would take 90 minutes. I turned up at 2:10, nice and early, unloaded the car from
the trailer and went to tell the testers that I was ready. The tester for the re-test was Les, and we started the
re-test at about 2:15. By 2:30 it was all over and I had a nice shiney MAC. Woo Hoo! We started off by looking at the fail sheet, and I showed Les the different bonnet I'd fitted to get rid of the bonnet bulge. He didn't say anything, but seemed content enough with it. I showed him that the indicator switch had been replaced, and showed him that they and the tail/stop lights worked properly. He seemed a bit dubious about the fog light (which had passed first time round) but I pointed out that it was correctly E-marked and that since it was an LED light, and therefore highly directional, it only looked bright from the correct angle. He seemed to accept this eventually. Then it was up on the ramps. I showed him the various clevises, nuts and bolts which I'd changed and again he seemed happy with what I'd done. Next, and last on the list, the brakes. Les looked down at the documentation from the first test, which had the brake test results on it, and saw that the car had passed everything (the written sheet doesn't record the handbrake test, which it had just failed). I showed Les that I'd removed the cover over the bias linkage, which had been a failure point, and had pinned the bias bar, which had been another failure point. He had a poke around at them, and then wandered off. And came back with a MAC for me. With this hard-won piece of paper, I can gather together all my build receipts, my build photographs, get some insurance for the car and head off to the DVLA for what must be the world's most pointless car inspection ever, but which will hopefully end up with the FuryRacer having its own registration number at last... |