| No pictures for this entry - SVA tests are stressful enough without
having to remember to take pictures. Mind you, the day was made considerably less stressful than it otherwise would be by Tim once again nobly volunteering to hold my hand during the trip to the VOSA testing station in Norwich. I find SVA tests pretty grim (perhaps unsurprisingly given my experience of Newcastle SVA testing station) and having someone as sensible and level-headed as Tim to provide the voice of reason makes things go much more smoothly. We arrived in good time for the start of the test, unloaded the car from the trailer and went to wait in the reception area. While we were waiting a navy blue Quantum H4 arrived on the back of a low-loaded, resplendent with a good carpeting of GRP dust all over the back half of the car. Having listened at length to detailed explanations of how the owner's bricklayer hadn't done a very good job on his extension, our tester came along and put us out of our misery by introducing himself and starting the test. As we left the testing shed to walk over to where we'd left the Fury, the Quantum owner was busy trying to find the engine number on his car, and apparently failing to do so. Our tester, Jim, expressed the view that it was 'a waste of a perfectly good Fiesta'. I can see where he's coming from, but each to their own and all that. Once the thick layer of GRP's cleaned off it, it'll probably look nearly as nice as a Mk 1 Fiesta anyway... The test started off, as usual, with a check on the chassis number. I'd put two on the chassis - one on a steel plate welded to the chassis, and one on an aluminium plate rivetted to it. Jim didn't seem to care about the car having the number stamped into it on two locations, just as long as it was there somewhere. That done, he instructed me to fire up the engine and let it warm up as the first stage would be the emissions test. Once the engine was up to temperature, we did the basic idle test and then the fast idle test. I had to adjust the idle slightly - it was idling rather high - but other than that it was just a case of sitting there and pressing the loud pedal very very gently when required to do so in order to get the revs up to 2.5k - 3k for the fast idle test. A few minutes later, and it was time to hop out of the car - and I could see the computer screen was reading 'PASS - PASS - PASS' for all three tests. According to Tim, the figures being shown during the tests were well under the limits - for instance, during the idle test the CO limit is 0.2% - and it was showing 0.06%. Looks like my 25 quid cat from Sweden via eBay did the trick after all. After the emissions test, Jim asked me to go through the usual routine with the lights (although I don't remember him asking me to switch on the rear foglight) which was except that he mentioned that although they were acceptable under the strict words of the test he didn't like my (admittedly rather nasty) indicator switch, on the basis that it was unmarked and vertically aligned. Apart from that, and the fact that the bulb in one of the stop/tail lights was in the wrong way round, so that the brake light came on when the sides/headlights were turned on, the lights were fine. Then it was time to roll the car forwards onto the 4-post lift. After a brief discussion on the relative merits of 4 and 2 post lifts, Jim donned his hard hat and went underneath the car. As usual it was a question of wiggling various controls (handbrake, foot brake, steering) while Jim poked things and shone lights at them. He asked what the thing underneath the propshaft was, and I explained that it was the reverse mechanism although it wasn't connected up yet. Once he'd finished proddling around, Jim said there were a few minor issues he'd like to point out. They were: 1. He wanted jam nuts of some sort of locking device on the bolts going into the handbrake clevises. I can't see it's really necessary, as the cable is soldered onto the ends so unless the cable turns round (which it can't) neither can the bolts. However, it's such a minor point I didn't try and argue the toss. 2. The insulation going to the wire on the electric reverse unit was frayed, with bits of copper poking through. Ooops. Good spot. All minor stuff, easily remedied. He did ask while he was proddling around whether I'd 'modified' the handbrake system. Given that the whole system's made up of aftermarket parts, homemade stuff, and a heavily modified Sierra handbrake lever, I felt obliged to confirm that it was... With the lift down at ground level again, it was time for the headlamp test. Bizarrely, despite the fact I'd made no attempt to get them pointing in even vaguely the right direction, the left hand headlight was apparently perfectly aligned. Unlike the right hand one, which was pointing too high and too far to the right. I was ready to leap out of the car and get my 19mm spanner to adjust them, but instead Jim suggested that Tim just bent the bracket into the correct place. He did give the headlamp units the occasional 'twang' and watched them bounce backwards and forwards, which caused me a few heart-stopping moments as I waited for the 'that's not rigid enough' call, but it never came. Then it was onto external and internal projections, always the thing that makes me most nervous. Before we got stuck into those areas properly, Jim did his best to give me a heart attack by saying he wasn't happy with the DASH2. He explained that while I'd been flicking through the various screens during the emissions test, keeping an eye on temperatures and lambda values at the same time, he'd noticed that the speed reading had disappeared. This is a common fail point on some digital dashboards, where under certain conditions the speed reading is replaced by something else - since the speed has to be permanently readable, that's a fail. However, I showed him that although the speed readout did disappear momentarily when changing from one screen to the next, it reappeared almost instantaneously and was visible on all 5 screens. This seemed to satisfy him. He also asked for confirmation of the DASH2's maximum speed reading. This was an issue raised on the Race Technology Forum a while back, and it was promised that the maximum speed would appear in the latest version of the datasheet. Naturally, it doesn't. Happily this didn't appear on the fail sheet at the end of the day. Jim had two comments on the internal projections - he wanted trim on the bottom of one of the dash supports and also thought that although the gear paddles, despite being behind the steering wheel, weren't exempt from the internal radius tests because it was part of the gear changing equipment. Jim had a quick chat with Les, the other tester, who denied any knowledge of any such rule, so that was fine. Although he did break the indicator switch while fiddling with it, so that was another fail. While we were doing this the owner of the Quantum made a valiant attempt to reverse at high speed through the SVA testing shed straight into the stationary Fury, but fortunately disaster was averted with some high-volume profanities from the 2 testers present... The external projections demonstrated in a nut-shell why the SVA test, which in principle seems a jolly sensible idea, ends up being rather a waste of time. The SVA rules require the end of any exhaust pipe which is above the floor line of the car to have a rounded end. Having seen the mess which an open-ended handlebar can make of someone crashing a mountain bike, I can appreciate the damage an open-ended pipe can do, and so I can see why this rule is present. The rules require, at 13.3(g) that the test checks that 'exhaust pipes where the tailpipe projects beyond the floor line lying directly above it by more than 10mm terminate ina radius of curvature of not less than 2.5mm'. There's then a rather complicated definition of the floor-line which involves a 30 degree conical section, and a rule which says that although for the purposes of establishing the floorline the tailpipe will be ignored where 'a tailpipe protrudes from under the body', but which goes onto state that 'The positioning of a side-mounted exhaust may provide the point of contact which determines the floor line'. Now, the exhaust I'd made up carefully retained the folded-back return to the end of the tail-pipe. But Jim decided that because the tailpipe was at the side of the car, it could form the floorline to the car, and this meant that the reverse side of the folded-back tail-pipe was too sharp. This is rather strange, as hundreds of Furies have passed SVA with exactly this sort of tail-pipe, so I suspect this interpretation is 'novel'. However, Jim pointed out that if I just chopped the nicely curved tailpipe end off, then as long as it was at an angle of at least 30 degrees then the end of the tailpipe would define the floorline of the car, in which case it could be as sharp as I liked and still pass. The net result of the rules, according to Jim, is that as it stands, with a nicely curved end to the exhaust pipe, it fails. If I chop the rounded return off, and leave a nice sharp edge, angled to optimise its abilities to carve open the legs of wayward pedestrians, then it'll pass. And while an entirely reasonable chap, who was trying to apply the rules in a constructive and sensible way, Jim obviously felt that he was obliged to stick to his interpretation of the rules. Which is, quite frankly, barking, since the car will be considerably more pedestrian-friendly in its current state than if I chop the end of the exhaust pipe off. Which is precisely what, of course, I'm going to have to do to get it to pass. Barking. Further, despite Jim's assurances that it'll pass if I chop the tailpipe off, I don't think it will, as if I chop the end off at an angle of less than 30 degrees then the top of the exhaust pipe will be above the floorline, and it'll fail if it's too sharp, and if I chop the end off at an angle of more than 30 degrees then the bottom of the tailpipe will be beneath the floorline and will need to have a rounded return on it. So, of course, if I get a different tester looking at it on the re-test, he may well come up with a different but equally barking interpretation of the rules, and fail the car despite the fact I've done exactly what tester number 1 said to do. Ah well, rules is rules, squire... Brakes were next, after I'd reassured Jim that the pressure senders in the brake lines weren't a way of adjusting the brake bias. He pointed to the inspection panel above the footwell and said that he'd need me to remove that to gain access to the bias bar. I pointed out that while I would happily do that, the bias bar wouldn't be accessible since the panel I'd rivetted into place would be in the way and, being rivetted, it definitely wasn't an inspection panel. He accepted that the bias bar wasn't adjustable, but then failed the brakes on the basis that it was 'fully accessible for maintenance purposes' (rule 16.2(2)(b)(i)). A fair enough interpretation, really, although annoying given that I know of at least 3 cars that've passed with precisely this set-up in place... I asked him to do the brake test anyway, so that at least I'd know whether the balance was acceptable, before removing the blanking panel and drilling and pinning the bias bar, this being the SVA-approved manner of making a bias-bar 'non-adjustable'. Under the IVA test apparently it's necessary to weld the bias bar along its entire exposed thread to render it non-adjustable. Yep, one of the most highly stressed components in the car, carefully heat-treated to make sure it'll handle the loads imposed on it, and the IVA rules require you to weld it, thereby totally buggering up that totally applied heat treatment. Well, guv, rules is rules... The service brakes were fine, apparently, although the handbrake wasn't. It seemed the handbrake was close, but no bananas, and there was much sucking of teeth when I confirmed that the car had Wilwood Powerlite HB calipers at the back. It appears that they're not exactly renowned for their awesome clamping power when it comes to the handbrake mechanism. Still, it didn't fail by much, so I think I'll be able to make it work. After that it was off outside for the speedo test (another heart-stopping moment when Jim said he wouldn't be able to test the speedo since it runs off one of the front (unpowered) wheels, and they don't have powered rollers), self-centering test, mirrors and noise. The good news was that the mirrors passed easily - Jim said it was one of the best kit-car set-ups he'd seen - the self-centering was apparently fine, and it passed the noise test easily (thanks to Tim for emitting only a stifling gasp when Jim asked me to confirm that the maximum power was produced at 8500rpm). The speedo elicited no further comments, but then came the bombshell - Jim wasn't happy with the bonnet bulge'o'doom, since he couldn't see over it. If only I'd had a taller tester... We headed back into the testing shed, and Jim and Les got out the rather Heath Robinson contraption they use for checking windscreen heights, harness heights and the car's 'field of view'. It was clear that the bonnet bulge was indeed too high to pass the test - by a good 3 inches - although Jim did claim that the headlights were OK. We looked at putting a more upright seat in there, and while that would help it wouldn't be enough. I can't lift the seating position, as we confirmed that this would make the harness brackets too low. After such a (relatively) good test, this was bad news. Jim said he'd go off and put the brake test numbers through the computer to check they were OK, but I said not to bother as it was very unlikely that the car would be coming back if the bonnet bulge was an issue as it wasn't really fixable in any sensible way - much as I'd like the car to be SVA'd and road-legal, there's no way in hell I'm chopping that bonnet bulge out after having spent so long putting it in place. Poor Jim looked utterly distraught at this, and spent the rest of the time we were there either telling Les how good the car had been to drive or trying to persuade me that there were ways round the bonnet bulge issue. |
| Needless to say, I will be back there for a retest at some point. Some
of the stuff is easy to fix - replace the indicator switch with something a bit more solid, add some trim, make
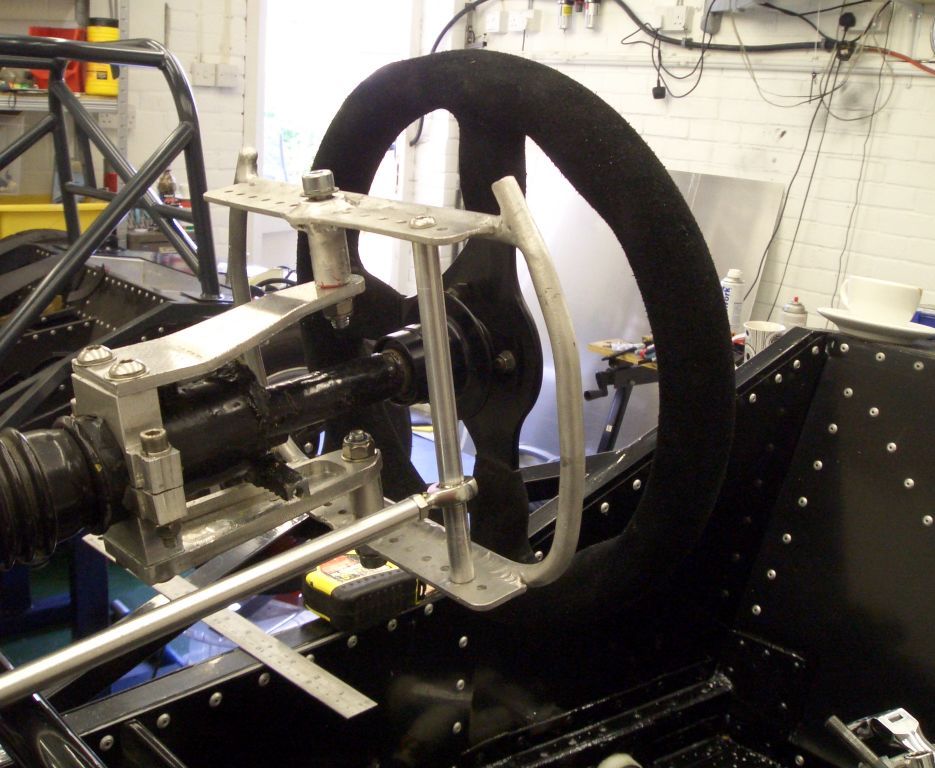
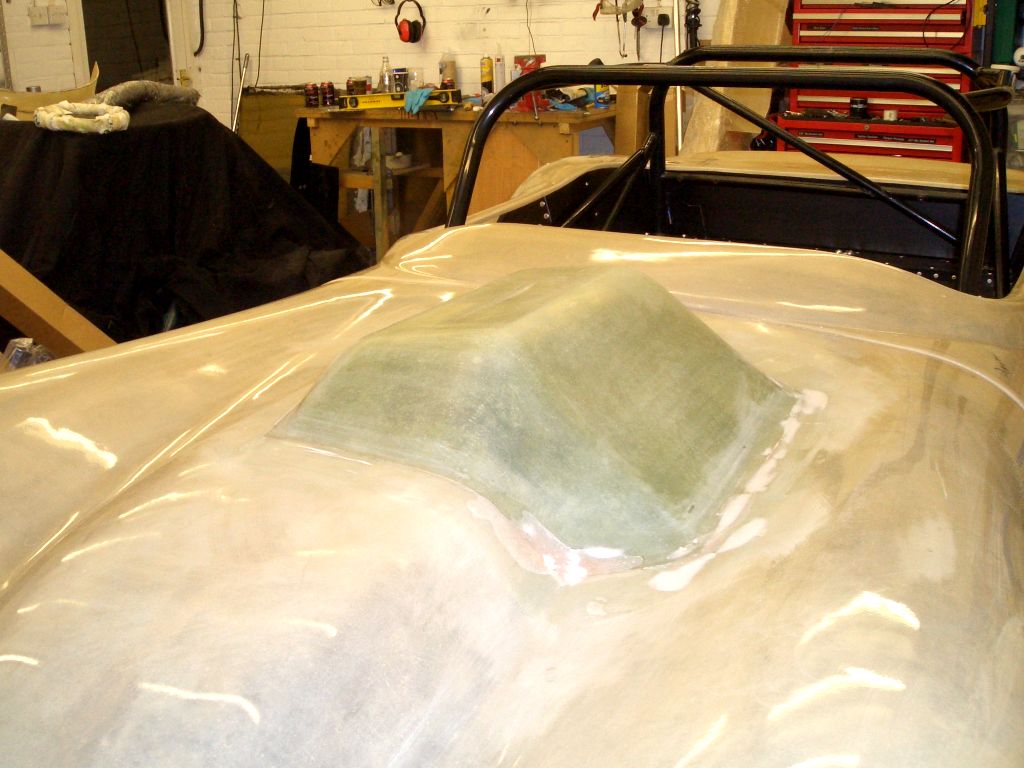
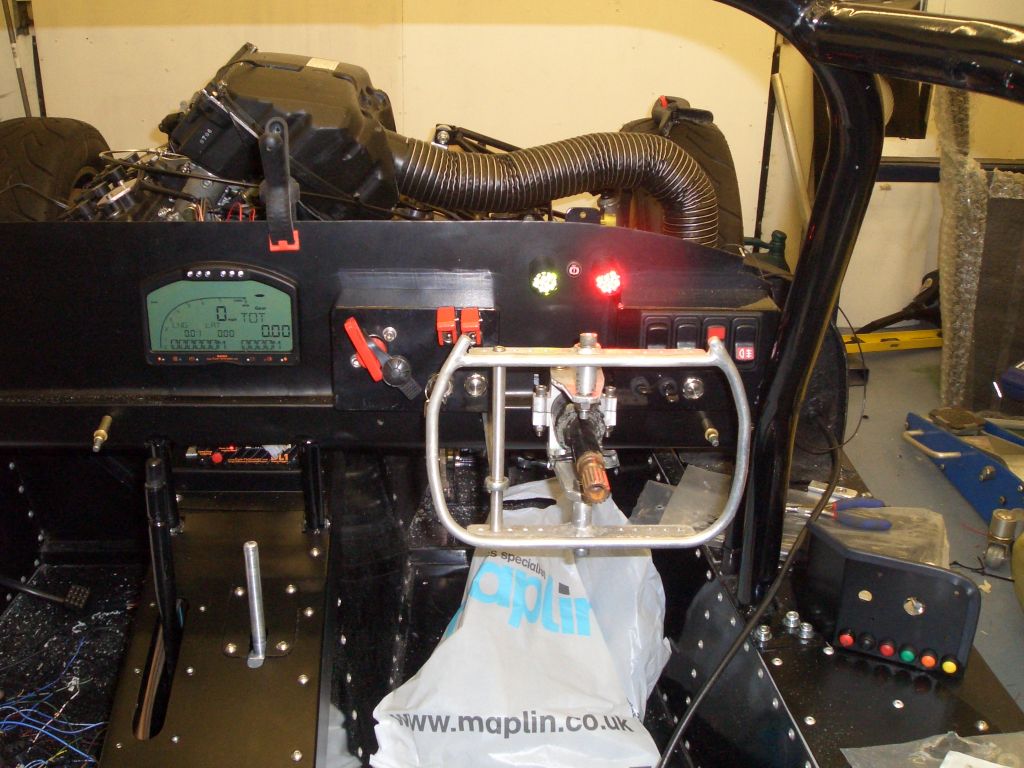
the exhaust into a pedestrian shin trap etc. There are only 2 real issues - the handbrake and the bonnet bulge. The handbrake I think I can get to work sufficiently. Of course, I could try fitting Sierra clappers, but that would require custom bracketry and would be an immense faff. I'm hoping that by increasing the mechanical advantage at the lever end I can get enough force at the caliper arms, hopefully without the cable ends being pulled off on any of the cables. I'm planning to do this in two ways - by moving the clevis up slightly, to get it closer to the pivot point on the handbrake lever, and by extending the length of the handbrake lever. There's only limited scope for doing both of these - I can't move the clevis up too far as the cable will start hitting the bottom mount for the handbrake lever. Similarly, I can't extend the handbrake lever too high up as otherwise it'll start obscuring the warning lights on the DASH2. Still, I'm hoping that I can increase the mechanical advantage by about 50%, which should provide enough grunt to make the handbrake pass provided that the rest of it holds together. The bonnet is more tricky, but I think I've found a way round it. Tim has a very old, and very battered bonnet, which I think I can make presentable enough for an SVA test. It's got a bonnet bulge on it too, but I can hack that off and glass over the hole without taking a hacksaw to my lovingly-created bulge'o'doom. That, of course, leaves the small issue that the bonnet bulge wasn't there for aesthetic purposes, but because it was full of airbox and induction gear. However, I can remove the airbox (temporarily) and run with just a home-made mesh filter over the ends of the throttle bodies. However, by itself that won't be enough - there's also bits of throttle body poking out through the hole. However, the bit you can see is just the servo for the secondary throttle bodies, and according to Mr. Yamaha's Big Book of R1 Information the engine will still start and run with that removed. So I'm hoping that if I just remove the servo, and hold the secondary butterflies permanently open, that it will still work and will fit underneath a fairly standard Fury bonnet. Of course, even if this does work it still means I have to resign myself to hours and hours of CSM, resin, filler and sanding. Ah well, it'll be worth it in the long run. So, where's my big bucket of Tesco Value body filler gone? |