
Once I'd decided to get a new chassis, and having just done a rather large and remunerative bit of work, I decided to change to an IRS chassis. The spec for the chassis is -
I rang Mark Fisher about powdercoating and was surprised to find out that I could basically have the chassis and cage powder-coated in any RAL colour I liked. At the Donnington Kit Car Show in 2003 I'd seen a couple of Furies built by The Kit Car Workshop which had a rather nice pewter-coloured powdercoating on them. I went for something similar (RAL7016 - Anthracite Grey). When I got the chassis I realised it wasn't quite what I'd been expecting, but I like the colour anyway (it's nicely understated) so no problems there.
I asked Mark to do a few mods on the chassis for me before I got it. They are
I've also made a few modifications of my own, courtesy of the Little Blue Welding Crayon:
Extra chassis members from scuttle to front suspension.
The Fury V8 chassis have these bars in to regain some of the stiffness lost by not having diagonals in the engine bay (they clash with the heads of the V8). Couldn't think of any particularly good reason not to do the same. The tubing is 16mm 1mm wall thickness CDS tubing. From B&Q (hangs head in shame...)
The picture's a bit pony, as is the highlighting, but hopefully it's clear enough what's been added...
Extra bracing for raised front suspension
 When I first got the chassis I was surprised that the rear suspension
plate wasn't braced in any way other than across the chassis. It was pretty easy to move it backwards and forwards
by hand. This is part of the problem with having the lowered chassis - the suspension pick-up points are no longer
at chassis level. Ideally the top rail of the chassis would be raised to the correct level - this would not only
make the suspension pick-up points better located, but would stifften the entire structure. However, it would mean
that the chassis wouldn't be able to be used with a non-Spyder shell and I imagine the costs of changing the chassis
jigs to this extent are too much.
When I first got the chassis I was surprised that the rear suspension
plate wasn't braced in any way other than across the chassis. It was pretty easy to move it backwards and forwards
by hand. This is part of the problem with having the lowered chassis - the suspension pick-up points are no longer
at chassis level. Ideally the top rail of the chassis would be raised to the correct level - this would not only
make the suspension pick-up points better located, but would stifften the entire structure. However, it would mean
that the chassis wouldn't be able to be used with a non-Spyder shell and I imagine the costs of changing the chassis
jigs to this extent are too much.
Tim Hoverd's
chassis has gussets going down to the top rail. I asked Mark Fisher about these and he said they were optional
(God knows how they decide which chassis gets them and which don't - never asked me if I'd like them or not) since
the front mount is gusseted and the rear one is held in place by the rocker arm.
I wasn't too convinced by this and for the sake of a bit of tube it seemed worth adding a little strengthening/stiffening.
The tubing's 3/4" 18 gauge CDS, and this time it's not from B&Q. Yay!!! It is, however, another rather
pony picture - I'm not sure what the camera was focussing on, but it's nothing in the shot, clearly...
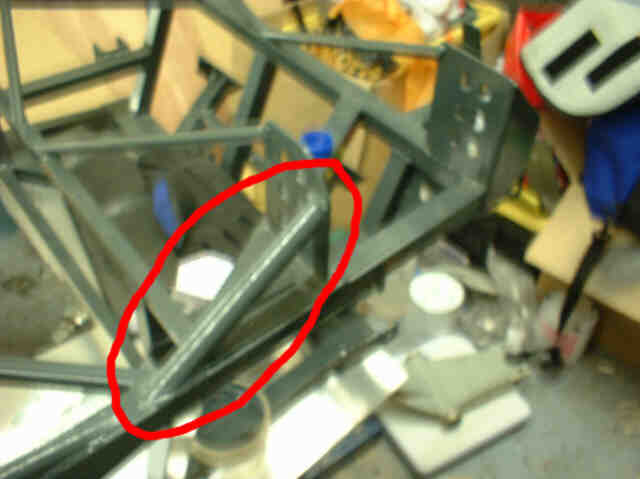
Cut out for oil filter
On the Furybird I I had to raise the engine mounts on the exhaust side by about 6mm to get the oil filter to clear
the chassis rail. It was still very very close (and I suspect touched occasionally) and meant the oil filter was
a total sod to get off. Given that the sump hangs about an inch below the lower chassis rails I've got about an
inch of room to play with so I cut out a section for the oil filter to sit in and welded an extra tube at the bottom.
The tubing's 1" square 18 gauge ERW and is actually scavenged off the old chassis. Tight batsrad that I am...
Chassis protection blocks with titanium skid plates

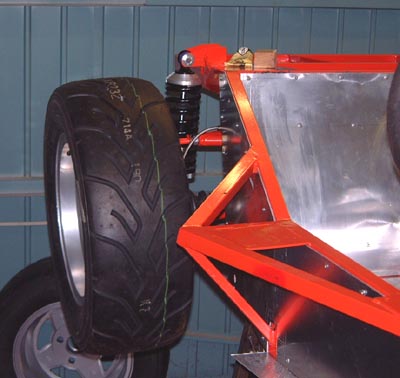
The Furybird II is going to be a road and track car (but probably not racing) so I was a bit concerned about having
the lowered suspension. Then again, I used to run a 3" ground clearance on Furybird I, which is what the lowered
suspension is designed for, so there *shouldn't* be any problems. However, I got a load of titanium plate off eBay
for a fairly reasonable sum and some of plate was an unfeasibly useless 8mm thick. This isn't really going to be
much good for making brackets - it's several times stronger than any part of the chassis. So I decided to make
skid-plates out of it.
The titanium skid plates have angled ends and are held in between 2 steel wedges welded onto a bit of 1" square
tube. The 1" square tube is then welded onto the chassis (with a cut-out to take account of the depth of the
8mm Ti plate, so that the overall depth below the lower chassis rail is 1 inch).
Repositioned seat belt mounts
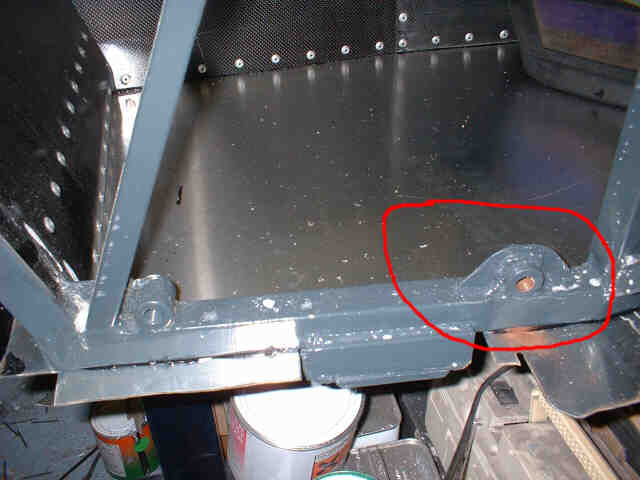
Because of my 'dentist's chair' driving position and the creation of The
Buttmould (tm), the lap belt mounts on the chassis were too far back.
So, I got some more 7/16" UNF bosses off Mark Fisher and welded them in further forwards. I kept the old ones
in place - they didn't look particularly keen to move, they don't weigh that much, I could always use them for
something else and, to be perfectly honest, I couldn't be bothered.
Braced driver's bulkhead
On the Fury, the MCs for the brakes (and the clutch in this case) mount directly onto the bulkhead in the footwell.
On Furybird I there was noticeable flexing of the bulkhead if you stamped on the brakes hard. Clearly, there's
no point in having super-duper whizzy brakes if the MCs are waving around. Although it's not relevant to me, some
Furies have failed SVA on this point apparently. Another short piece of steel scavenged from the remains of the
Furybird I chassis soon sorted that out (and, though I say it myself, in a rather more elegant manner than some
other solutions I've seen...)
Scuttle bracing
One of the few things that really annoyed me about Furybird I was the scuttle shake. The scuttle tube was a single
3/4" tubular hoop with no lateral supports and it was perfectly easy to make the whole thing bend from side
to side just by moving the steering wheel from side to side. The scuttle tube on the Furybird II chassis has supports
down to the transmission tunnel which should help stiffen it up, but nothing to stop it moving fore and aft. So,
a bit more B&Q tubing there...
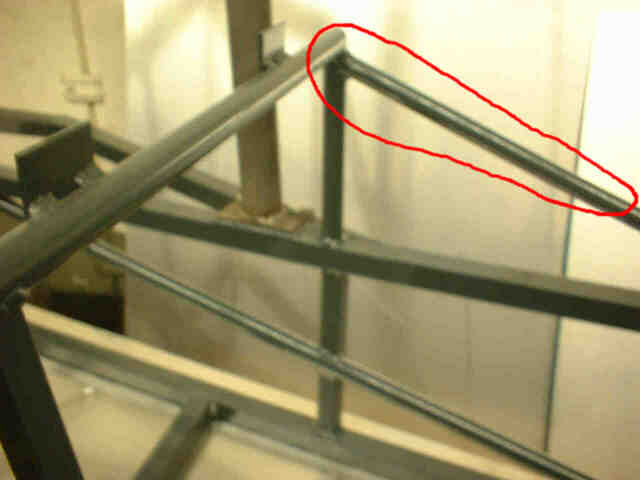
Roll cage (front hoop) supports
Another chassis member which appears to Tim's car but not mine. Again, Mark assured me that they're optional and that cars had rolled
with cages but without these bars and hadn't collapsed. Again, for the sake of a short length of tubing, it seemed
daft not to add them. And again, they were of course a complete batsrad to make and fit... I used 1" ERW 18
gauge, again scavenged from bits of the old chassis.
Then again, I think mine are rather nicer than the factory ones as on Tim's car - mine don't protrude beyond the
plane of the sheeting on this part of the chassis, so the panel doesn't have to be slotted.
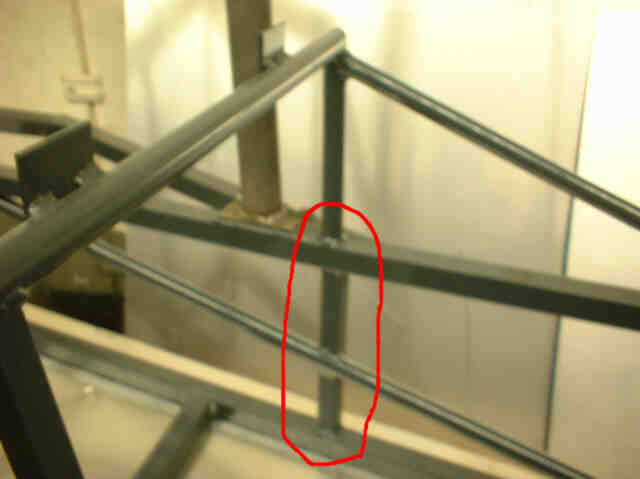
 Roll cage
(side protection bar) supports
Roll cage
(side protection bar) supports
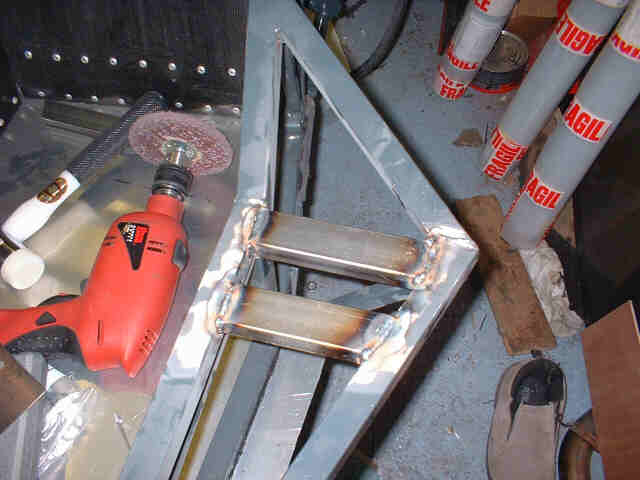
Due to a little confusion, my chassis came ready to have a rollcage with
the side impact protection fitted to it. As a result, it didn't have the plates to attach the side arms onto as
you can see here on Tim's car. Rather than adding a flat plate like this, I decided to add 2 20mm x 40mm
ERW tubes onto the side structure and put reinforcing tubes through them for the bolts to pass through. The picture
on the right shows the first tube resting in place having been cut to size.
Then it was just a question of making up the other support and welding them in place. This shows the passenger side mounts before the tubular reinforcements for the bolts went in. The driver's side is the same.
Oil cooler mounts
On the Furybird I, I had problems with the oil temps getting too high - at a race at Cadwell they were nudging
150degC. The Redline oil seemed happy enough, but I wasn't. I think the problem was due to the oil cooler being
a goodly distance behind the rad - so I'm moving the oil cooler to right in front of the rad. Hence, some mounts
going forward from the chassis are needed to keep it in place. Again, they're made out of steel scavenged from
the old chassis.
There are probably further mods I'll need to make, possibly around the front of the chassis to fit the dry sump
tank it, and probably the damper mounts to get them in the right position.