The fabrication of the bells for the front brake discs was very similar to that of the rear brakes but was quite a bit simpler due to the fact that the front discs need a lot less offset, being mounted on the rear of the hubs, and so the bells can be a lot flatter in profile. This means there's a lot less material to machine away.
 The starting point was again
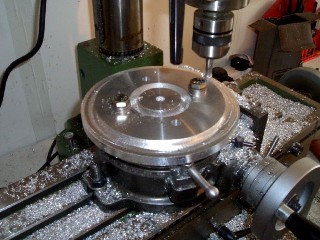
to drill out a centre hole and holes for the wheel studs to locate the blank on the rotary table. In the picture
I'm using a centre drill on the pillar drill to accurate drill pilot holes where the wheel stud holes are going
to be.
The starting point was again
to drill out a centre hole and holes for the wheel studs to locate the blank on the rotary table. In the picture
I'm using a centre drill on the pillar drill to accurate drill pilot holes where the wheel stud holes are going
to be.
Then it's again a case of milling out the centre spigot ring, and the edges of the mounting face. I did much more
of the machining on the front bells on the lathe as the discs are tapered from the mounting face for the hub to
the mounting face for the rotors. That's easy to do on the lathe using an angled topslide, but tricky on the milling
machine without CNC.
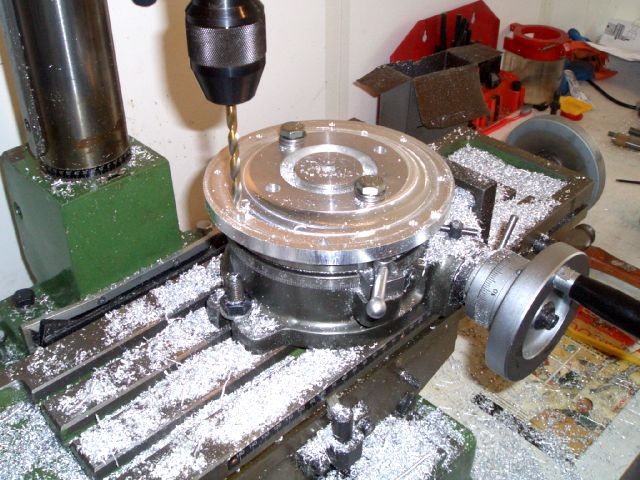 I did however rough out the taper on the mill as you can see in this
picture. At this point I'm drilling the mounting holes for the bobbins the front rotors fit onto. The front rotors
are going to be floating so the rotors don't have mounting holes, they have slots for the bobbins to fit onto.
The reason for this is that the front brakes have to work much harder than the rears, so will heat up a lot more,
and also because the flatter brake bell won't have as much compliance to withstanding the changes in size of the
rotor due to the temperature changes.
I did however rough out the taper on the mill as you can see in this
picture. At this point I'm drilling the mounting holes for the bobbins the front rotors fit onto. The front rotors
are going to be floating so the rotors don't have mounting holes, they have slots for the bobbins to fit onto.
The reason for this is that the front brakes have to work much harder than the rears, so will heat up a lot more,
and also because the flatter brake bell won't have as much compliance to withstanding the changes in size of the
rotor due to the temperature changes.
In fact, I was going to have them floating all round but AP Racing/Demon Tweeks sent the wrong ones for the rears
and I couldn't be bothered to change them. Looking at it now, I'm glad they did - I don't think there'd be clearance
for the bobbins at the back as there's not much clearance between the caliper and the rotor/bell.
 Looking back through my
pictures, it seems I didn't take many photos of the fabrication of the front brake bells. However, the process
was basically the same as for the rear brake bells except that it wasn't necessary to make slots for the mounting
bolts and the use of the angled topslide to make the tapered top of the front brake bells. As with the rear bells,
the final stage was anodising and then assembly with the rotors - and the assembly of the rotors I *have* got pictures
of.
Looking back through my
pictures, it seems I didn't take many photos of the fabrication of the front brake bells. However, the process
was basically the same as for the rear brake bells except that it wasn't necessary to make slots for the mounting
bolts and the use of the angled topslide to make the tapered top of the front brake bells. As with the rear bells,
the final stage was anodising and then assembly with the rotors - and the assembly of the rotors I *have* got pictures
of.
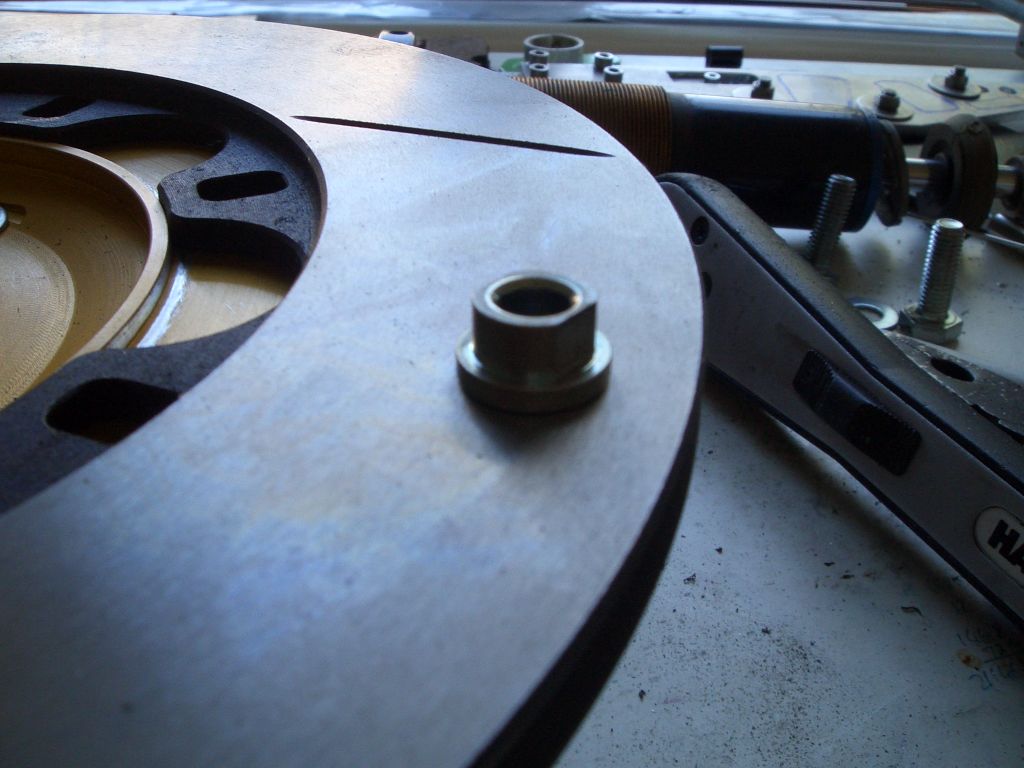
This is because I had to disassemble the nearside rotor and bell - the rotors are supposed to float on the bells, and due to the change in tolerances which happened when I got the bells anodised, this bell was an interference rather than a sliding fit on the rotor. So I had to take it apart and file the centre spigot slightly - you can see the after-effects in the larger version of the photo on the right, which shows the bell and the rotor placed into position.
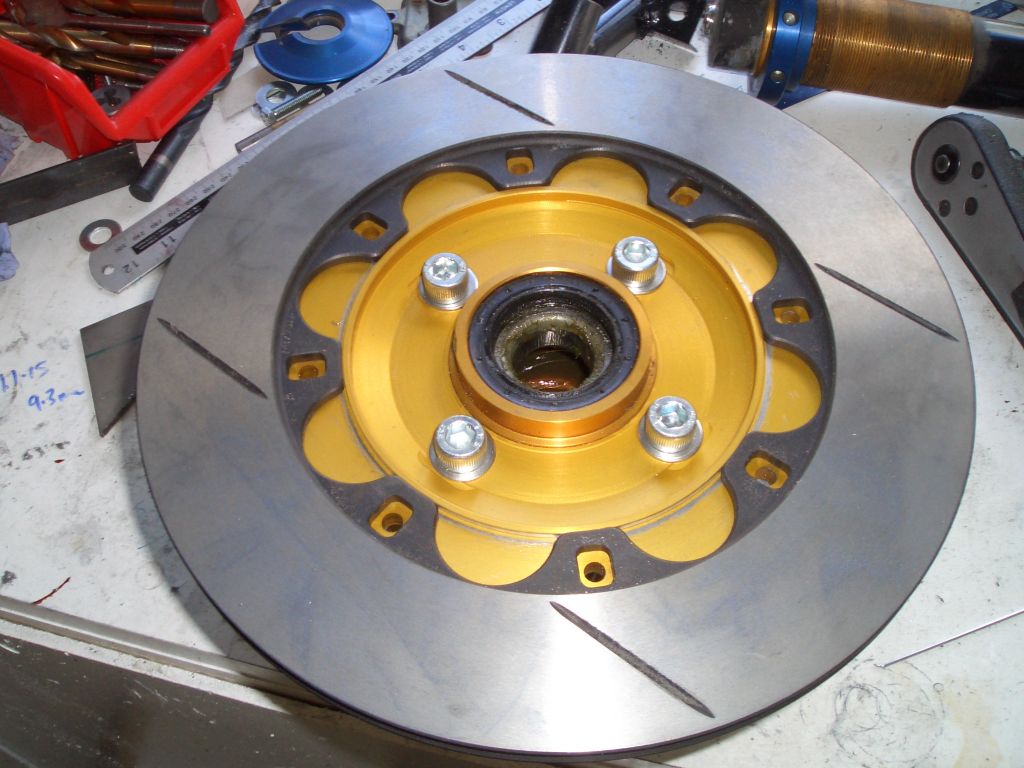
The front brakes, unlike the rear ones, don't have the rotors bolted
straight to the bells. Instead, they're attached using these little top-hat shaped bobbins. As you can just about
see, despite the truly bobbins photo, the bobbins have flat sides. They're made so that the larger bit of the
bobbin is just slightly deeper than the mounting face of the bell.
| The bobbin then goes in the slot in the rotor... | 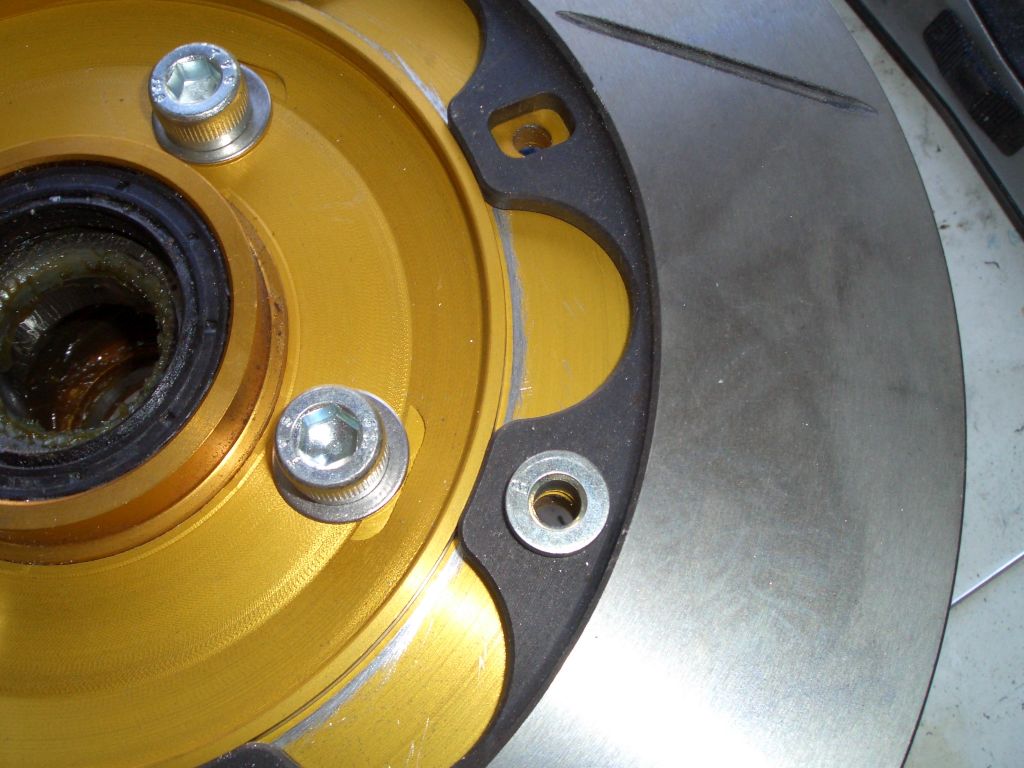 |
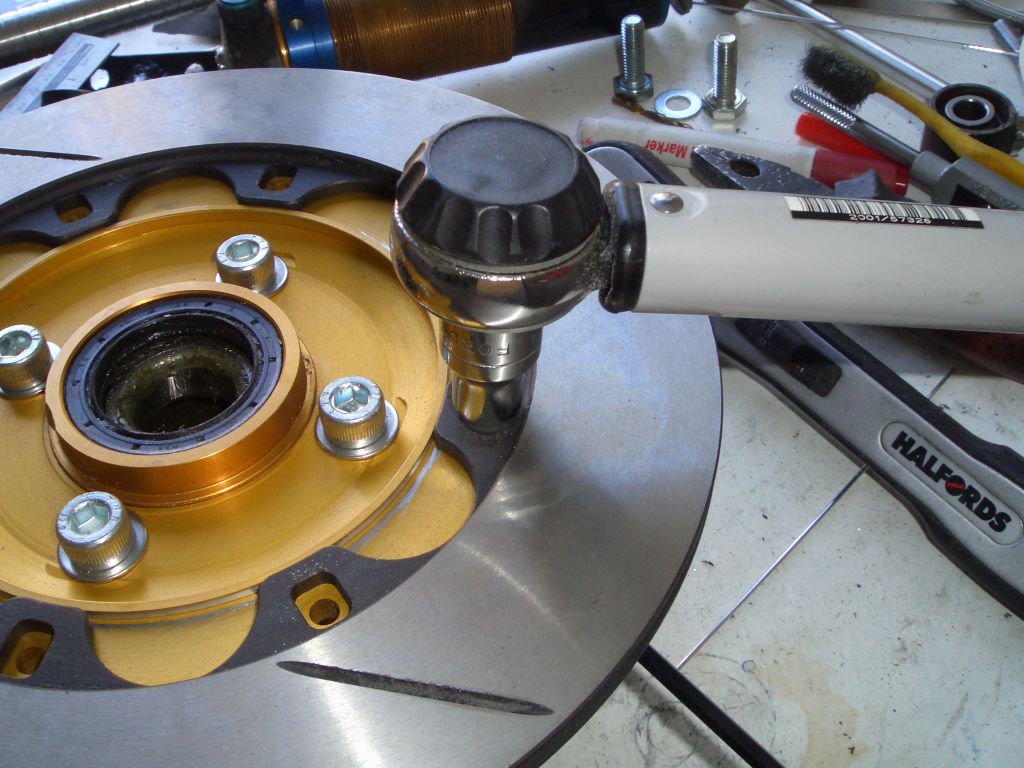 |
A 1/4" bolt then goes through the bobbin, and a 1/4" stif nut (not a nyloc - the nylon would melt as soon as you got the brakes really hot) goes on the end. Torque up to 14Nm, and repeat 8 times. |
| And after doing that 8 times the rotor is attached to the bell. |  |
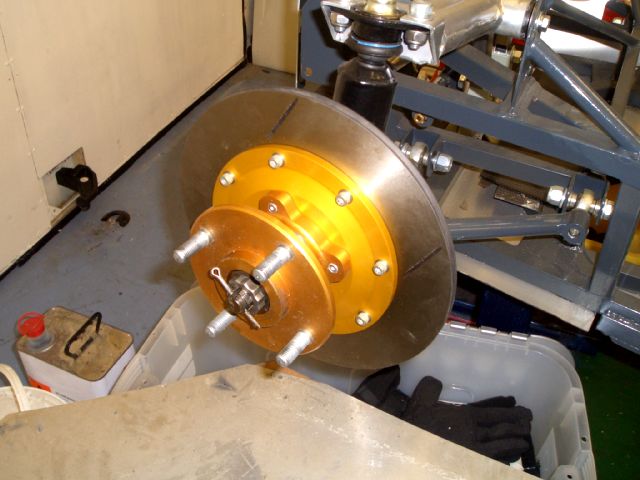 |
At which point it's ready to be attached to the car. |
Things to do: Make up the mounts
for the front calipers, fit the front calipers and make and fit the front brake hoses.